Honey & Gluten-Free: Sweet, Safe, & Scrumptious!
Wondering 'is honey gluten free'? Yes! Discover if honey has gluten and create delightful gluten-free honey recipes with our easy guide.
- 1Is Honey Gluten-Free? The Sweet Truth for Your Diet
- 2Why You’ll Love This Gluten-Free Honey Recipe (and Its Simplicity!)
- 3Ingredients Overview: What Does Honey Have (or Not Have!) for this Recipe?
- 4Essential Equipment You’ll Need for Gluten-Free Honey Treats
- 5Step-by-Step Instructions: Crafting Your Gluten-Free Honey Goodness
- 6Pro Tips & Tricks for Perfect Gluten-Free Honey Creations
Ingredients
Main Ingredients
- 1 cup (240g) certified gluten-free rolled oats
- 1/2 cup (120g) pure honey
- 1/2 cup (120g) natural nut butter (e.g., peanut, almond)
- 1/4 cup (60g) coconut oil, melted
- 1 teaspoon vanilla extract
Optional Mix-ins
- 1/4 cup gluten-free chocolate chips
- 1/4 cup chopped nuts or seeds (e.g., almonds, pumpkin seeds)
- 2 tablespoons dried cranberries
Instructions
Instructions
Line an 8x8 inch baking dish with parchment paper, leaving an overhang.
Instructions
In a medium saucepan over low heat (or microwave), gently melt honey and coconut oil until just combined. Remove from heat.
Instructions
Stir in the nut butter and vanilla extract until smooth.
Instructions
In a large bowl, combine the certified gluten-free rolled oats and any desired optional mix-ins.
Instructions
Pour the wet mixture over the dry ingredients and stir until the oats are thoroughly coated.
Instructions
Transfer the mixture to the prepared baking dish. Press down firmly and evenly with a spatula or the back of a spoon.
Instructions
Refrigerate for at least 2-3 hours, or until completely firm.
Instructions
Using the parchment paper overhang, lift the slab from the dish. Place on a cutting board and cut into 12-16 squares or bars.
Instructions
Store in an airtight container in the refrigerator.
Recipe FAQs
Is all honey gluten-free, or do I need to check labels?
Can I use quick oats instead of rolled oats for this recipe?
My honey bars aren't holding together. What went wrong?
How long do these gluten-free honey treats last in the fridge?
Can I make this recipe without coconut oil?
What's the best way to cut clean squares or bars?
Honey & Gluten-Free: Sweet, Safe, & Scrumptious!
Wondering 'is honey gluten free'? Yes! Discover if honey has gluten and create delightful gluten-free honey recipes with our easy guide.
Prep Time
15 min
Cook Time
25 min
Total Time
40 min
Main Ingredients
- 1 cup (240g) certified gluten-free rolled oats
- 1/2 cup (120g) pure honey
- 1/2 cup (120g) natural nut butter (e.g., peanut, almond)
- 1/4 cup (60g) coconut oil, melted
- 1 teaspoon vanilla extract
Optional Mix-ins
- 1/4 cup gluten-free chocolate chips
- 1/4 cup chopped nuts or seeds (e.g., almonds, pumpkin seeds)
- 2 tablespoons dried cranberries
Is Honey Gluten-Free? The Sweet Truth for Your Diet
Here’s the thing, for anyone navigating a gluten-free diet, understanding the safety of everyday ingredients is paramount. A common question I hear in my kitchen, especially from newer followers of a gluten-free lifestyle, is whether common pantry staples are safe. Among these, the question of “is honey gluten free” frequently arises. This isn’t just a casual inquiry; for individuals with celiac disease or significant gluten sensitivities, even trace amounts can cause adverse reactions. What I discovered is that many people assume all natural products are inherently free from allergens, but the reality can sometimes be more nuanced, especially concerning processing.
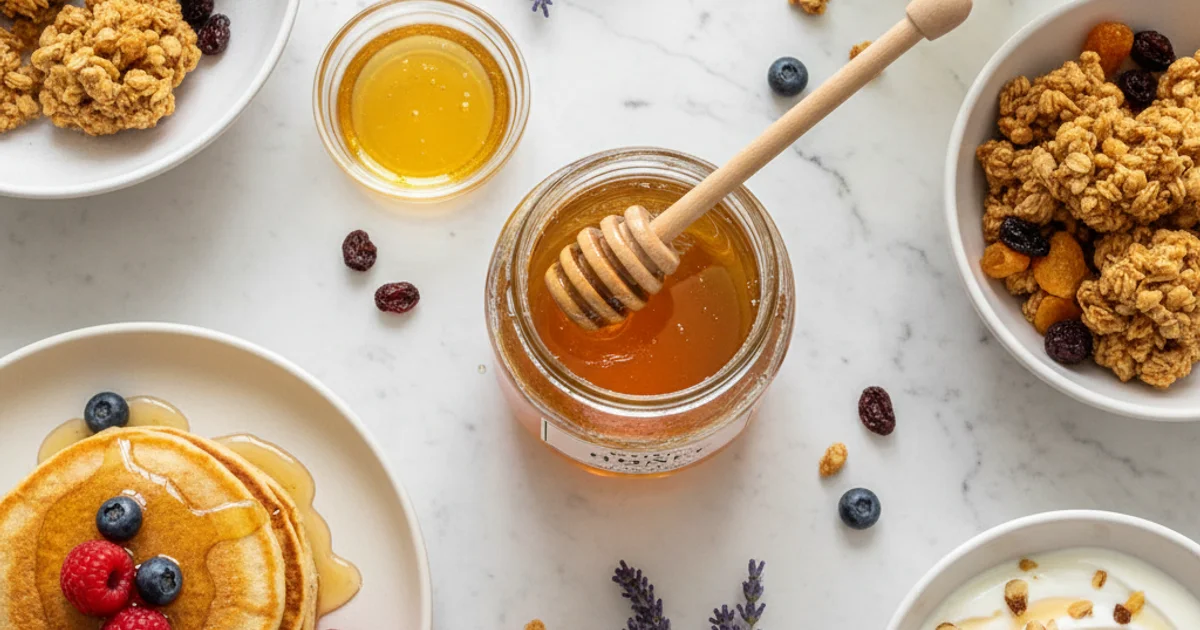
The good news is, in its pure, unprocessed form, honey is naturally gluten-free. It’s a simple, sweet substance produced by bees, primarily composed of various sugars, water, enzymes, and a tiny amount of trace minerals and vitamins. Crucially, it contains absolutely no gluten proteins, which are found in wheat, barley, and rye. Therefore, when you pick up a jar of raw, unadulterated honey, you can generally be confident in its gluten-free status. However, the query “does honey have gluten” often stems from a valid concern about potential cross-contamination during processing or the addition of other ingredients in commercial products. For instance, some flavored honey products or those processed in facilities that also handle gluten-containing items might pose a risk. Always check labels carefully if you have severe sensitivities. This recipe leverages the inherent gluten-free nature of honey to create a delightful treat that everyone can enjoy without worry.
Why You’ll Love This Gluten-Free Honey Recipe (and Its Simplicity!)
In my kitchen, simplicity often yields the most satisfying results. This recipe exemplifies that philosophy, offering a delightful treat that caters effortlessly to various dietary needs. You see, understanding whether is honey gluten free is just the first step; the real magic happens when you transform that knowledge into something truly palatable. This particular dish leverages the natural sweetness and texture of honey, ensuring a depth of flavor that processed sugars simply cannot replicate.
What I love about this recipe is its straightforward approach. It doesn’t demand exotic ingredients or intricate techniques, making it incredibly accessible for even novice bakers. I always appreciate a recipe that delivers big on taste without requiring hours of labor. Furthermore, the inherent nature of the core ingredient means that does honey have gluten is a question you won’t need to ponder when enjoying this dessert. It’s a naturally compliant option, offering peace of mind alongside its deliciousness. This makes it an ideal choice for families where diverse dietary considerations are a daily reality, ensuring everyone can partake in the joy of a shared meal.
Ingredients Overview: What Does Honey Have (or Not Have!) for this Recipe?
Here’s the thing, when we talk about creating genuinely gluten-free treats, understanding each ingredient’s role and its inherent gluten status is paramount. My kitchen always prioritizes clarity, especially for those navigating dietary restrictions. This section breaks down everything you’ll need for this delightful recipe, ensuring every component aligns with a gluten-free lifestyle.
The star of our show, of course, is pure honey. This natural sweetener brings a unique depth of flavor and acts as a fantastic binder in many recipes. What I discovered early on in my gluten-free baking journey is that pure, raw honey is inherently gluten-free. It comes directly from bees, untouched by grains. You might wonder, “does honey have gluten?” The simple answer for pure honey is no. Different types of honey, like light clover, robust wildflower, or delicate acacia, will subtly alter the final taste profile. I often reach for a local wildflower honey for its complex, floral notes that truly elevate this dish.
Next up, we have gluten-free rolled oats. These provide a wonderful chewy texture and a good dose of fiber. While oats themselves are naturally gluten-free, the critical distinction lies in sourcing certified gluten-free oats. This certification ensures they haven’t been processed on shared equipment with wheat, barley, or rye, which can lead to cross-contamination. A common mistake is assuming all oats are safe; always check for that crucial label.
For richness and binding power, we’re using nut butter. Whether you prefer peanut butter or almond butter, these provide healthy fats and protein. Most pure nut butters, made solely from nuts and perhaps a little salt, are naturally gluten-free. However, it’s always wise to check the label for any added ingredients, like thickeners or flavorings, which could contain gluten. I personally love the creamy texture that natural, unsweetened almond butter lends to this recipe.
A touch of coconut oil adds moisture and helps solidify the mixture as it cools. This healthy fat contributes a subtle, tropical note that complements the other flavors beautifully. You’ll notice that coconut oil is solid at room temperature but melts easily when gently heated, which is essential for combining our ingredients smoothly.
Finally, vanilla extract enhances all the sweet notes. Pure vanilla extract, made from vanilla beans, alcohol, and water, is a gluten-free staple in my pantry. Always opt for pure extract over imitation vanilla for the best flavor.
For those who love to customize, optional add-ins like chocolate chips, dried fruit, or chopped nuts are fantastic. If adding chocolate, ensure you select certified gluten-free chocolate chips. For dried fruits, check that they haven’t been coated in flour or other gluten-containing substances. Similarly, if using nuts, choose plain, unsalted varieties to avoid any hidden gluten ingredients. These additions allow for endless variations, making this recipe truly adaptable to any craving.
Essential Equipment You’ll Need for Gluten-Free Honey Treats
Building on this, having the right tools makes all the difference when creating gluten-free honey treats. In my kitchen, I always reach for a few essential items before I even start measuring. These aren’t fancy gadgets; they are everyday pieces that ensure success and make the process enjoyable. The right equipment helps maintain the integrity of your gluten-free ingredients and prevents cross-contamination, which is paramount for those managing dietary restrictions.
A sturdy large mixing bowl is non-negotiable for combining all your dry and wet ingredients without making a mess. For precise measurements, especially in gluten-free baking where ratios can be more sensitive, a good set of measuring cups and spoons is crucial. You’ll also want a small saucepan if your recipe calls for gently melting ingredients like coconut oil or honey; this helps achieve a smooth, uniform mixture. A spatula or wooden spoon works perfectly for mixing everything together until well combined. For setting your treats, an 8x8 inch baking dish or tray is ideal, often lined with parchment paper to prevent sticking and allow for easy removal. Once your treats are firm, a sharp knife or pizza cutter will give you clean, even slices. Finally, an airtight container is essential for proper storage, keeping your gluten-free honey creations fresh.
Step-by-Step Instructions: Crafting Your Gluten-Free Honey Goodness
-
Prepare Your Pan: Line an 8x8 inch baking dish with parchment paper, leaving an overhang on two sides to easily lift the finished product.
-
Melt Wet Ingredients: Gently melt the honey and coconut oil together in a small saucepan over low heat, stirring occasionally, or in a microwave-safe bowl in 30-second intervals until fully combined and liquid.
-
Combine Wet & Dry: In a large mixing bowl, combine the melted honey and coconut oil mixture with the nut butter and vanilla extract, stirring vigorously until the mixture is smooth and well-incorporated.
-
Add Oats & Mix-ins: Gently fold in the gluten-free rolled oats and any desired optional add-ins, such as nuts, seeds, or dried fruit, until all ingredients are thoroughly coated with the honey mixture.
-
Press into Pan: Carefully transfer the entire mixture into the parchment-lined baking pan, using the back of a spoon or your hands to press it down firmly and evenly across the bottom.
-
Chill to Set: Place the pan in the refrigerator and allow it to chill for a minimum of 2 to 3 hours, or until the honey bars are completely firm and easy to slice.
-
Cut & Serve: Once the gluten-free honey treat has cooled completely, carefully remove it from the pan, then cut it into your desired shapes and serve immediately.
Pro Tips & Tricks for Perfect Gluten-Free Honey Creations
In my kitchen, achieving that perfect texture and flavor in gluten-free treats often comes down to a few critical details. Building on this, I’ve learned that even the simplest ingredients require careful handling. One of the most important aspects when crafting these honey-sweetened delights is ensuring every component truly aligns with a gluten-free lifestyle. This means going beyond just the obvious.
Here’s the thing, always scrutinize your labels, especially for ingredients like oats, chocolate chips, or even baking powder. Look for the “certified gluten-free” seal. Many oats, for instance, are processed in facilities that also handle wheat, leading to cross-contamination. Trust me on this one; a quick glance at the label can save you from an upset stomach later. It’s not enough to assume; always verify.
The secret is in how you treat your key sweeteners. When melting honey with coconut oil, maintain a very low heat. Overheating honey can diminish its natural enzymes and delicate flavor profile. You’re aiming for just enough warmth to make it pourable, not a rolling boil. This gentle approach preserves the nuanced sweetness that makes this recipe so special. You’ll notice that a slow melt yields a much smoother, more integrated base.
What I discovered over countless batches is the absolute necessity of firm pressing. After combining your ingredients, press the mixture into your prepared pan with significant force. I often use the bottom of a clean glass or a flat spatula to really compact it. This dense packing is what prevents your bars from crumbling when you cut them. It creates a cohesive structure that holds everything together beautifully.
Worth noting here, chilling time is not merely a suggestion; it’s a non-negotiable step for success. Allow your creation to chill for at least two hours, or even better, overnight. This extended cooling period allows the fats to solidify and the ingredients to truly bind. Trying to cut them too soon will result in a sticky, messy outcome. Patience truly is a virtue here, leading to clean, crisp edges.
A common mistake is sticking to the exact recipe without exploring variations. Feel free to get creative with your flavor profiles. Swap out almond butter for cashew butter or peanut butter. Add a pinch of cinnamon or nutmeg for a warming spice note. A few drops of almond extract can also introduce an unexpected depth. For more ideas on how to safely incorporate various ingredients into a gluten-free diet, check out this helpful guide on Healthline.
The key difference is how you approach the final cut. For perfectly neat squares or bars, use a sharp knife that has been warmed under hot water. Wipe it dry between each cut. This technique helps glide through the firm mixture without dragging or tearing. You’ll achieve those bakery-worthy edges every single time.
Enjoyed this recipe? Share it with a friend or save it to your board for later. Leave a comment below — I love hearing how it turned out!
You May Also Enjoy





You Might Also Love These 🍽️
Recipes picked just for you based on what you’re cooking