Fudgy Butter Bean Blondies: Secretly Healthy!
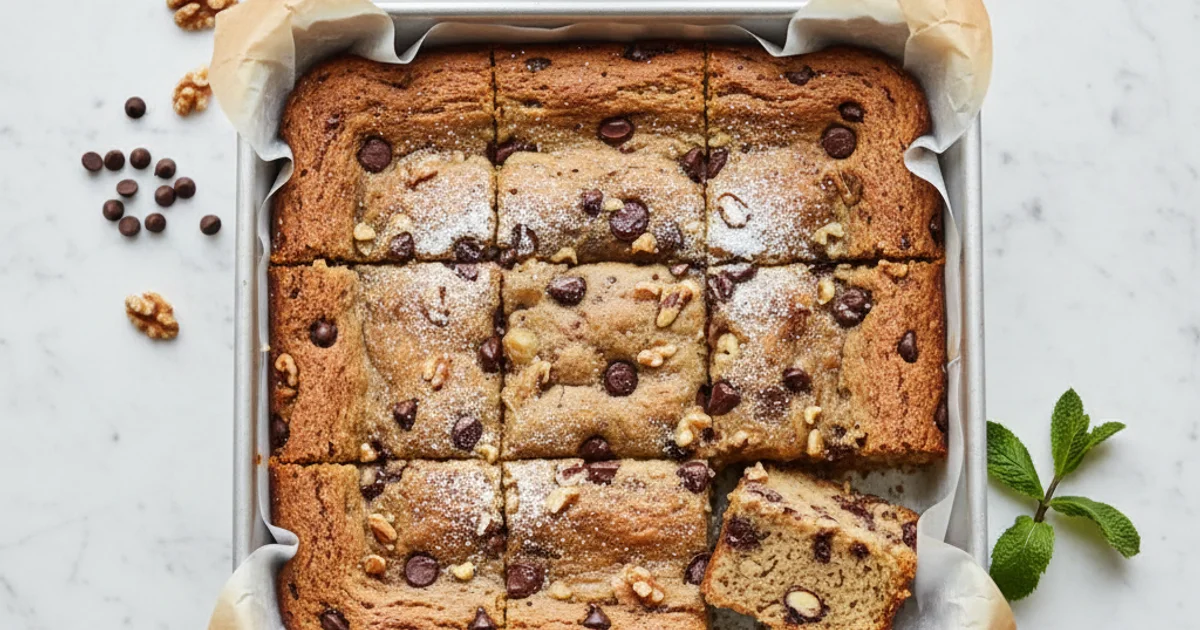
Unlock the magic of butter bean seeds with this fudgy, gluten-free blondie recipe! A healthy, easy dessert that's secretly packed with protein and fiber.
- 1Introduction: The Surprising Secret to the Best Healthy Blondies
- 2Why You’ll Love This Butter Bean Blondie Recipe
- 3Ingredients Overview: Crafting the Perfect Gluten-Free Blondie
- 4Essential Equipment for Blondie Success
- 5Step-by-Step Instructions to a Perfect Batch
- 6Pro Tips, Tricks, and Decorative Touches
Ingredients
Butter Bean Blondies
- 1 (15-ounce) can butter beans, rinsed and drained
- 1/2 cup creamy cashew butter (or almond butter)
- 1/2 cup maple syrup
- 2 large eggs (or 2 flax eggs)
- 1 tbsp gluten free vanilla extract
- 1 cup gluten-free oat flour
- 1/2 tsp baking soda
- 1/4 tsp baking powder
- 1/4 tsp salt
- 1/2 cup chocolate chips, plus more for topping
Instructions
Instructions
Preheat oven to 350°F (175°C). Line an 8x8 inch square cake pan with parchment paper.
Instructions
In a food processor, combine the rinsed butter beans, cashew butter, maple syrup, and vanilla extract. Blend until completely smooth.
Instructions
Add the eggs and blend again until just combined.
Instructions
Add the oat flour, baking soda, baking powder, and salt. Pulse 5-7 times until the flour is just incorporated. Do not overmix.
Instructions
Pour the batter into a bowl and fold in the chocolate chips.
Instructions
Spread the thick batter evenly into the prepared pan. Top with extra chocolate chips.
Instructions
Bake for 22-26 minutes, or until a toothpick inserted into the center comes out with moist crumbs.
Instructions
Let cool completely in the pan on a wire rack before slicing into 16 squares.
Recipe FAQs
Can you actually taste the butter beans in these blondies?
Does cake have gluten? Are these blondies gluten-free?
My batter seems very thick. Is that normal?
Can I use a different type of bean?
How do I know when the blondies are done baking?
Can I make this recipe nut-free?
Fudgy Butter Bean Blondies: Secretly Healthy!
Unlock the magic of butter bean seeds with this fudgy, gluten-free blondie recipe! A healthy, easy dessert that's secretly packed with protein and fiber.
Prep Time
15 min
Cook Time
25 min
Total Time
40 min
Butter Bean Blondies
- 1 (15-ounce) can butter beans, rinsed and drained
- 1/2 cup creamy cashew butter (or almond butter)
- 1/2 cup maple syrup
- 2 large eggs (or 2 flax eggs)
- 1 tbsp gluten free vanilla extract
- 1 cup gluten-free oat flour
- 1/2 tsp baking soda
- 1/4 tsp baking powder
- 1/4 tsp salt
- 1/2 cup chocolate chips, plus more for topping
Introduction: The Surprising Secret to the Best Healthy Blondies
What if you could indulge in a sweet, decadent treat that secretly packed a nutritional punch? For years, I’ve been on a quest to create desserts that satisfy my sweet tooth without compromising on health. It’s a delicate balance, often leading to compromises in texture or flavor. But then, I stumbled upon a truly remarkable ingredient that changed everything for me: the humble butter bean. When I first heard about using butter bean seeds – specifically, the creamy, cooked beans – in baking, I was skeptical. Could these legumes truly transform into a rich, fudgy blondie without any bean-y aftertaste?
Here’s the thing: they absolutely can. This recipe isn’t just another “healthy” dessert that tastes like cardboard. It delivers on all fronts: deep, caramelized flavor, a wonderfully moist and chewy texture, and a surprisingly robust nutritional profile. We’re talking about a dessert that provides fiber and protein, keeping you feeling satisfied long after the last bite. Forget those processed “healthy” cake mixes with their long lists of unpronounceable ingredients. This dish offers the ultimate homemade solution, giving you complete control over what goes into your body. What I discovered is that the butter bean seeds (the cooked beans themselves, not the dry planting kind) act as a magical binder and moistener, creating a truly exceptional blondie. These blondies are naturally gluten-free and easily adaptable for various dietary preferences, making them a versatile addition to any baker’s repertoire. You’ll be amazed at how this simple ingredient elevates a classic dessert.
Why You’ll Love This Butter Bean Blondie Recipe
You might be skeptical about using legumes in a dessert, but trust me on this one. What I love about this recipe is how it completely transforms your perception of “healthy treats.” It’s not just “good for you;” it’s genuinely delightful.
Here’s the thing: these blondies offer a truly indulgent experience without the guilt. I always strive to create recipes that balance flavor with wholesome ingredients. You’ll notice that the texture is simply unparalleled, unlike any other healthy dessert you’ve tried.
- Incredibly Fudgy & Delicious: These aren’t your typical dry, crumbly “healthy” baked goods. The secret is in the beans, creating an astonishingly dense, moist, and chewy crumb that rivals any traditional blondie. They have that satisfying chewiness we all crave.
- Secretly Nutritious: Beyond the amazing taste, these blondies are packed with goodness. They’re a fantastic source of plant-based protein and fiber, making them a satisfying treat that helps stabilize blood sugar rather than causing a crash. This makes them a superior alternative to any standard healthy cake mix.
- Unbelievably Easy to Make: In my kitchen, efficiency is key. This is a true one-bowl wonder, primarily relying on a food processor to blend everything seamlessly. Cleanup is minimal, making it perfect for busy weeknights or when you need a quick dessert.
- Perfectly Adaptable: This recipe provides an excellent foundation for customization. It’s naturally a gluten dairy free cake recipe with a simple swap for plant-based butter. We can easily adapt this to an eggless cupcake recipe too, offering even more versatility. You can also explore options like substituting rice flour for a unique texture.
- Budget-Friendly: Utilizing pantry staples, this recipe proves that wholesome eating doesn’t have to break the bank. You don’t need fancy ingredients; just simple, accessible items.
- Kid-Approved: Even the pickiest eaters won’t suspect the nutritious secret ingredient. The rich, sweet flavor and fudgy texture win over everyone every time.
- Great for Gifting: These blondies hold up beautifully, making them ideal for sharing. They travel well and are always a welcome treat, whether for a bake sale or a thoughtful gift.
A common mistake is thinking healthy desserts compromise on flavor. This recipe proves that you can have both: rich, decadent taste and nourishing ingredients.
Ingredients Overview: Crafting the Perfect Gluten-Free Blondie
Let’s delve into the components that make this blondie recipe truly exceptional. The foundation of this treat lies with butter beans. I always use canned ones for convenience, ensuring they are thoroughly rinsed and drained. These creamy legumes replace a significant portion of traditional flour and fat. They create an incredibly smooth, almost fudgy texture. This is far superior to any store-bought healthy cake mix you might find.
Next, we incorporate gluten-free oat flour. This flour lends a subtle nutty flavor and a wonderfully soft crumb. You can easily make your own by blending certified gluten-free rolled oats until fine. If you’re considering alternatives, substituting rice flour can work, but it might result in a slightly denser blondie. For those who prefer pre-made options, look for brands like King Flour Gluten Free flour blends. What I love about this choice is its natural sweetness and how it complements the other ingredients.
For richness and binding, nut butter is essential. I prefer cashew or almond butter for their neutral, buttery profiles. They contribute healthy fats and help hold everything together. The sweetness comes from maple syrup or coconut sugar, ensuring this recipe is refined-sugar-free. This offers a much cleaner taste compared to a typical cake mix gluten free product, which often contains corn syrup or other processed sugars.
Eggs act as a crucial binder, providing structure. For a vegan option, flax eggs work beautifully, making this adaptable for an eggless cupcake recipe or even a vegan sponge cake. Building on this, leavening agents are key. Baking powder and a touch of baking soda provide a gentle lift. A small amount of cornstarch also helps with texture, creating a tender crumb. Many wonder, is cornstarch vegan? Yes, it is derived from corn, making it suitable for plant-based diets.
To elevate the flavor, high quality vanilla beans or a pure gluten free vanilla extract are non-negotiable. Trust me on this one; the difference in aroma and taste is remarkable. A pinch of salt is also vital. It balances the sweetness and brings out the other flavors. This attention to detail sets this recipe apart from simpler options like a basic gluten free yellow cake recipe. You’ll notice that each ingredient plays a specific, important role in the final outcome.
Essential Equipment for Blondie Success
Building on this, having the right tools makes all the difference for these blondies. In my kitchen, I always prioritize efficiency and quality, and the equipment you use directly impacts the outcome. You won’t regret investing in a few key items for this recipe.
First and foremost, a food processor or a powerful high-speed blender is absolutely essential. Trust me on this one; for that silky-smooth blondie batter, you need to completely pulverize the beans. No one wants an unexpected chunk of bean disrupting the tender texture of their dessert. This piece of equipment ensures a consistently creamy base, making the blondies truly indistinguishable from their traditional counterparts. It’s the secret to getting that perfect consistency without any grittiness.
Next, consider your baking vessel. For a classic blondie shape, an 8x8 or 9x9 inch square cake pan is ideal. I always line mine with parchment paper, leaving an overhang on two sides. This simple trick makes lifting the cooled blondie block out of the pan incredibly easy, preventing any sticking or breakage. What I discovered is that if you only have 9 inch cakes (round pans), you can certainly use one, but your servings will be wedge-shaped instead of squares. This doesn’t affect the taste, just the presentation.
Worth noting here, you can also transform this recipe into a cupcake pan cake. Simply divide the batter among a lined muffin tin. You’ll need to reduce the baking time significantly, so keep a close eye on them. This is a great option for individual portions, especially if you’re making an eggless cupcake recipe. However, an angel cake pan with its central tube is not suitable for this dense, moist batter. The structure of an angel food cake is entirely different, relying on whipped egg whites for its airy texture, which is not what we’re aiming for here.
Beyond these specialized items, you’ll need standard kitchen tools. This includes a couple of mixing bowls for combining dry ingredients, a sturdy spatula for scraping down your processor and pan, and accurate measuring cups and spoons. Finally, a wire rack is crucial for cooling the blondies completely. Allowing them to cool fully on the rack prevents them from becoming soggy and helps them set properly. This careful cooling process contributes to their ultimate texture.
Step-by-Step Instructions to a Perfect Batch
Here are the first three steps for your “The Ultimate Butter Bean Blondies” recipe:
-
Prep: Preheat your oven to 350°F (175°C) and prepare an 8x8 inch (20x20 cm) baking pan by greasing it thoroughly, then lining it with parchment paper, leaving an overhang on two sides for easy removal.
-
Blend the Wet Ingredients: In a food processor, combine the rinsed and drained butter beans, eggs (or flax eggs if using), nut butter, maple syrup, and vanilla extract. Blend these ingredients until the mixture is completely smooth and creamy, with no visible bean chunks.
-
Add the Dry Ingredients: To the food processor with the wet ingredients, add the oat flour, baking powder, baking soda, cornstarch, and salt. Pulse the mixture until just combined, being careful not to overmix, as this can lead to tough blondies.
-
Fold in Mix-Ins: Transfer the prepared batter to a medium-sized mixing bowl and gently fold in any desired mix-ins, such as chocolate chips, chopped nuts, or dried fruit, until evenly distributed throughout the batter.
-
Bake: Spread the blondie batter evenly into the prepared baking pan using a spatula. Bake in the preheated oven for 25-30 minutes, or until a toothpick inserted into the center comes out with moist crumbs attached, indicating they are cooked through but still delightfully fudgy.
-
Cool Completely: This is a crucial step for achieving the perfect texture. Allow the blondies to cool completely in the pan on a wire rack for at least 1-2 hours before attempting to slice them, as this ensures they set properly and maintain their shape without crumbling.
Pro Tips, Tricks, and Decorative Touches
Achieving the perfect blondie texture can feel like a delicate dance, but with a few pointers, you’ll master it every time. Don’t underecook, but don’t overcook is my mantra here. An undercooked center will be disappointingly gummy, while an overbaked blondie turns crumbly and dry.
The trick is to watch for the edges to be golden brown and set, while the center still looks slightly soft. A reliable test involves inserting a toothpick into the center; it should come out with moist crumbs, not wet batter. This indicates that it’s perfectly fudgy without being raw.
The importance of cooling cannot be overstated for these blondies. I know it’s tempting to dive in immediately, but resist the urge! Slicing them warm will result in a messy, gooey pile, albeit a delicious one. Allowing them to cool completely, preferably in the square cake pans, lets the texture set, leading to that ideal dense, fudgy consistency.
What I discovered is that patience truly yields the best results for this recipe. Cooling allows the starches to fully hydrate and the fats to firm up, creating a stable structure. You’ll notice that the blondies become easier to handle and cut into neat squares after a good chill.
For those looking to add a little flair, topping ideas are endless. A simple drizzle of melted chocolate or a sprinkle of flaky sea salt enhances the flavor without much effort. If you’re hosting a party, you might consider a dollop of whipped cream on top. For a quick option, knowing how to quickly defrost cool whip can be a lifesaver.
Building on this, getting creative with color can be fun, especially for holidays. If you’re wondering how do you make dark red icing for Valentine’s Day or Christmas, I recommend using gel food coloring in a basic cream cheese frosting. Gel colors are more concentrated than liquid dyes, providing vibrant hues without altering the frosting’s consistency. This technique works equally well for other bold shades, allowing you to customize your blondies for any occasion.
Enjoyed this recipe? Share it with a friend or save it to your board for later. Leave a comment below — I love hearing how it turned out!
You May Also Enjoy





You Might Also Love These 🍽️
Recipes picked just for you based on what you’re cooking