GF Corn Chips: Myth or Munch? + Recipe!
Wondering, "Are corn chips gluten-free?" Discover the answer and learn to make your own delicious, naturally gluten-free corn chips from scratch with this easy recipe!

- 1Introduction: Are Corn Chips Gluten-Free? Demystifying Your Favorite Snack
- 2Why You’ll Love This Homemade Gluten-Free Corn Chip Recipe
- 3Ingredients Overview: Crafting Perfect Gluten-Free Corn Chips
- 4Equipment You’ll Need for Homemade Corn Chips
- 5Step-by-Step Instructions: Your Guide to Crispy, Gluten-Free Perfection
- 6Pro Tips & Tricks for the Best Homemade Gluten-Free Corn Chips
- 7Pro Tips & Tricks for the Best Homemade Gluten-Free Corn Chips
Ingredients
For the Chips
- 1 ½ cups masa harina
- ¾ teaspoon fine sea salt, plus more for sprinkling
- 1 cup warm water (approx., may need a little more or less)
- 4-6 cups high smoke point oil, for frying (e.g., vegetable, canola, corn)
Optional Seasonings
- ½ teaspoon chili powder
- ¼ teaspoon garlic powder
- Pinch of cumin
- Lime zest
Instructions
Instructions
Combine masa harina and salt in a bowl.
Instructions
Gradually add warm water, mixing until a soft, pliable dough forms.
Instructions
Knead for 2-3 minutes, then cover and let rest for 15 minutes.
Instructions
Divide dough into 12-16 equal balls.
Instructions
Press each ball into a thin tortilla using a tortilla press or rolling pin.
Instructions
Cut each tortilla into 6-8 triangles.
Instructions
Heat oil in a heavy-bottomed pot to 350-375°F (175-190°C).
Instructions
Fry chips in batches for 2-3 minutes, flipping once, until golden and crispy.
Instructions
Remove chips with a slotted spoon and drain on a paper towel-lined plate or wire rack.
Instructions
Immediately sprinkle with additional salt or desired seasonings.
Instructions
Allow to cool completely before serving.
Equipment You'll Need
Here's what I use to make this recipe perfectly every time:
- Large Mixing Bowl — This is essential for combining your dry and wet ingredients without making a mess. I always opt for one that gives me plenty of room to work, ensuring everything gets properly incorporated. A spacious bowl also helps when you're mixing a larger batch. → Buy Now
- Tortilla Press — Trust me on this one, a good tortilla press is a game-changer for uniform, thin chips. It flattens your dough quickly and consistently, which is crucial for even frying. If you don't have one, don't worry; a rolling pin used between two sheets of parchment paper works perfectly too. → Buy Now
- Parchment Paper or Plastic Wrap — Whether you're using a press or a rolling pin, these are indispensable. They prevent the dough from sticking and make transferring your flattened tortillas much easier. I always keep a good supply in my pantry. → Buy Now
- Heavy-Bottomed Pot or Dutch Oven — For frying, a pot with a heavy bottom is non-negotiable. It maintains a stable oil temperature, which is vital for crisp, evenly cooked chips. Thin pots tend to have hot spots and can burn your oil quickly. → Buy Now
- Slotted Spoon or Spider Skimmer — Safety first! These tools are perfect for carefully retrieving your chips from the hot oil. They allow excess oil to drain away before the chips even hit the cooling rack. → Buy Now
- Paper Towel-Lined Plate or Wire Rack — Once fried, your chips need a place to shed any remaining oil. A plate lined with paper towels works well, or even better, a wire rack placed over a baking sheet allows for maximum air circulation, keeping them crisp. → Buy Now
- Measuring Cups & Spoons — Precision matters in baking and frying. Accurate measurements ensure consistency in your recipe every time. I always double-check my measurements before mixing. → Buy Now
- Optional: Kitchen Thermometer — For those who want ultimate control over their frying, a kitchen thermometer is invaluable. Maintaining the correct oil temperature prevents greasy chips and ensures a perfect golden crispness. → Buy Now
Recipe FAQs
Are all store-bought corn chips gluten-free?
Can I use regular cornmeal instead of masa harina for corn chips?
What is the best oil for frying homemade corn chips?
My homemade corn chips are coming out soggy, what am I doing wrong?
How can I make these corn chips healthier?
Can I make these chips with Jiffy Gluten-Free Corn Muffin Mix?
GF Corn Chips: Myth or Munch? + Recipe!
Wondering, "Are corn chips gluten-free?" Discover the answer and learn to make your own delicious, naturally gluten-free corn chips from scratch with this easy recipe!
Prep Time
15 min
Cook Time
20 min
Total Time
35 min
For the Chips
- 1 ½ cups masa harina
- ¾ teaspoon fine sea salt, plus more for sprinkling
- 1 cup warm water (approx., may need a little more or less)
- 4-6 cups high smoke point oil, for frying (e.g., vegetable, canola, corn)
Optional Seasonings
- ½ teaspoon chili powder
- ¼ teaspoon garlic powder
- Pinch of cumin
- Lime zest
Introduction: Are Corn Chips Gluten-Free? Demystifying Your Favorite Snack
There’s nothing quite like the satisfying crunch of a corn chip, whether it’s dunked into a vibrant salsa or piled high with cheesy nachos. But if you’re navigating a gluten-free lifestyle, a simple snack can suddenly become a source of anxiety. The question, “are corn chips gluten free?” is one I hear often in my kitchen. Many assume that because corn is naturally gluten-free, all corn chips must be too. While corn itself is indeed free from gluten, the journey from kernel to chip can sometimes introduce unexpected ingredients or create opportunities for cross-contamination, making some store-bought options a no-go for those with sensitivities or celiac disease. This growing concern about hidden gluten in everyday foods is completely valid.
What I discovered over years of developing gluten-free recipes is that taking control of your ingredients is always the safest bet. Commercial production lines often process wheat-containing products alongside corn chips, leading to potential cross-contact. Additionally, some brands might use flavorings, seasonings, or even binders that contain gluten. For anyone needing to strictly avoid gluten, this uncertainty can really limit snack choices. That’s why I’m so excited to share a foolproof recipe for homemade corn chips today.
This recipe not only guarantees a truly gluten-free snack but also delivers an unparalleled freshness and flavor you won’t find in a bag. We’ll dive into the simple steps to create perfectly crispy, golden chips right in your own kitchen. You’ll be amazed at how easy it is to achieve that authentic corn chip experience without any of the worry. Say goodbye to label scrutiny and hello to pure, unadulterated snack bliss with this simple, satisfying recipe.
Why You’ll Love This Homemade Gluten-Free Corn Chip Recipe
Here’s the thing, store-bought snacks can be a minefield for those avoiding gluten. Even if the label says “corn chips,” hidden ingredients or cross-contamination during manufacturing can be a real concern. That’s why I always gravitate towards making things from scratch in my kitchen. What I love about this homemade recipe is the absolute peace of mind it offers. You have complete control over every single ingredient, ensuring your corn chips are genuinely gluten-free from start to finish. This eliminates any worry about sneaky gluten-containing additives or shared equipment in a factory setting.
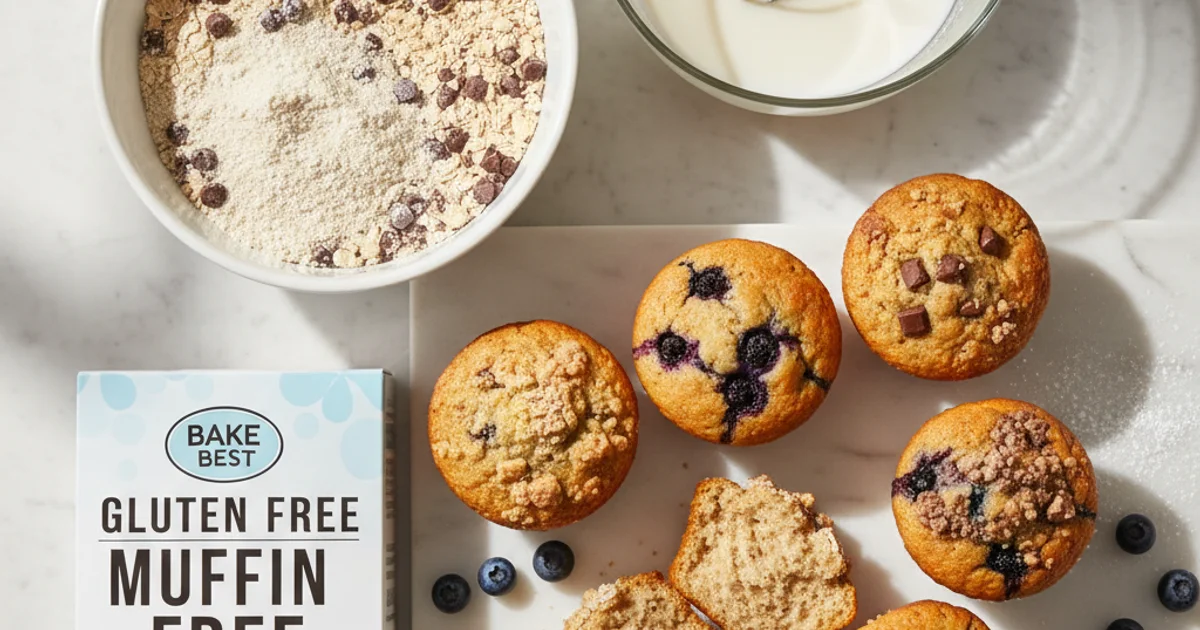
Beyond the safety aspect, the flavor and texture of these homemade chips are simply unparalleled. There’s a certain magic to a warm, crispy chip fresh from the oven or air fryer that store-bought versions just can’t replicate. You’ll notice that the edges get perfectly golden brown and the texture is wonderfully crisp, never stale or overly hard. This recipe delivers that satisfying crunch every single time. It’s also surprisingly budget-friendly. Specialty gluten-free products often come with a premium price tag, but making your own using simple ingredients like corn masa flour or even a good quality gluten free corn bread mix can save you a significant amount. I’ve even experimented successfully with Jiffy gluten free corn muffin mix in a pinch, though masa harina gives the most authentic result. The trick is to keep it simple and fresh.
Ingredients Overview: Crafting Perfect Gluten-Free Corn Chips
Here’s the thing, while the question “are corn chips gluten free” often focuses on the finished product, understanding the raw materials is crucial. Every ingredient plays a vital role in achieving that perfect crispness and authentic taste. For truly exceptional homemade corn chips, the foundation is everything. I always prioritize quality ingredients, knowing they directly impact the final outcome. You’ll notice that the list is quite simple, which is part of the beauty of this recipe.
The absolute star of this show is masa harina. This isn’t just any corn flour; it’s a specially prepared flour made from corn kernels that have been nixtamalized. Nixtamalization is an ancient process where corn is cooked and steeped in an alkaline solution, then ground. This process not only makes the corn more nutritious but also gives masa harina its distinctive flavor and a dough that’s pliable and easy to work with. Crucially, masa harina is naturally gluten-free, making it the bedrock of our gluten-free corn chip endeavor. Look for brands like Maseca or Bob’s Red Mill, which are widely available and reliable. Building on this, the texture it provides is incomparable to regular cornmeal.
Next up, warm water is absolutely essential. Its temperature helps the masa harina hydrate properly, creating a smooth, workable dough. Too cold, and your dough might be crumbly; too hot, and it could become gummy. The secret is to add it gradually, allowing the masa to absorb it fully. This careful hydration is what prevents your chips from being too brittle or too dense.
For flavor, salt is non-negotiable. I recommend fine sea salt for incorporating directly into the dough, as it dissolves evenly. For a final flourish, a sprinkle of flaky sea salt after frying elevates the experience significantly. It provides that satisfying textural contrast.
When it comes to frying, the choice of oil matters. You need a high smoke point oil to achieve that golden crisp without burning. Vegetable, canola, corn, or peanut oils are all excellent choices. Using fresh oil is paramount; old oil can impart off-flavors to your chips, which we definitely want to avoid. What I discovered is that fresh oil makes a world of difference in the chip’s final taste and appearance.
Finally, optional seasonings allow you to customize your chips. A touch of garlic powder, onion powder, chili powder, or even cumin can transform a simple chip into something extraordinary. These additions are fantastic for depth of flavor. In practice, I often add a small amount of chili powder to the dough itself for a subtle kick. These simple ingredients combine to create a truly irresistible snack.
Equipment You’ll Need for Homemade Corn Chips
In my kitchen, having the right tools makes all the difference, especially when creating something as specific as homemade chips. You don’t need a professional setup, but a few key items will ensure your success. This setup prevents common pitfalls and makes the process enjoyable.
- Large Mixing Bowl: This is essential for combining your dry and wet ingredients without making a mess. I always opt for one that gives me plenty of room to work, ensuring everything gets properly incorporated. A spacious bowl also helps when you’re mixing a larger batch.
- Tortilla Press: Trust me on this one, a good tortilla press is a game-changer for uniform, thin chips. It flattens your dough quickly and consistently, which is crucial for even frying. If you don’t have one, don’t worry; a rolling pin used between two sheets of parchment paper works perfectly too.
- Parchment Paper or Plastic Wrap: Whether you’re using a press or a rolling pin, these are indispensable. They prevent the dough from sticking and make transferring your flattened tortillas much easier. I always keep a good supply in my pantry.
- Heavy-Bottomed Pot or Dutch Oven: For frying, a pot with a heavy bottom is non-negotiable. It maintains a stable oil temperature, which is vital for crisp, evenly cooked chips. Thin pots tend to have hot spots and can burn your oil quickly.
- Slotted Spoon or Spider Skimmer: Safety first! These tools are perfect for carefully retrieving your chips from the hot oil. They allow excess oil to drain away before the chips even hit the cooling rack.
- Paper Towel-Lined Plate or Wire Rack: Once fried, your chips need a place to shed any remaining oil. A plate lined with paper towels works well, or even better, a wire rack placed over a baking sheet allows for maximum air circulation, keeping them crisp.
- Measuring Cups & Spoons: Precision matters in baking and frying. Accurate measurements ensure consistency in your recipe every time. I always double-check my measurements before mixing.
- Optional: Kitchen Thermometer: For those who want ultimate control over their frying, a kitchen thermometer is invaluable. Maintaining the correct oil temperature prevents greasy chips and ensures a perfect golden crispness.
What I discovered is that while specific tools are helpful, creativity and careful technique with what you have can also yield fantastic results. For instance, if you’re exploring alternative flours, you might find that a gluten free corn bread mix behaves similarly to traditional masa in a press, offering a slightly different texture. Similarly, some home cooks have had success adapting recipes using jiffy gluten free corn muffin mix for a quick chip base, though the texture will vary. The secret is knowing your equipment and adapting.
Step-by-Step Instructions: Your Guide to Crispy, Gluten-Free Perfection
Here are the first three steps for your recipe:
-
Make the Dough: In a large bowl, combine the masa harina, salt, and warm water. Mix well and then knead the mixture until it forms a smooth and pliable dough. Cover the dough and let it rest for at least 15 minutes.
-
Form the Tortillas: Divide the rested dough into equal-sized balls, about the size of a golf ball. Using a tortilla press or a rolling pin between two sheets of parchment paper, press each dough ball into a thin, even tortilla.
-
Cut the Chips: Take each formed tortilla and, using a sharp knife or pizza cutter, cut it into your desired chip shapes, such as classic triangles or small squares.
-
Heat the Oil: Pour enough oil into a heavy-bottomed pot or deep fryer to submerge the tortilla pieces, then heat the oil to a temperature between 350-375°F (175-190°C), using a kitchen thermometer to ensure accuracy.
-
Fry the Chips: Carefully place a small batch of tortilla pieces into the hot oil, ensuring not to overcrowd the pot, and fry them for 2-3 minutes, or until they are golden brown and delightfully crispy.
-
Drain & Season: Using a slotted spoon or spider, carefully remove the fried chips from the oil and transfer them to a plate lined with paper towels or a wire rack to drain any excess oil, then immediately sprinkle them generously with fine sea salt or your preferred spices while they are still warm.
-
Cool: Once baked, carefully transfer the corn chips to a wire rack and allow them to cool completely at room temperature. This crucial step ensures they achieve their maximum crispness and best texture.
Pro Tips & Tricks for the Best Homemade Gluten-Free Corn Chips
Pro Tips & Tricks for the Best Homemade Gluten-Free Corn Chips
Here’s the thing: making gluten-free corn chips at home isn’t just about following steps; it’s about understanding the subtle nuances that elevate them from good to truly exceptional. I always aim for that satisfying crunch and rich corn flavor. Trust me on this one, paying attention to these details makes all the difference. Building on this, let’s dive into some of my most cherished kitchen secrets for perfect chips.
The secret is in the dough consistency. When you’re mixing your dough, you want it to be pliable but not sticky. If it’s too wet, your chips will absorb too much oil and be greasy. Too dry, and they’ll crack when you roll them out. I start with the recommended water amount, then add a tiny bit more, maybe a teaspoon at a time, until it feels just right – like soft playdough. This might mean adjusting slightly based on your specific corn masa flour, as different brands can vary in absorption. Sometimes, I even use a small amount of gluten free corn bread mix in my masa for a slightly different flavor profile, and that can change the water needs too.
Once your dough is ready, even thickness is paramount. I use a tortilla press, but if you’re rolling by hand, aim for paper-thin disks. In practice, uneven chips cook unevenly; some will burn while others remain soft. You want that consistent, delicate crispness throughout each chip. I often place my dough balls between two sheets of parchment paper before pressing or rolling to prevent sticking and ensure a smooth, even surface. This also makes transferring them much easier.
Oil temperature control is another critical factor for achieving that signature crispiness. What I discovered is that too-cold oil leads to greasy, soggy chips, because they sit in the oil too long. Too-hot oil will burn the outside before the inside is cooked, resulting in a bitter taste. I always use a deep-fry thermometer to maintain a steady temperature, ideally around 350-375°F (175-190°C). This range ensures a quick, clean fry and a beautiful golden color. Maintaining the correct oil temperature is crucial for safety and culinary success.
A common mistake is overcrowding the pot. This drops the oil temperature significantly, leading to those undesirable soggy chips. Always fry in small batches, giving each chip ample space to cook evenly. You’ll notice that the oil temperature recovers more quickly between smaller batches, leading to consistently crisp results. Patience is key here; rushing this step will compromise the texture of your entire batch.
The trick is to season immediately after frying. As soon as those chips come out of the hot oil, transfer them to a paper towel-lined plate and sprinkle generously with salt. The residual oil and heat help the salt adhere perfectly, ensuring every bite is flavorful. If you wait too long, the salt won’t stick as well. Worth noting here, I sometimes experiment with different seasonings, like a sprinkle of chili powder or a squeeze of lime juice right after salting, for an extra kick.
Don’t skip resting the dough. After mixing, let your dough sit, covered, for at least 15-30 minutes at room temperature. This allows the masa flour to fully hydrate, resulting in a more pliable dough that’s easier to work with and yields a smoother, less crumbly chip. This simple step vastly improves the final texture.
Before you start frying, testing the oil is a good practice. Drop a tiny piece of dough into the hot oil. If it sinks then slowly rises with small bubbles, the oil is not hot enough. If it sizzles violently and browns instantly, it’s too hot. You want it to sizzle gently and float to the surface within a few seconds. This quick test helps you fine-tune the temperature before committing a whole batch of chips.
Finally, safety first when deep-frying. Always be mindful of hot oil. Use a sturdy pot, keep a lid nearby in case of a grease fire (never use water!), and ensure your workspace is clear. Never leave hot oil unattended. A little caution goes a long way in the kitchen.
Enjoyed this recipe? Share it with a friend or save it to your board for later. Leave a comment below — I love hearing how it turned out!
You May Also Enjoy




You Might Also Love These 🍽️
Recipes picked just for you based on what you’re cooking