Sweet Truth: Gluten-Free Chocolate Chips Revealed!
Are chocolate chips gluten-free? Get the definitive answer and a scrumptious gluten-free chocolate chip cookie recipe perfect for home cooks!

- 1Unraveling the Mystery: Are Chocolate Chips Gluten-Free?
- 2Why You’ll Adore This Gluten-Free Chocolate Chip Cookie Recipe
- 3Essential Ingredients for Your Gluten-Free Chocolate Chip Masterpiece
- 4Gather Your Gear: Equipment You’ll Need for Perfect Gluten-Free Cookies
- 5Bake Your Best: Step-by-Step Gluten-Free Chocolate Chip Cookie Instructions
- 6Unlock Cookie Perfection: Pro Tips & Tricks for Gluten-Free Baking
Ingredients
Dry Ingredients
- 2 ¼ cups (270g) gluten-free 1:1 all-purpose flour blend (with xanthan gum)
- 1 teaspoon baking soda
- ½ teaspoon salt
Wet Ingredients
- 1 cup (2 sticks / 226g) unsalted butter, softened
- ¾ cup (150g) granulated sugar
- ¾ cup (165g) packed light brown sugar
- 2 large eggs, room temperature
- 1 teaspoon vanilla extract
Add-ins
- 1 ½ cups (255g) certified gluten-free semi-sweet chocolate chips
Instructions
Instructions
Preheat oven to 375°F (190°C). Line baking sheets with parchment paper.
Instructions
Whisk together GF flour blend, baking soda, and salt in a medium bowl.
Instructions
In a large bowl, cream softened butter, granulated sugar, and brown sugar with an electric mixer until light and fluffy (2-3 minutes).
Instructions
Beat in eggs one at a time, mixing well after each addition. Stir in vanilla extract.
Instructions
Gradually add the dry ingredients to the wet ingredients, mixing on low speed until just combined. Do not overmix.
Instructions
Fold in the gluten-free chocolate chips until evenly distributed.
Instructions
Drop rounded tablespoons or use a cookie scoop to place dough balls onto prepared baking sheets, about 2 inches apart.
Instructions
Bake for 10-12 minutes, or until edges are golden and centers are set but still slightly soft.
Instructions
Remove from oven and let cool on the baking sheets for 5 minutes before transferring to a wire rack to cool completely.
Recipe FAQs
Are all chocolate chips naturally gluten-free?
What brands of chocolate chips are certified gluten-free?
Can I use any gluten-free flour blend for this recipe?
Why is chilling the cookie dough important for gluten-free cookies?
How do I know when gluten-free chocolate chip cookies are done baking?
Can I make these cookies dairy-free and egg-free?
Sweet Truth: Gluten-Free Chocolate Chips Revealed!
Are chocolate chips gluten-free? Get the definitive answer and a scrumptious gluten-free chocolate chip cookie recipe perfect for home cooks!
Prep Time
15 min
Cook Time
12 min
Total Time
27 min
Dry Ingredients
- 2 ¼ cups (270g) gluten-free 1:1 all-purpose flour blend (with xanthan gum)
- 1 teaspoon baking soda
- ½ teaspoon salt
Wet Ingredients
- 1 cup (2 sticks / 226g) unsalted butter, softened
- ¾ cup (150g) granulated sugar
- ¾ cup (165g) packed light brown sugar
- 2 large eggs, room temperature
- 1 teaspoon vanilla extract
Add-ins
- 1 ½ cups (255g) certified gluten-free semi-sweet chocolate chips
Unraveling the Mystery: Are Chocolate Chips Gluten-Free?
For anyone navigating the world of gluten-free eating, every ingredient becomes a potential question mark. From sauces to spices, I’ve learned that hidden gluten can lurk in the most unexpected places. This is precisely why the question, are chocolate chips gluten free, frequently pops up in my DMs and community forums. It’s a valid concern, particularly for those with celiac disease or significant gluten sensitivities, where even trace amounts can cause adverse reactions.
What I discovered is that while chocolate itself is naturally gluten-free, the manufacturing process for chocolate chips can introduce gluten. This often happens through cross-contamination in facilities that also process wheat-containing products. Sometimes, even stabilizers or anti-caking agents added to chocolate chips might contain gluten, though this is less common with reputable brands. It’s not always about the core ingredients; sometimes it’s about the journey they take from bean to bag. Trust me on this one, label reading becomes a superpower when you’re gluten-free. I always scrutinize packaging, looking for explicit “gluten-free” certifications.
Building on this, many major chocolate chip manufacturers have recognized the growing need for clearly labeled gluten-free options. You’ll notice that more and more brands proudly display the certified gluten-free seal, providing peace of mind. This shift has made it significantly easier to enjoy our favorite sweet treats without worry. However, assuming all chocolate chips are safe without checking is a common mistake. Always double-check, even with brands you think you know. This diligence ensures your baking remains a joy, not a source of concern. We’re going to dive into how to make a truly delightful gluten-free chocolate chip recipe that satisfies every craving.
Why You’ll Adore This Gluten-Free Chocolate Chip Cookie Recipe
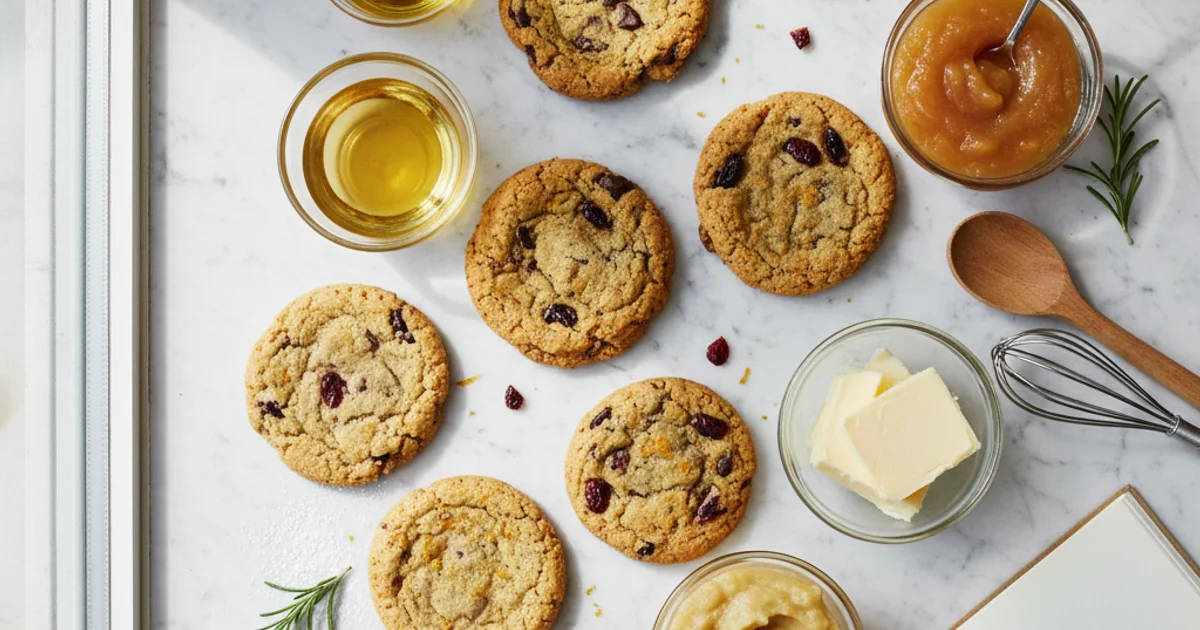
In my kitchen, I’ve spent years perfecting gluten-free baking, and this particular recipe for chocolate chip cookies consistently brings smiles. What I love about this treat is its uncanny resemblance to traditional cookies, a feat many gluten-free versions struggle to achieve. You’ll notice that each bite offers that coveted contrast: delightfully crisp, golden-brown edges giving way to a wonderfully soft and yielding center. This isn’t just another gluten-free cookie; it’s the cookie you’ve been searching for, delivering on texture and taste without compromise.
Here’s the thing: achieving a rich, deep chocolate flavor in gluten-free baking can sometimes be a challenge, but this recipe nails it. The carefully selected ingredients work in harmony to produce a buttery, complex taste that satisfies even the most discerning palate. It’s a treat that truly transcends dietary restrictions. In practice, I’ve found that even friends and family who don’t follow a gluten-free diet rave about these cookies, often surprised they are indeed gluten-free. This recipe removes the guesswork from gluten-free baking, offering a simple and straightforward approach that yields consistently excellent results every time. It’s a reliable recipe I turn to again and again.
Essential Ingredients for Your Gluten-Free Chocolate Chip Masterpiece
In my kitchen, selecting the right ingredients is paramount, especially when baking for specific dietary needs. This recipe shines because each component plays a vital role in achieving that classic cookie texture and taste without compromise. We’re aiming for a treat that satisfies every craving.
Gluten-Free Flour Blend is the cornerstone here. I always recommend a high-quality, pre-mixed cup-for-cup gluten-free flour blend for consistent results. These blends are specifically formulated to mimic wheat flour’s structure, often containing a mix of rice flour, tapioca starch, and potato starch. What I discovered is that using a single gluten-free flour, like just almond or oat, often leads to a drier, crumbly cookie. Many excellent blends already include xanthan gum, which is crucial for elasticity and binding in gluten-free baking. Always double-check your chosen blend’s label to ensure it contains xanthan gum; if not, you’ll need to add a small amount separately, usually about half a teaspoon per cup of flour. This careful selection ensures our cookies have the perfect chew.
Next up, unsalted butter. The key difference is that unsalted butter allows you to control the overall salt content in your recipe. It contributes richness and helps achieve those golden-brown edges we all love. Make sure it’s softened to room temperature for easier creaming with the sugars, which creates air pockets for a lighter texture. For the sugars, we’re using a combination of granulated sugar and light brown sugar. Granulated sugar contributes to crispness and spread, while brown sugar adds moisture, chewiness, and a deeper, more complex flavor profile thanks to its molasses content. This combination is essential for that perfect cookie balance.
Eggs act as a binder, holding all the ingredients together, and contribute moisture and richness. Large eggs are standard for baking, so stick to that size. Pure vanilla extract is non-negotiable for flavor depth; don’t skimp on quality here. It enhances all the other flavors in the cookie, creating a truly aromatic experience. Baking soda is our leavening agent, reacting with the brown sugar’s acidity to create carbon dioxide bubbles, which helps the cookies rise and spread slightly. A common mistake is using baking powder instead; they are not interchangeable for this recipe. Finally, a pinch of salt is critical. It balances the sweetness and makes all the other flavors pop. Without it, the cookies can taste flat.
The star of the show, of course, is the gluten-free chocolate chips. Trust me on this one, not all chocolate chips are created equal regarding gluten. While chocolate itself is naturally gluten-free, some brands may have cross-contamination risks during processing or include unexpected gluten-containing additives. You’ll notice that many major brands now offer certified gluten-free options. I always reach for brands like Enjoy Life Semi-Sweet Chocolate Mega Chunks or Nestle Toll House Simply Delicious Semi-Sweet Morsels, which explicitly state their gluten-free status. Always check the packaging for a gluten-free certification label. You can choose between semi-sweet, dark, or even milk chocolate chips based on your preference; just ensure they are verified gluten-free. This ensures that the treat is safe for everyone.
Gather Your Gear: Equipment You’ll Need for Perfect Gluten-Free Cookies
In my kitchen, having the right tools makes all the difference, especially when baking. You don’t need a professional setup, but a few key pieces of equipment will ensure your gluten-free chocolate chip cookies turn out perfectly every time. Building on this, gathering everything beforehand prevents frantic searching mid-recipe. A common mistake is starting without all your gear ready, which can disrupt the flow and impact your baking.
First, you’ll want a stand mixer with a paddle attachment, or a sturdy hand mixer. This is crucial for properly creaming together the butter and sugars, which incorporates air and creates that light, chewy texture. Trust me on this one; trying to do this by hand can be a real arm workout and often doesn’t yield the same results. Next, grab at least two large mixing bowls. I always use one for my dry ingredients and another for the wet, keeping everything separate until the right moment. This organization is key to successful baking.
Accuracy is paramount in baking, so a reliable set of measuring cups and measuring spoons is non-negotiable. Don’t eyeball ingredients, especially with gluten-free flours, as their properties can be quite different from traditional wheat flour. A flexible rubber spatula is also essential for scraping down the sides of your mixing bowl, ensuring all ingredients are fully incorporated. This prevents pockets of unmixed flour or sugar, leading to an uneven bake.
For baking the cookies themselves, you’ll need at least two baking sheets. I prefer light-colored, heavy-gauge sheets as they conduct heat more evenly, preventing burnt bottoms. Line them with parchment paper or silicone baking mats; this not only prevents sticking but also makes cleanup a breeze. What I love about this is how effortlessly the cookies slide off. While optional, a cookie scoop (about 1.5 to 2 tablespoons) is a fantastic tool for creating uniformly sized cookies. Uniformity ensures they all bake at the same rate, avoiding some being underdone while others are overdone. Finally, a cooling rack is vital for allowing your cookies to cool completely and prevent them from becoming soggy on the bottom. The secret is that air circulation helps them crisp up properly. Of course, you’ll need a preheated oven; proper preheating is non-negotiable for consistent results.
Bake Your Best: Step-by-Step Gluten-Free Chocolate Chip Cookie Instructions
-
Prep Work: Preheat your oven to 375°F (190°C) and line two baking sheets with parchment paper or silicone baking mats, ensuring they are ready for the cookie dough.
-
Combine Dry Ingredients: In a medium bowl, whisk together the gluten-free all-purpose flour blend, baking soda, and salt until they are thoroughly combined and evenly distributed.
-
Cream Wet Ingredients: In a large bowl, using an electric mixer, beat the softened unsalted butter and both granulated sugar and brown sugar on medium speed until the mixture is light, fluffy, and pale in color, typically taking 2-3 minutes.
-
Add Eggs & Vanilla: Crack one egg into the wet mixture and beat until fully incorporated, then repeat with the second egg. Stir in the vanilla extract until evenly distributed, ensuring a smooth and fragrant base.
-
Combine Wet & Dry: Gradually add the prepared dry ingredient mixture to the wet ingredients, mixing on low speed or by hand until just combined. Be careful not to overmix, as this can lead to tough cookies.
-
Fold in Chocolate Chips: Gently fold in the gluten-free chocolate chips using a spatula, distributing them evenly throughout the dough without crushing them.
-
Scoop & Bake: Drop rounded tablespoons of dough, about 2 inches apart, onto the prepared baking sheets. Bake for 10-12 minutes, or until the edges are golden brown and the centers are still slightly soft.
-
Cooling (Initial): Remove the baking sheets from the oven and let the cookies cool on the sheets for 5 minutes. This allows them to set up and prevents them from breaking apart.
-
Cooling (Final): Carefully transfer the cookies from the baking sheets to a wire rack to cool completely. They will firm up further as they cool, achieving that perfect chewy-crisp texture.
Unlock Cookie Perfection: Pro Tips & Tricks for Gluten-Free Baking
Building on this, mastering gluten-free baking requires a few nuanced techniques. These specific steps ensure your cookies achieve that sought-after texture and flavor. I always find that paying close attention to these small details elevates an ordinary batch to something truly special.
- Don’t overmix the dough: Even with gluten-free flours, excessive mixing can develop toughness. Mix until just combined. Overworking the dough can lead to a dense, cake-like texture instead of a tender, chewy one.
- Chill the dough: This step is non-negotiable for superior cookies. Chilling allows the flours to fully hydrate, preventing a gritty texture. It also solidifies the fat, which controls spread during baking. I often chill my dough for at least 30 minutes, or even overnight for deeper flavor.
- Room temperature ingredients: Butter and eggs at room temperature emulsify better, creating a smoother dough. Cold ingredients can cause the butter to seize, resulting in a lumpy mixture. This smoother base leads to a more uniform cookie.
- Measure flour correctly: Incorrect flour measurement is a common pitfall. Always spoon your gluten-free flour into the measuring cup, then level it off with a straight edge. Never scoop directly from the bag, as this compacts the flour and adds too much.
- Baking sheet choice: Light-colored baking sheets promote even baking and prevent over-browning on the bottom. Darker sheets absorb more heat, which can lead to burnt bottoms. Using parchment paper or a silicone mat also ensures easy removal and consistent results. For more on proper baking techniques, check out this guide on cookie baking science.
- Don’t overbake: This is crucial for soft, chewy cookies. Look for edges that are set and lightly golden, while the centers still appear slightly soft. They will continue to set as they cool on the baking sheet. Pulling them out just a minute or two early can make all the difference.
- A sprinkle of salt: For an elevated touch, a light sprinkle of flaky sea salt on top of the warm cookies enhances the chocolate flavor. This simple addition provides a pleasant contrast. It really makes the chocolate sing.
Enjoyed this recipe? Share it with a friend or save it to your board for later. Leave a comment below — I love hearing how it turned out!
You May Also Enjoy




You Might Also Love These 🍽️
Recipes picked just for you based on what you’re cooking