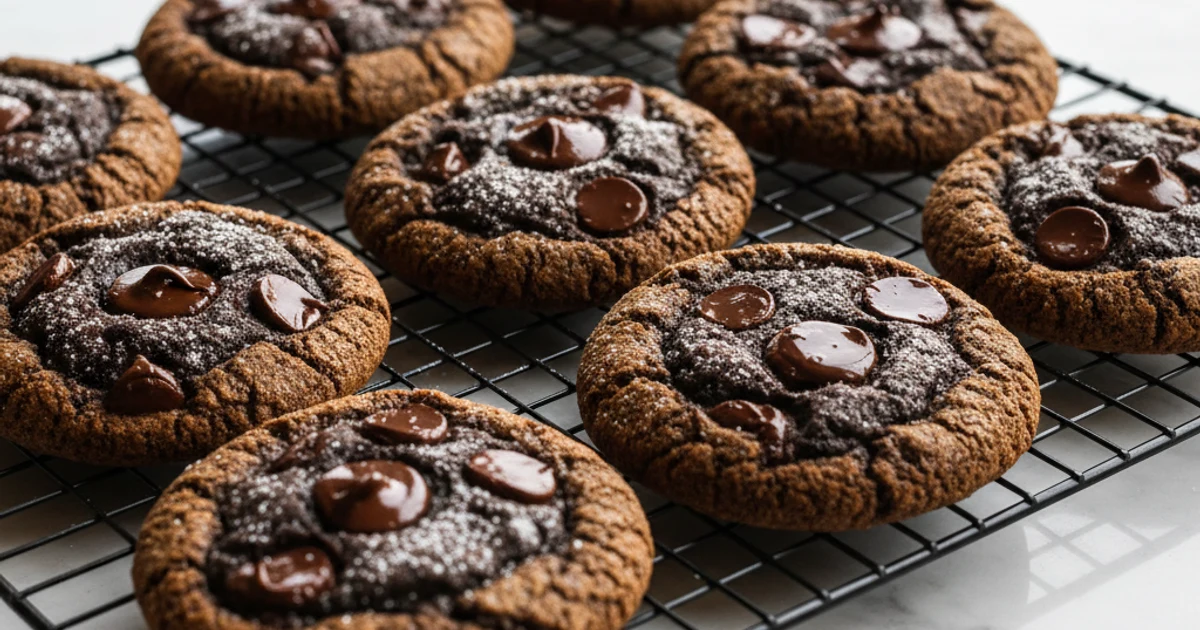
No-Bake Chocolate Chip Cookies: Pure Delight!
Wondering can you make cookies without baking soda? Yes! Discover our easy recipe for no-bake cookies using chocolate chips, perfect for a quick, delicious treat.

- 1Can You Make Cookies Without Baking Soda? The Sweet Answer is Yes!
- 2Why You’ll Love These Incredible No-Bake Cookies Using Chocolate Chips
- 3Essential Ingredients for Cookies Without Baking Soda or Powder
- 4Equipment You’ll Need for Microwave No Bake Cookies
- 5Step-by-Step Instructions: Mastering Cookies with No Baking Soda
- 6Pro Tips & Tricks for Perfect No-Bake Chocolate Chip Cookies
Ingredients
Cookie Base
- 2 cups granulated sugar
- 1/2 cup unsalted butter
- 1/2 cup milk (any kind)
- 1/4 cup unsweetened cocoa powder
- 1 teaspoon vanilla extract
- 1/2 cup creamy peanut butter
Dry Ingredients & Add-ins
- 3 cups quick-cooking oats
- 1 cup chocolate chips (optional)
Instructions
Instructions
Line a baking sheet with parchment paper.
Instructions
In a large saucepan, combine sugar, butter, milk, and cocoa powder. Bring to a rolling boil over medium heat, stirring constantly.
Instructions
Boil for exactly 1 minute, continuing to stir.
Instructions
Remove the saucepan from heat.
Instructions
Stir in vanilla extract and peanut butter until completely smooth and melted.
Instructions
Quickly add the quick-cooking oats and chocolate chips (if using), stirring until well combined and coated.
Instructions
Drop spoonfuls of the mixture onto the prepared baking sheet.
Instructions
Allow cookies to set at room temperature for 1-2 hours, or chill in the refrigerator for 30-45 minutes until firm.
Equipment You'll Need
Here's what I use to make this recipe perfectly every time:
- Large Saucepan — This is your primary vessel. It needs to be big enough to comfortably boil the butter, sugar, milk, and cocoa without overflowing. A heavy-bottomed pan is ideal for even heat distribution, preventing scorching. → Buy Now
- Measuring Cups and Spoons — Precision matters, even in a seemingly forgiving recipe. Accurate measurements ensure the right balance of sweetness and texture for your cookies without baking soda or powder. → Buy Now
- Whisk — Essential for thoroughly combining the initial liquid ingredients. A good whisk eliminates lumps, creating a smooth, homogenous base. → Buy Now
- Wooden Spoon or Sturdy Spatula — Once you add the oats and peanut butter, the mixture thickens considerably. A robust spoon or spatula will handle the dense stirring required. → Buy Now
- Parchment Paper or Wax Paper — Crucial for preventing sticking. Laying this out on your baking sheet makes cleanup a breeze and ensures your cookies lift off easily once set. → Buy Now
- Baking Sheet — This provides a flat, cool surface for your formed cookies to set. Any flat tray will work, as long as it fits in your refrigerator or a cool spot. → Buy Now
- Microwave-Safe Bowl (optional) — While you can add chocolate chips directly to the warm mixture, some prefer to melt them slightly in a separate bowl for a smoother incorporation. This is entirely up to personal preference for microwave no bake cookies. → Buy Now
Recipe FAQs
Why do my no-bake cookies not set up?
Can I use old-fashioned oats instead of quick-cooking oats?
Can I make these no-bake cookies without peanut butter?
How long do no-bake cookies take to set?
My no-bake cookies are too dry/crumbly. What went wrong?
Are these cookies truly 'no bake' if I boil ingredients on the stove?
No-Bake Chocolate Chip Cookies: Pure Delight!
Wondering can you make cookies without baking soda? Yes! Discover our easy recipe for no-bake cookies using chocolate chips, perfect for a quick, delicious treat.
Prep Time
10 min
Cook Time
2 min
Total Time
12 min
Cookie Base
- 2 cups granulated sugar
- 1/2 cup unsalted butter
- 1/2 cup milk (any kind)
- 1/4 cup unsweetened cocoa powder
- 1 teaspoon vanilla extract
- 1/2 cup creamy peanut butter
Dry Ingredients & Add-ins
- 3 cups quick-cooking oats
- 1 cup chocolate chips (optional)
Can You Make Cookies Without Baking Soda? The Sweet Answer is Yes!
I’ve been in the kitchen for over a decade, and trust me, we’ve all faced that moment. You’re ready to bake, ingredients laid out, then you realize your baking soda container is empty. It’s a common scenario that often leads to the question: can you make cookies without baking soda? For many traditional recipes, this leavening agent is crucial for achieving that fluffy, airy texture. Its absence can result in flat, dense treats.
Here’s the thing, while baking soda is vital for chemical leavening in many baked goods, it’s not a universal requirement for all types of cookies. This recipe is a fantastic example of creating delightful treats without needing any leavening whatsoever. We’re diving into the wonderful world of no-bake cookies. These aren’t your typical oven-baked, puffed-up delights. Instead, they offer a dense, chewy, and incredibly satisfying experience.
What I discovered years ago, amidst a frantic search for a baking soda substitute, was the magic of no-bake recipes. They bypass the oven entirely, relying on a stovetop mixture that sets up beautifully as it cools. This approach means you don’t have to worry about leavening agents at all. It eliminates the need for baking soda or baking powder, making it a perfect solution for those impromptu cravings or when your pantry is missing key items. You can whip up these no bake cookies using chocolate chips in a fraction of the time it takes for traditional cookies. The minimal equipment required is another huge plus. You don’t need fancy mixers or even an oven. Just a saucepan, a spoon, and a little patience while they set. This treat offers a rich, decadent flavor profile, proving that cookies with no baking soda can be just as, if not more, enjoyable.
Why You’ll Love These Incredible No-Bake Cookies Using Chocolate Chips
Here’s the thing: sometimes you just need a cookie, and you need it now. I always keep a few pantry staples on hand for those moments. What I love about this particular recipe is its sheer simplicity and speed. You won’t be heating up your kitchen, which is a blessing during summer months or when your oven is already busy with dinner. This means more time enjoying your treat and less time waiting.
Building on this, these no bake cookies using chocolate chips are a lifesaver for busy weeknights. They come together in mere minutes, making them the ultimate solution for unexpected guests or sudden dessert cravings. Trust me on this one; I’ve whipped up batches of these in under 15 minutes. The process is so straightforward that even the youngest kitchen helpers can get involved safely. There’s no hot oven to worry about, making it a fantastic activity for kids. You’ll notice that these microwave no bake cookies still deliver that deeply satisfying, chewy texture you crave, packed with rich chocolate. They genuinely hit all the right notes for a sweet escape. What I discovered is that even if you’re out of traditional leavening agents, making cookies without baking soda or powder doesn’t mean sacrificing flavor or texture. This recipe proves that deliciousness is always within reach.
Essential Ingredients for Cookies Without Baking Soda or Powder
Here’s the thing, crafting the perfect no-bake cookie relies heavily on understanding each ingredient’s role. We’re not relying on chemical leavening here, so every component pulls its weight in texture and flavor. This recipe is a masterclass in ingredient synergy, particularly when you’re making no bake cookies using chocolate chips.
Granulated sugar isn’t just for sweetness; it’s a foundational element. It dissolves in the warm butter and milk mixture, creating that essential syrupy base. This syrupy texture is what binds our oats and peanut butter together, forming the characteristic chewiness of the treat. Without sufficient sugar, the cookies would be crumbly and lack their signature structure.
Next up, unsalted butter is non-negotiable for richness and binding. I always reach for real butter in my kitchen; margarine simply doesn’t deliver the same creamy mouthfeel or flavor. The milk solids in butter contribute to a deeper, more satisfying taste. It also carries the flavors of the cocoa and peanut butter beautifully.
Milk, whether whole, skim, or a non-dairy alternative, provides the necessary liquid. It helps dissolve the sugar and butter, creating a smooth, homogenous mixture before the dry ingredients are added. This liquid base is crucial for hydrating the oats and ensuring a consistent cookie texture. A common mistake is not letting the milk and sugar come to a proper boil, which affects the final set.
For that rich chocolatey depth, unsweetened cocoa powder is essential. I prefer unsweetened because it allows us to control the overall sweetness of the cookies precisely. Dutched cocoa powder can also be used for a darker color and milder chocolate flavor. This ensures our cookies with no baking soda still pack a flavor punch.
A splash of vanilla extract elevates all the other flavors. Trust me on this one, a good quality vanilla makes a noticeable difference. It adds a warm, aromatic note that rounds out the chocolate and peanut butter perfectly. Don’t skimp on the good stuff here; it’s a small but mighty addition.
The true workhorse of this recipe is quick-cooking oats. They provide the bulk and structure for our cookies without baking soda or powder. Unlike old-fashioned oats, quick-cooking oats are pre-steamed and rolled thinner, allowing them to absorb the warm liquid mixture much faster. This results in a softer, more uniform cookie texture without any grittiness. Using old-fashioned oats would lead to a much chewier, potentially tough cookie.
Creamy peanut butter adds a wonderful nutty flavor and acts as another binder. Its natural oils and thickness help hold everything together, contributing to the cookie’s fudgy consistency. If allergies are a concern, you can substitute it with almond butter or a sunflower seed butter, though the flavor profile will, of course, shift.
Finally, chocolate chips are an optional but highly recommended addition. They melt slightly into the warm mixture, creating pockets of intense chocolate flavor. Semi-sweet, milk, or even dark chocolate chips all work beautifully, depending on your preference. They add visual appeal and an extra layer of indulgence to these delightful microwave no bake cookies.
Equipment You’ll Need for Microwave No Bake Cookies
In my kitchen, simplicity is often the secret to success, especially when time is short. This treat truly shines in its minimal equipment requirements. You won’t need an electric mixer, a fancy stand mixer, or even an oven for these no bake cookies using chocolate chips. What I love about this is how accessible it makes baking for everyone, regardless of their kitchen setup.
Here’s the thing: you’re essentially making a stovetop fudge base before transforming it into delightful cookies with no baking soda. This process means focusing on a few key tools that handle heat and mixing efficiently. I always gather everything before I start, a practice I highly recommend to keep things flowing smoothly. This preparation prevents frantic searching mid-recipe. You’ll notice that the tools are mostly standard kitchen items, making this a perfect recipe for beginners or those looking for a quick dessert. The trick is to have them clean and ready to go.
- Large Saucepan: This is your primary vessel. It needs to be big enough to comfortably boil the butter, sugar, milk, and cocoa without overflowing. A heavy-bottomed pan is ideal for even heat distribution, preventing scorching.
- Measuring Cups and Spoons: Precision matters, even in a seemingly forgiving recipe. Accurate measurements ensure the right balance of sweetness and texture for your cookies without baking soda or powder.
- Whisk: Essential for thoroughly combining the initial liquid ingredients. A good whisk eliminates lumps, creating a smooth, homogenous base.
- Wooden Spoon or Sturdy Spatula: Once you add the oats and peanut butter, the mixture thickens considerably. A robust spoon or spatula will handle the dense stirring required.
- Parchment Paper or Wax Paper: Crucial for preventing sticking. Laying this out on your baking sheet makes cleanup a breeze and ensures your cookies lift off easily once set.
- Baking Sheet: This provides a flat, cool surface for your formed cookies to set. Any flat tray will work, as long as it fits in your refrigerator or a cool spot.
- Microwave-Safe Bowl (optional): While you can add chocolate chips directly to the warm mixture, some prefer to melt them slightly in a separate bowl for a smoother incorporation. This is entirely up to personal preference for microwave no bake cookies.
Building on this, having your equipment ready means you can focus on the cooking process itself, which is quite fast. You’ll avoid the common mistake of scrambling for a whisk while your mixture is bubbling on the stove. This organized approach contributes significantly to the overall success and enjoyment of making this treat.
Step-by-Step Instructions: Mastering Cookies with No Baking Soda
-
Preparation: Line a large baking sheet with parchment paper, ensuring it covers the entire surface to prevent sticking and make cleanup easier.
-
Boil the Base: In a medium saucepan, combine the granulated sugar, unsalted butter, milk, and unsweetened cocoa powder. Bring this mixture to a full, rolling boil over medium heat, stirring constantly with a whisk or wooden spoon to prevent burning. Once a rolling boil is achieved, continue boiling for exactly 1 minute, maintaining constant stirring.
-
Remove from Heat & Add Flavor: Immediately remove the saucepan from the heat source. Stir in the vanilla extract and creamy peanut butter until the mixture is completely smooth and well combined.
-
Incorporate Oats & Chocolate: Quickly stir in the quick-cooking oats and chocolate chips until they are evenly distributed throughout the mixture.
-
Scoop & Form: Using a spoon or a small cookie scoop, drop rounded spoonfuls of the mixture onto the prepared baking sheet, leaving a little space between each cookie.
-
Set & Chill: Allow the cookies to set at room temperature for at least 30 minutes, or for a quicker set, place them in the refrigerator for 15-20 minutes until firm.
-
Press and Chill: Gently press the mixture firmly and evenly into the prepared pan, ensuring it’s packed tightly from edge to edge. Once pressed, place the pan in the refrigerator for at least 30 minutes, or until the cookie dough is firm enough to slice easily.
Pro Tips & Tricks for Perfect No-Bake Chocolate Chip Cookies
Here’s the thing, even the simplest recipes benefit from a few expert touches. I always tell my readers that understanding the ‘why’ behind each step elevates your cooking from good to truly great. These no-bake cookies using chocolate chips are no exception; a little foresight goes a long way in achieving that perfect texture and flavor.
One of the most critical steps in making these treats is the boiling time for the sugar mixture. Trust me on this one: exactly one minute is your sweet spot. If you boil it for less time, your cookies might not set properly, remaining too soft and sticky. Conversely, boiling for too long can evaporate too much liquid, resulting in dry, crumbly cookies that lack that satisfying chew. I’ve found that setting a timer as soon as the mixture reaches a full, rolling boil prevents guesswork and ensures consistent results every single time. This precise timing is crucial for the sugar to reach the correct temperature and consistency, allowing it to bind the oats effectively without the need for traditional leavening agents.
Once you add the oats, speed is your ally. The mixture starts to thicken and set very quickly, so you need to work efficiently to incorporate everything evenly. Have your measured oats ready to go, and stir them in briskly until just combined. Overmixing at this stage can lead to a tougher, more crumbly texture rather than the soft, chewy cookie you’re aiming for. What I discovered is that a sturdy spatula works better than a whisk here, allowing for quicker, more thorough incorporation without overworking the mixture.
Regarding peanut butter choice, I always opt for creamy peanut butter in this recipe. Its smooth consistency helps bind the ingredients together seamlessly, contributing to the desirable soft texture. While crunchy peanut butter can certainly be used for a textural variation, be aware that the nut pieces might slightly alter the binding properties, potentially making the cookies a little less cohesive. If you do use crunchy, ensure it’s well-stirred into the hot mixture to help those pieces integrate. This is key for a consistent outcome when making cookies with no baking soda.
For those eager to enjoy their creations sooner, chilling is your best friend. While these cookies will eventually set at room temperature, placing them in the refrigerator significantly speeds up the process. I usually pop them in for about 30 minutes to an hour, and they come out perfectly firm and ready to enjoy. This is especially helpful if you’re making them for a last-minute gathering or just can’t wait to taste them.
A common mistake is overmixing the oats. Once the dry ingredients hit the hot sugar mixture, stir just enough to combine them. Excessive stirring can break down the oat structure, leading to a less desirable, denser texture. You want those oats to remain distinct but coated, creating that classic no-bake cookie chew. This quick mixing technique helps maintain the integrity of the oats and prevents the cookies from becoming too stiff.
While not strictly essential for melting, having your butter and peanut butter at room temperature can make the initial melting and mixing process smoother. It allows these ingredients to combine more easily and evenly with the sugar and milk, creating a homogenous base before boiling. This can prevent any small lumps and ensure a perfectly smooth starting point for your mixture.
Adjusting sweetness is a personal preference. This recipe is designed to be well-balanced, but if you prefer a less sweet treat, you can reduce the sugar by up to 1/4 cup without drastically affecting the cookie’s structure. Conversely, for a sweeter indulgence, an extra tablespoon or two of sugar can be added. Just remember that significant changes might slightly alter the final texture. For more on the science of sugar in baking, you can check out this helpful guide on sugar’s role.
Finally, a quick tip for cleaning up: immediately after scooping out your cookies, fill the saucepan with hot water and let it soak. The residual sugar mixture will harden quickly, making it difficult to clean. Soaking it right away will dissolve the hardened sugar, making washing up much easier and preventing a sticky mess later. This simple step saves a lot of scrubbing time.
Enjoyed this recipe? Share it with a friend or save it to your board for later. Leave a comment below — I love hearing how it turned out!
You May Also Enjoy




You Might Also Love These 🍽️
Recipes picked just for you based on what you’re cooking