Crispy Coconut Shrimp: Gluten-Free & Delicious!
Discover delicious gluten-free shrimp recipes! Our crispy gluten-free coconut shrimp is easy to make and perfect with vibrant side dishes. Get the recipe!

- 1Introduction: Savoring Delicious Gluten-Free Shrimp Recipes
- 2Why You’ll Love This Gluten-Free Coconut Shrimp Recipe
- 3Ingredients Overview: Crafting Your Gluten-Free Coconut Shrimp
- 4Essential Equipment You’ll Need for Perfect Gluten-Free Coconut Shrimp
- 5Essential Equipment You’ll Need for Perfect Gluten-Free Coconut Shrimp
- 6Step-by-Step Instructions: Mastering Crispy Gluten-Free Coconut Shrimp
- 7Pro Tips & Tricks for the Best Gluten-Free Coconut Shrimp
Ingredients
For the Shrimp
- 1 lb large shrimp, peeled, deveined, tail-on (or off)
- 1/2 cup gluten-free all-purpose flour blend
- 2 large eggs, beaten
- 1 1/2 cups unsweetened shredded coconut
- 1/2 teaspoon salt
- 1/4 teaspoon black pepper
- 1/4 teaspoon garlic powder
- 2-3 cups coconut oil or neutral oil for frying
For the Zesty Dipping Sauce
- 1/2 cup sweet chili sauce
- 2 tablespoons fresh lime juice
- 1 tablespoon chopped fresh cilantro
- 1/2 teaspoon grated fresh ginger (optional)
Instructions
Instructions
Prepare shrimp by patting very dry with paper towels.
Instructions
Set up a breading station: one shallow bowl with GF flour, salt, pepper, garlic powder; one with beaten eggs; one with shredded coconut.
Instructions
Dredge each shrimp first in flour, then egg, then firmly press into coconut to coat completely.
Instructions
Heat oil in a large skillet or deep fryer to 350°F (175°C).
Instructions
Fry shrimp in batches for 2-3 minutes per side, until golden brown and cooked through.
Instructions
Remove shrimp to a wire rack set over paper towels to drain excess oil.
Instructions
Whisk together all dipping sauce ingredients in a small bowl.
Instructions
Serve hot with the zesty dipping sauce.
Recipe FAQs
Is shrimp naturally gluten-free?
What is the best gluten-free flour to use for crispy coconut shrimp?
Can I bake or air fry gluten-free coconut shrimp instead of frying?
How do I prevent the coconut from falling off during frying?
What are some good side dishes for coconut shrimp?
Can I make the dipping sauce ahead of time?
Crispy Coconut Shrimp: Gluten-Free & Delicious!
Discover delicious gluten-free shrimp recipes! Our crispy gluten-free coconut shrimp is easy to make and perfect with vibrant side dishes. Get the recipe!
Prep Time
15 min
Cook Time
15 min
Total Time
30 min
For the Shrimp
- 1 lb large shrimp, peeled, deveined, tail-on (or off)
- 1/2 cup gluten-free all-purpose flour blend
- 2 large eggs, beaten
- 1 1/2 cups unsweetened shredded coconut
- 1/2 teaspoon salt
- 1/4 teaspoon black pepper
- 1/4 teaspoon garlic powder
- 2-3 cups coconut oil or neutral oil for frying
For the Zesty Dipping Sauce
- 1/2 cup sweet chili sauce
- 2 tablespoons fresh lime juice
- 1 tablespoon chopped fresh cilantro
- 1/2 teaspoon grated fresh ginger (optional)
Introduction: Savoring Delicious Gluten-Free Shrimp Recipes
Finding truly satisfying gluten-free shrimp recipes can sometimes feel like a treasure hunt. Many folks, myself included, navigate dietary restrictions, and the quest for meals that don’t compromise on flavor or texture is real. I’ve spent countless hours in my kitchen, experimenting with different flours and coatings, determined to crack the code for that perfect, crispy bite without a trace of gluten. What I discovered is that shrimp, inherently gluten-free, offers an incredible canvas for culinary creativity. Its delicate flavor pairs beautifully with a myriad of spices and cooking methods. This particular dish, featuring crispy coconut shrimp with a vibrant dipping sauce, is a testament to how incredible gluten-free cooking can be. It’s not just about avoiding gluten; it’s about elevating a simple ingredient into something truly extraordinary. You’ll find that this recipe delivers on all fronts: a satisfying crunch, succulent shrimp, and a zesty counterpoint that brightens every mouthful. This isn’t just another gluten-free option; it’s a celebration of flavor and texture that everyone at your table will adore. It’s about making mealtime an exciting adventure, proving that dietary needs can inspire some of the most memorable dishes.
Why You’ll Love This Gluten-Free Coconut Shrimp Recipe
In my kitchen, I always look for dishes that bring joy without compromising on dietary needs. This recipe for crispy coconut shrimp is a prime example. You’ll notice that the golden-brown coating isn’t just visually appealing; it delivers an unparalleled crunch with every bite. The trick is in the combination of finely shredded coconut and carefully selected gluten-free flours, creating a texture that stands up beautifully to frying or baking.
What I love about this dish is its vibrant flavor profile. The natural sweetness of the coconut perfectly complements the succulent shrimp, while the accompanying zesty dipping sauce cuts through with a bright, tangy counterpoint. It’s a harmonious blend that truly excites the palate. This isn’t just another gluten free shrimp recipe; it’s a culinary experience. Furthermore, the preparation is surprisingly straightforward. I often whip this up on a busy weeknight, but it’s equally impressive when entertaining guests. It looks and tastes gourmet, yet the effort involved is minimal, making it a fantastic option for both novice and experienced cooks.
Building on this, this dish naturally accommodates various dietary requirements. For those wondering, is shrimp gluten free inherently? Yes, plain shrimp is naturally gluten-free, and this recipe ensures the entire preparation remains safe. It’s a fantastic option for anyone seeking delicious gluten free coconut shrimp, providing peace of mind alongside incredible taste. The versatility extends beyond dietary needs, too. You can easily adjust the spice level in the dipping sauce or experiment with different herbs to match your preference. Trust me on this one; this recipe is a keeper. It offers a delightful balance of taste, texture, and ease, making it a staple in my rotation.
Ingredients Overview: Crafting Your Gluten-Free Coconut Shrimp
In my kitchen, selecting the right ingredients is paramount for any dish, especially when catering to specific dietary needs. This recipe’s success hinges on understanding each component’s role. Here’s the thing, using high-quality items elevates the final product from good to truly exceptional.
The foundation of this dish is, of course, the shrimp. I always opt for large, raw, peeled, and deveined shrimp. Tail-on makes for a beautiful presentation and a convenient handle for dipping, but tail-off works perfectly fine if you prefer. Freshness is key; look for shrimp that are firm, translucent, and have a mild, oceanic smell. Avoid any with a strong ammonia odor or slimy texture. Frozen shrimp can be excellent too, just ensure they are fully thawed and patted very dry before breading. Moisture is the enemy of crispiness.
For the crucial gluten-free coating, a good gluten-free flour blend is essential. I’ve found that a mix of rice flour and tapioca starch works wonderfully, or a store-bought all-purpose gluten-free blend that contains xanthan gum. This blend provides the initial adherence for the other breading layers. It creates a light, crisp shell that holds up well during frying. Using a dedicated gluten-free flour ensures the finished product is safe for those with sensitivities, making this one of the best gluten-free shrimp recipes you can make.
Eggs act as the binder, providing the sticky surface for the coconut to adhere to. I typically use two large eggs, whisked well with a splash of water or milk to create a smooth wash. This ensures even coverage and helps create that golden-brown exterior. Without this crucial step, the coconut simply wouldn’t stick.
The star of the show, the shredded coconut, should ideally be unsweetened. This allows you to control the sweetness of the final dish and prevents it from becoming overly dessert-like. If you only have sweetened coconut, reduce or omit any added sugar in your dipping sauce. The texture of medium-shred coconut provides that satisfying crunch and tropical flavor.
For frying, coconut oil is my top choice, as it complements the coconut flavor of the shrimp beautifully. However, any neutral high-smoke point oil like avocado oil or grapeseed oil will work. The key is maintaining the correct oil temperature – too low, and your shrimp will be greasy; too high, and they’ll burn before cooking through. A common mistake is crowding the pan, which drops the oil temperature.
The accompanying dipping sauce brings everything together. A good quality sweet chili sauce forms the base, offering a lovely balance of sweet and spicy. Freshly squeezed lime juice adds a bright, zesty counterpoint, cutting through the richness of the fried shrimp. Finally, a handful of finely chopped fresh cilantro contributes a herbaceous freshness that elevates the entire experience. These sauce components are what make the dish truly sing.
To enhance the natural flavor of the shrimp and the coating, simple seasonings like salt, pepper, and garlic powder are indispensable. I season the shrimp lightly before breading, and also incorporate a pinch of salt into the flour mixture. This layering of seasoning ensures every bite is flavorful, not just the outside.
Essential Equipment You’ll Need for Perfect Gluten-Free Coconut Shrimp
Essential Equipment You’ll Need for Perfect Gluten-Free Coconut Shrimp
Having the right tools makes all the difference when preparing this recipe. In my kitchen, I always set up my workspace efficiently before I even touch the ingredients. This preparation ensures a smooth cooking process and prevents any last-minute scrambling. You’ll notice that having everything within reach streamlines the breading and cooking stages.
First up, you’ll need three shallow bowls or plates for your breading station. I prefer shallow dishes because they make it much easier to coat the shrimp evenly without making a huge mess. One bowl will hold your gluten-free flour blend, another your whisked eggs, and the third your shredded coconut. Trust me on this one; trying to use deep bowls for breading is an exercise in frustration. Next, a large skillet or a deep fryer is essential for cooking. If you’re opting for a skillet, choose one with high sides to minimize oil splatter. A cast-iron skillet works beautifully for achieving that golden-brown crispness. The key difference is that a deep fryer offers more consistent oil temperature, which can lead to a more uniformly cooked product. However, a skillet is perfectly adequate for home cooks and requires less specialized equipment.
You’ll definitely need a good pair of tongs for safe handling of the shrimp, especially when placing them into hot oil and flipping them. Long-handled tongs are best to keep your hands away from any splattering oil. Building on this, a wire rack placed over a sheet pan lined with paper towels is crucial for draining excess oil after frying. This setup allows air to circulate around the shrimp, keeping them crispy rather than letting them steam and become soggy on a flat surface. A whisk is also necessary for smoothly combining your eggs and for preparing the zesty dipping sauce. For accurate measurements, measuring cups and spoons are standard kitchen tools you’ll use throughout the preparation, from flour to spices.
What I discovered is that consistency in measurements leads to consistent results. What I love about this recipe is its versatility with cooking methods. For those looking for a lighter option, an air fryer is a fantastic alternative. While it won’t yield the exact same deep-fried texture, it still produces delightfully crispy gluten-free coconut shrimp with significantly less oil. If using an air fryer, you’ll want to lightly spritz the coated shrimp with cooking spray before cooking to help with browning. This dish pairs wonderfully with various side dishes to go with coconut shrimp, like a fresh mango salsa or a simple green salad. The convenience of an air fryer makes preparing side dishes for coconut shrimp much easier while the main event cooks. The secret is to not overcrowd the air fryer basket, cooking in batches if necessary.
Step-by-Step Instructions: Mastering Crispy Gluten-Free Coconut Shrimp
-
Prep the Shrimp: Begin by thoroughly cleaning your shrimp. If using fresh shrimp, peel and devein them, removing the outer shell and the dark intestinal tract. If using frozen shrimp, thaw them completely under cold running water, then peel and devein as needed. Once cleaned, pat the shrimp completely dry with paper towels; this crucial step ensures the breading adheres properly and the shrimp cooks up crispy.
-
Set Up Breading Station: Prepare your breading station by arranging three shallow bowls in a row on your countertop. In the first bowl, place the gluten-free flour. In the second bowl, whisk the eggs until well combined. In the third and final bowl, spread out the shredded coconut.
-
Breading Process: Take one shrimp at a time and dredge it first in the gluten-free flour, ensuring it’s fully coated, then gently shake off any excess. Next, dip the floured shrimp into the whisked egg, allowing any extra egg to drip back into the bowl. Finally, transfer the shrimp to the shredded coconut, pressing gently to ensure a thick and even layer of coconut adheres to every surface.
-
Prepare the Zesty Dipping Sauce: In a small bowl, whisk together the mayonnaise, sweet chili sauce, lime juice, and a pinch of salt until well combined and smooth. Taste and adjust seasonings as needed, then set aside for serving.
-
Fry the Coconut Shrimp: Heat about 2-3 inches of vegetable oil in a large, heavy-bottomed pot or deep fryer to 350°F (175°C). Carefully add the breaded shrimp to the hot oil in small batches, ensuring not to overcrowd the pot, which can lower the oil temperature and result in soggy shrimp. Fry for 2-3 minutes per batch, turning occasionally, until golden brown and cooked through.
-
Drain and Serve: Using a slotted spoon, transfer the fried shrimp to a wire rack placed over a baking sheet to drain any excess oil. This crucial step helps maintain their crispy texture. Serve immediately with the zesty dipping sauce.
-
Serve the crispy coconut shrimp immediately with the zesty dipping sauce on the side for a delightful appetizer or main course.
Pro Tips & Tricks for the Best Gluten-Free Coconut Shrimp
Here’s the thing, even with the best recipe, little details make a huge difference. These pro tips ensure your gluten-free coconut shrimp turns out perfectly every single time. Paying attention to these nuances will elevate your dish from good to truly exceptional.
Shrimp Selection: I always opt for fresh, wild-caught shrimp when possible, but high-quality frozen shrimp works beautifully too. For this recipe, I find medium to large shrimp (21/25 or 16/20 count) are ideal. Smaller shrimp can overcook quickly, while jumbo shrimp might not get as crispy. When using frozen shrimp, always thaw them completely in the refrigerator overnight. Avoid thawing at room temperature, as this can affect texture and safety. Worth noting here, properly thawed shrimp ensures even cooking.
Drying Shrimp: This step is non-negotiable for achieving that satisfying sizzle and crispy coating. After thawing and peeling, lay your shrimp on a few layers of paper towels. Pat them aggressively dry with more paper towels. Any excess moisture will prevent the breading from adhering properly, leading to a soggy coating. This meticulous drying process is critical for the success of your gluten-free coconut shrimp.
Breading Technique: Trust me on this one, the ‘wet hand, dry hand’ method is a game-changer. Dedicate one hand solely to handling the wet shrimp and dipping it into the egg mixture. Use your other hand exclusively for the dry breading ingredients. This prevents clumpy, sticky fingers and ensures a smooth, even coating on every piece. This technique keeps your workstation tidy and efficient, making the breading process much less messy.
Oil Temperature Control: The secret is maintaining a consistent oil temperature. Too low, and your shrimp will absorb too much oil, becoming greasy. Too high, and the coating will burn before the shrimp cooks through. I always use a deep-fry thermometer to keep the oil between 350°F and 375°F (175°C and 190°C). Adjust your heat as needed between batches. This precision ensures a golden brown exterior and perfectly cooked interior. Learn more about deep-frying safely and effectively.
Don’t Overcrowd the Pan: A common mistake is trying to cook too many shrimp at once. Overcrowding significantly drops the oil temperature, leading to less crispy results. Cook in small batches, giving each shrimp plenty of space. This allows for even cooking and maintains that crucial oil temperature. You’ll notice that shrimp cooked in smaller batches are consistently crispier.
Seasoning Layers: Building on this, flavor development doesn’t stop at the breading. I always season the shrimp directly before breading, then ensure the breading itself has ample seasoning. A pinch of salt and pepper on the shrimp, then seasoned flour, egg, and coconut mixture. This layering of flavor ensures every bite is vibrant. Consider adding a touch of cayenne to your breading for a subtle kick that complements the sweetness of the coconut.
Testing for Doneness: Shrimp cooks very quickly. You’ll know it’s done when the shrimp turns opaque and curls into a C-shape. Overcooked shrimp becomes rubbery, so keep a close eye on it. The coating should be beautifully golden brown and crisp. This visual cue is your best friend for perfectly cooked shrimp every time.
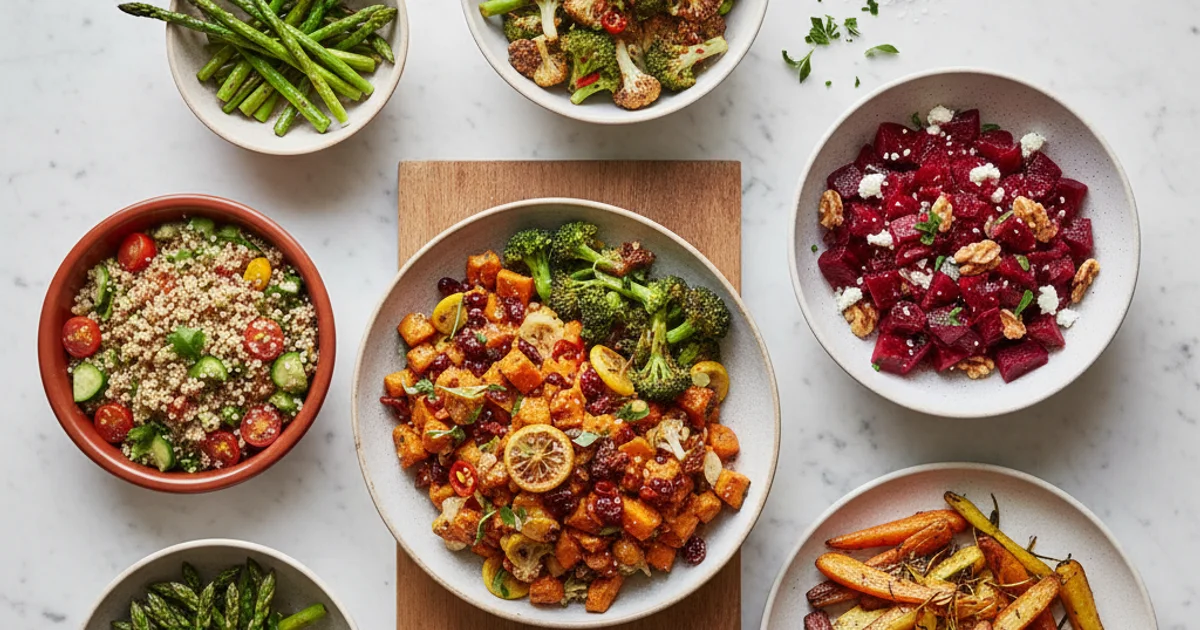
Serving Suggestions: While these are fantastic on their own, consider side dishes to go with coconut shrimp. A fresh mango salsa or a simple green salad with a citrus vinaigrette makes excellent side dishes for coconut shrimp. For a more substantial meal, jasmine rice or roasted asparagus are also great choices. The bright flavors of a dipping sauce, like the zesty one in this recipe, perfectly complement the richness of the coconut.
Enjoyed this recipe? Share it with a friend or save it to your board for later. Leave a comment below — I love hearing how it turned out!
You May Also Enjoy




You Might Also Love These 🍽️
Recipes picked just for you based on what you’re cooking