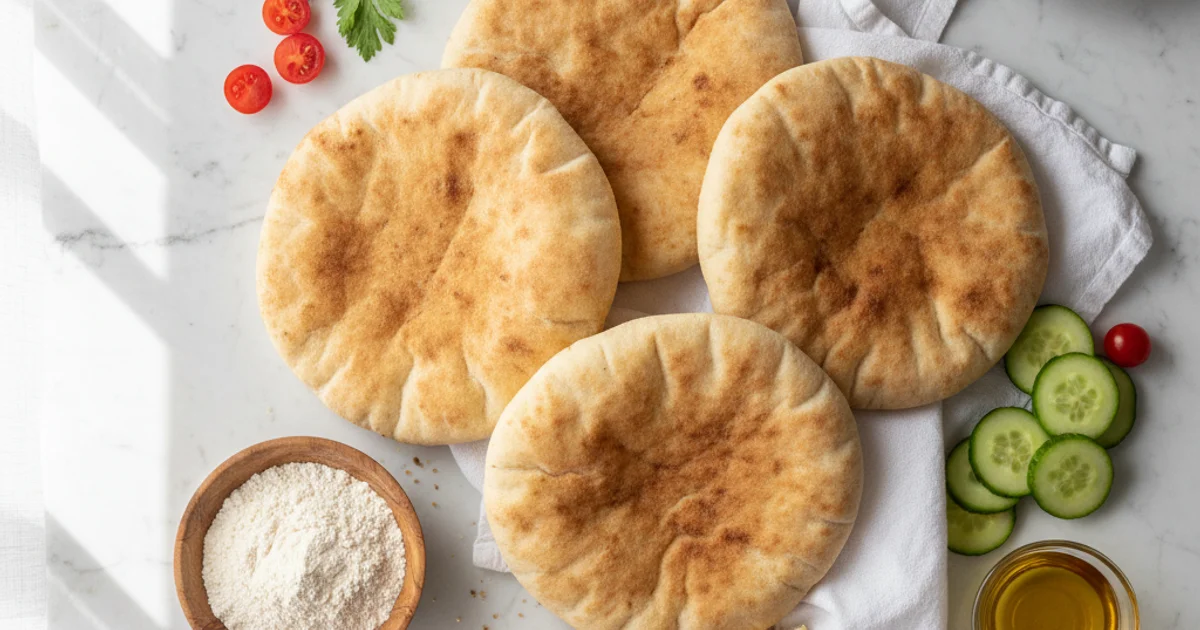
Your New Go-To Gluten-Free, Rice-Free Bread!
Craving delicious bread but need a gluten-free, rice-free option? This easy recipe uses a unique blend of rice-free gluten-free flour for the perfect loaf!
- 1Introduction: The Quest for Perfect Gluten-Free, Rice-Free Bread
- 2Why You’ll Absolutely Love This Gluten-Free, Rice-Free Bread Recipe
- 3Ingredients Overview: Crafting the Perfect Rice-Free Gluten-Free Flour Blend
- 4Essential Equipment for Your Rice Flour Bread Recipe Journey
- 5Step-by-Step Instructions: Baking Your Perfect Gluten-Free, Rice-Free Loaf
- 6Pro Tips & Tricks for Flawless Gluten-Free, Rice-Free Baking
Ingredients
Dry Ingredients
- 1 cup (120g) Sorghum Flour
- 3/4 cup (90g) Tapioca Starch
- 1/2 cup (60g) Arrowroot Starch
- 1/2 cup (60g) Millet Flour
- 2 tablespoons Psyllium Husk Powder
- 1 teaspoon Salt
Wet Ingredients & Yeast
- 1 1/2 cups (360ml) Warm Water or Plant-Based Milk (105-115°F / 40-46°C)
- 2 teaspoons Active Dry Yeast
- 1 tablespoon Granulated Sugar (or maple syrup)
- 3 tablespoons Olive Oil (plus extra for greasing)
Instructions
Instructions
Activate yeast with warm liquid and sugar; let bloom.
Instructions
Whisk all dry ingredients thoroughly in a large bowl.
Instructions
Add yeast mixture and olive oil to dry ingredients; mix well until a thick, sticky batter forms.
Instructions
Mix/knead dough for 5-7 minutes (stand mixer recommended).
Instructions
Transfer dough to a greased, parchment-lined loaf pan; smooth top.
Instructions
Cover and let rise in a warm place for 60-90 minutes, until nearly doubled.
Instructions
Preheat oven to 375°F (190°C) with an optional steam pan.
Instructions
Bake for 35-45 minutes, or until golden brown and internal temperature reaches 200-210°F (93-99°C).
Instructions
Remove from pan immediately and cool completely on a wire rack before slicing.
Recipe FAQs
Can I use a different gluten-free flour blend for this rice-free recipe?
Why is my gluten-free, rice-free bread gummy or crumbly?
Do I need a stand mixer for this rice free gluten free flour bread?
How long does this gluten free rice free loaf stay fresh?
Can I make this recipe vegan?
What's the best way to measure the flours for this gluten-free, rice-free bread?
Your New Go-To Gluten-Free, Rice-Free Bread!
Craving delicious bread but need a gluten-free, rice-free option? This easy recipe uses a unique blend of rice-free gluten-free flour for the perfect loaf!
Prep Time
20 min
Cook Time
45 min
Total Time
65 min
Dry Ingredients
- 1 cup (120g) Sorghum Flour
- 3/4 cup (90g) Tapioca Starch
- 1/2 cup (60g) Arrowroot Starch
- 1/2 cup (60g) Millet Flour
- 2 tablespoons Psyllium Husk Powder
- 1 teaspoon Salt
Wet Ingredients & Yeast
- 1 1/2 cups (360ml) Warm Water or Plant-Based Milk (105-115°F / 40-46°C)
- 2 teaspoons Active Dry Yeast
- 1 tablespoon Granulated Sugar (or maple syrup)
- 3 tablespoons Olive Oil (plus extra for greasing)
Introduction: The Quest for Perfect Gluten-Free, Rice-Free Bread
Finding a truly satisfying loaf of bread when you’re navigating specific dietary restrictions can feel like a quest for the holy grail. For years, I struggled to bake a bread that checked all the boxes: soft, pliable, and without that tell-tale gummy texture so common in many gluten-free options. The biggest hurdle? So many recipes rely heavily on rice flour, making them unsuitable for those with rice sensitivities or allergies. This often leads to a dense, crumbly result that just doesn’t hit the spot for a proper sandwich or a comforting slice with soup.
What I discovered after countless experiments was that the right blend of alternative flours could yield something truly remarkable. This recipe is a game-changer for anyone seeking a genuinely delicious, gluten free rice free bread. It’s designed to banish those past disappointments, delivering a loaf with a beautifully tender crumb and a delightful crust. You’ll be able to enjoy the simple pleasure of real bread again, whether you’re making toast or a hearty sandwich. This particular bread offers a solution that doesn’t compromise on taste or texture, proving that dietary needs don’t have to mean sacrificing your favorite foods. I’m thrilled to share this innovative approach to baking, one that focuses on creating an exceptional loaf from start to finish.
Why You’ll Absolutely Love This Gluten-Free, Rice-Free Bread Recipe
Finding a loaf that caters to specific dietary needs can often feel like a culinary scavenger hunt. I always hear from readers struggling to find a bread that is both gluten-free and genuinely rice-free. Many commercial options, even those labeled gluten-free, still rely heavily on rice flour, which can be problematic for some. This recipe offers a genuine solution, meticulously crafted to be completely free from both gluten and rice, ensuring it’s suitable for those with multiple sensitivities or allergies. You no longer have to compromise on taste or texture to meet your dietary requirements.
Here’s the thing, achieving a soft, pliable crumb in alternative baking can be tricky. Often, gluten-free rice-free breads turn out dense, crumbly, or with an unappealing texture. What I discovered through countless test batches is that the right combination of specific flours creates a loaf that’s remarkably airy and tender. You’ll notice that each slice boasts a delightful chewiness, far from the brick-like consistency some expect. The flavor is subtly nuanced, not overwhelmingly “alternative,” making it a perfect canvas for both sweet and savory toppings. This isn’t just a passable substitute; it’s a genuinely enjoyable bread in its own right.
In practice, many home bakers are intimidated by the perceived complexity of specialty baking. However, I’ve designed this recipe with simplicity in mind. The steps are clear, concise, and don’t demand advanced baking skills or specialized equipment. If you can follow basic baking instructions, you can absolutely master this loaf. This makes it an ideal introduction to baking your own alternative breads, building confidence in the kitchen.
Worth noting here, this bread isn’t just for toast. Its robust yet tender structure makes it incredibly versatile. Slice it thick for hearty sandwiches, cube it for croutons, or even transform it into a flavorful garlic bread. The unique blend of flours, including a special rice free gluten free flour blend, ensures it holds up beautifully to various preparations. This versatility means one loaf can serve many purposes throughout your week, reducing the need for multiple specialized purchases. It’s a wholesome, nourishing choice made with accessible ingredients you can feel good about incorporating into your daily meals.
Ingredients Overview: Crafting the Perfect Rice-Free Gluten-Free Flour Blend
Creating a truly satisfying bread without both gluten and rice flour requires a careful selection of alternative flours and binders. In my kitchen, I’ve experimented endlessly to find the ideal combination that yields a loaf with excellent texture and flavor. This specific blend is designed to mimic the qualities we love in traditional bread, ensuring a tender crumb and a pleasant chew.
Let’s break down the role of each component in our rice free gluten free flour blend. Sorghum flour is a cornerstone for this recipe. It’s light, possesses a subtle sweetness, and contributes significantly to a soft, tender crumb without weighing down the final product. You’ll notice it provides a delicate structure, making the bread palatable and inviting.
Tapioca starch, often called tapioca flour, is absolutely essential here. It brings that much-needed chewiness and elasticity, effectively stepping in to perform some of the functions of gluten. Without it, the bread would likely be too crumbly. Building on this, arrowroot starch plays a similar role, adding further lightness and aiding in the overall binding of the dough. It helps achieve that desirable internal structure.
Millet flour introduces a lovely, slightly nutty flavor profile to the bread. Beyond taste, it also boosts the nutritional content with added protein and fiber, making this treat more wholesome. The key difference is that millet flour provides substance without making the loaf dense.
Perhaps the most critical non-flour ingredient is psyllium husk powder. Trust me on this one; it’s a powerful binding agent in gluten free rice free baking. It acts as a phenomenal “gluten replacer,” providing structure and preventing the bread from falling apart. Worth noting here, always use the powder form, not whole husks, for consistent results and better hydration.
For leavening, we rely on yeast. Whether you choose active dry or instant, it’s what makes the bread rise beautifully. If using active dry, remember to activate it first in warm liquid with a touch of sugar. The sugar, whether granulated, honey, or maple syrup, serves two purposes: it feeds the yeast, allowing it to produce carbon dioxide, and it adds a subtle layer of flavor to the bread. A common mistake is using water that is too hot, which can kill the yeast.
Salt is not just for seasoning; it’s crucial for enhancing all the other flavors and, importantly, it helps control the yeast’s activity. It slows down fermentation just enough to develop deeper flavors. Warm water or milk (dairy or non-dairy) is vital for activating the yeast and properly hydrating all the flours. The temperature is key here; aim for lukewarm, around 105-115°F (40-46°C).
Finally, olive oil or another neutral oil like avocado oil, is incorporated to add moisture and tenderness. It also contributes to a beautiful golden-brown crust during baking. This fat content ensures the bread stays soft and doesn’t dry out quickly.
Essential Equipment for Your Rice Flour Bread Recipe Journey
For any baking endeavor, having the right tools makes all the difference, and this is especially true when working with a gluten free rice free recipe. I always gather my equipment before I even think about mixing ingredients. This organized approach prevents last-minute scrambling and ensures a smoother baking process from start to finish. You’ll find that being prepared contributes significantly to the success of your loaf.
Here’s the thing: while some tools are absolute necessities, others simply make the job easier. Building on this, I often tell new bakers that precision is paramount, particularly when dealing with alternative flours. Unlike traditional wheat-based baking, where you can sometimes eyeball measurements, the chemistry of rice free gluten free flour demands exactitude. This attention to detail will reward you with a consistently well-textured bread.
To start, you’ll definitely need a large mixing bowl. I prefer one with a non-slip bottom for stability. This generous size allows ample room for incorporating all your dry and wet ingredients without making a mess. Next, measuring cups and spoons are non-negotiable; accurate proportions are crucial for the structure of this bread. I recommend a good quality set that clearly marks measurements.
What I discovered is that a kitchen scale is arguably the most valuable tool for any serious baker, especially when making a rice flour bread recipe. Weighing your flours in grams rather than measuring by volume ensures unparalleled accuracy. Cups can vary wildly depending on how you scoop and level, leading to inconsistent results. Trust me on this one; once you start weighing, you won’t go back.
A stand mixer with a dough hook is a fantastic helper for this recipe, making the mixing process effortless. Gluten-free doughs, even those without rice flour, can be quite sticky, and a mixer handles this with ease. If you don’t have one, a sturdy wooden spoon and some elbow grease will work just fine, though it requires a bit more effort. Just be prepared for a slightly stickier dough than you might be used to.
You’ll also need a loaf pan. An 8.5x4.5 inch or 9x5 inch pan is ideal for this recipe, providing the perfect dimensions for a well-risen loaf. I always line my pan with parchment paper, leaving an overhang on the sides. This simple trick prevents sticking and makes lifting the baked bread out of the pan incredibly easy. It’s one of those small steps that saves a lot of frustration.
For the proofing stage, plastic wrap or a clean, damp kitchen towel will be necessary to cover the dough. This creates a warm, humid environment, essential for the yeast to do its work. Finally, an oven thermometer is a highly recommended but optional piece of equipment. Ovens can be notoriously inaccurate, and knowing the true internal temperature ensures proper baking. A wire rack is also essential for cooling the bread completely after baking, preventing a soggy bottom.
Step-by-Step Instructions: Baking Your Perfect Gluten-Free, Rice-Free Loaf
-
Activate the Yeast: In a medium bowl, combine 1/2 cup of warm water (105-115°F or 40-46°C), 1 tablespoon of sugar, and 2 teaspoons of active dry yeast. Stir gently and let it sit for 5-10 minutes until the mixture becomes foamy and bubbly, indicating the yeast is active.
-
Whisk Dry Ingredients: In a large mixing bowl, thoroughly whisk together 1 cup of gluten-free all-purpose flour blend, 1/2 cup of tapioca flour, 1/4 cup of almond flour, 2 tablespoons of psyllium husk powder, and 1 teaspoon of salt, ensuring all ingredients are evenly distributed and no lumps remain.
-
Combine Wet & Dry: Pour the activated yeast mixture and 2 tablespoons of olive oil into the bowl with the dry ingredients, then mix using a stand mixer with a paddle attachment on low speed or a sturdy wooden spoon until a shaggy, cohesive dough begins to form.
-
‘Knead’ the Dough: Using a stand mixer with a paddle attachment or a sturdy spoon, mix the dough on medium speed for 5-7 minutes. Unlike traditional wheat dough, gluten-free dough will not become elastic; instead, it will develop a thick, sticky, batter-like consistency as the psyllium husk works to bind the ingredients.
-
First Proof: Lightly grease a 9x5 inch loaf pan. Carefully transfer the dough into the prepared pan, using a wet spatula to smooth the top if needed. Cover the pan loosely with plastic wrap or a clean kitchen towel and place it in a warm, draft-free spot for 45-60 minutes, or until the dough has visibly doubled in size.
-
Preheat Oven: While the dough is proofing, preheat your oven to 375°F (190°C). For an even crispier crust, place a small, oven-safe pan filled with about half a cup of water on the bottom rack of your oven to create steam during baking.
Here are steps 7 to 9 for your recipe article:
-
Bake the Loaf: Carefully transfer the loaf pan to the preheated oven. If you are using a steam pan for a crispier crust, place it on the rack below the loaf pan now. Bake for 45 minutes. At this point, carefully remove the steam pan if you used one. Continue baking for another 15-25 minutes, or until the top of the bread is a beautiful golden brown and an instant-read thermometer inserted into the center of the loaf registers 200-210°F (93-99°C).
-
Cool Slightly in Pan: Once baked, remove the bread from the oven and let it cool in the loaf pan on a wire rack for 10-15 minutes. This initial cooling period helps the bread firm up and makes it easier to remove from the pan without sticking or crumbling.
-
Cool Completely on Rack: After the initial cooling, carefully invert the loaf onto the wire rack and remove the pan. This is a crucial step for gluten-free bread: allow the bread to cool completely, for at least 2-3 hours, or even longer, before slicing. Rushing this step will result in a gummy texture, as the internal starches need ample time to set and firm up, transforming from a soft, almost wet consistency to a proper bread crumb. The loaf will feel much lighter and firmer once fully cooled.
Pro Tips & Tricks for Flawless Gluten-Free, Rice-Free Baking
Here’s the thing, baking bread without traditional wheat and rice flours presents unique challenges. What I discovered is that understanding these nuances elevates your final product from good to truly exceptional. Trust me on this one, small details make a significant difference.
Accurate Measuring is Key for consistent results in this recipe. I always recommend using a kitchen scale for your flours and starches. Measuring by volume can lead to vastly different amounts, especially with lighter flours. A difference of even 20 grams can impact the dough’s hydration and structure. This precision ensures your rice free gluten free flour blend behaves as expected every single time.
Water Temperature Matters when activating yeast. You want the water to be lukewarm, around 105-115°F (40-46°C). Think of it as baby bottle warm. If it’s too hot, it kills the yeast. Too cold, and the yeast won’t activate properly, leading to a dense loaf. A kitchen thermometer is your best friend here, but if you don’t have one, the “baby bottle” test is a reliable guide.
Don’t Skimp on Psyllium. This ingredient is crucial for providing structure and elasticity in this dish. It acts as a binder, mimicking the gluten that’s absent. Substitutions like xanthan gum or guar gum won’t yield the same texture or loaf volume. The secret is using whole psyllium husk, not powder, for the best results.
Proofing Environment plays a huge role in a successful rise. Yeast loves warmth and a draft-free space. In my kitchen, I often turn on my oven light for about 10 minutes, then turn it off, creating a perfectly cozy spot. Another trick is to place the dough in a microwave with a cup of hot water. This creates a humid, warm microclimate for optimal rising.
The Importance of Cooling cannot be overstated. I know it’s tempting to slice into a warm loaf, but resist! Cooling completely allows the starches to set and the moisture to redistribute. Cutting it too soon results in a gummy, crumbly texture. You’ll notice that patience here yields a much better eating experience.
Don’t Overbake or Underbake. Knowing when your bread is perfectly done is an art. The trick is to look for a deep golden-brown crust and listen for a hollow sound when you tap the bottom. For ultimate precision, an internal temperature of 200-210°F (93-99°C) indicates doneness. Understanding bread baking temperatures can help here.
Humidity Considerations can affect your dough. On very humid days, you might need slightly less liquid. Conversely, in dry climates, a touch more water might be necessary. This is where you learn to “feel” the dough. It should be pliable but not overly sticky. Adjust your liquids incrementally until you reach the right consistency.
High Altitude Adjustments are sometimes necessary. At higher elevations, yeast ferments faster and moisture evaporates more quickly. You might need to reduce the yeast slightly, increase the liquid, and potentially bake at a slightly higher temperature for a shorter time. These are general guidelines, and experimentation is often required for the perfect rice flour bread recipe.
Enjoyed this recipe? Share it with a friend or save it to your board for later. Leave a comment below — I love hearing how it turned out!
You May Also Enjoy





You Might Also Love These 🍽️
Recipes picked just for you based on what you’re cooking