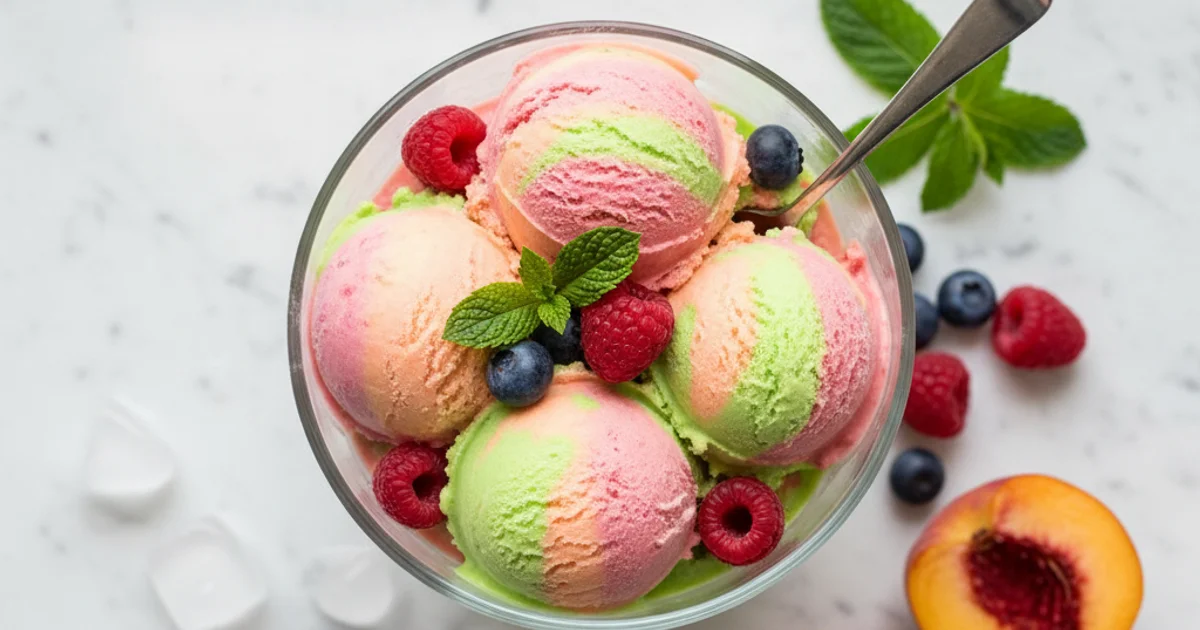
Guilt-Free Sherbet Bliss: Dairy-Free & Delicious!
Indulge in homemade dairy free sherbet! This easy recipe is perfect for a delicious, refreshing, and guilt-free treat. Options for sugar-free and gluten-free!
- 1Introduction: Why Dairy Free Sherbet is Your New Favorite Frozen Dessert
- 2Why You’ll Love This Easy Dairy Free Sherbet Recipe
- 3Ingredients Overview: Crafting the Best Dairy Free Sherbet
- 4Essential Equipment You’ll Need for Homemade Non Dairy Sherbet
- 5Step-by-Step Instructions: Making Your Gluten and Dairy Free Ice Cream Dream a Reality
- 6Pro Tips & Tricks for the Creamiest Dairy Free Sherbet
Ingredients
For the Sherbet
- 4 cups (about 1.5 lbs) frozen mixed berries (or fruit of choice)
- 1 (13.5 oz) can full-fat coconut milk, well chilled
- 1/2 cup maple syrup (or other sweetener to taste)
- 2 tablespoons fresh lemon juice
- 1 teaspoon vanilla extract (optional)
- Pinch of salt (optional)
Instructions
Instructions
Ensure your ice cream maker bowl is frozen solid (at least 24 hours prior).
Instructions
In a high-speed blender, combine frozen fruit, chilled coconut milk, maple syrup, lemon juice, vanilla extract (if using), and salt (if using).
Instructions
Blend until completely smooth and creamy, scraping down the sides as needed. The mixture should be thick but pourable.
Instructions
Taste the mixture and adjust sweetness or tartness if desired.
Instructions
Pour the mixture into your pre-chilled ice cream maker.
Instructions
Churn according to the manufacturer's instructions, typically 20-30 minutes, until it reaches a soft-serve consistency.
Instructions
Transfer the soft sherbet to an airtight, freezer-safe container.
Instructions
Freeze for at least 2-4 hours, or until firm enough to scoop.
Instructions
Allow to soften at room temperature for 5-10 minutes before serving.
Recipe FAQs
What's the difference between dairy-free sherbet and dairy-free ice cream?
Can I make this dairy free sherbet without an ice cream maker?
Why is my dairy free sherbet rock-hard after freezing?
What if I don't like coconut flavor?
How long does homemade dairy free sherbet last in the freezer?
Can I use fresh fruit instead of frozen fruit?
Guilt-Free Sherbet Bliss: Dairy-Free & Delicious!
Indulge in homemade dairy free sherbet! This easy recipe is perfect for a delicious, refreshing, and guilt-free treat. Options for sugar-free and gluten-free!
Prep Time
10 min
Cook Time
25 min
Total Time
35 min
For the Sherbet
- 4 cups (about 1.5 lbs) frozen mixed berries (or fruit of choice)
- 1 (13.5 oz) can full-fat coconut milk, well chilled
- 1/2 cup maple syrup (or other sweetener to taste)
- 2 tablespoons fresh lemon juice
- 1 teaspoon vanilla extract (optional)
- Pinch of salt (optional)
Introduction: Why Dairy Free Sherbet is Your New Favorite Frozen Dessert
There’s nothing quite like the simple joy of a cold, fruity scoop on a warm day. For many, that classic summer indulgence often comes with a side of digestive discomfort or dietary restrictions. I’ve spent years perfecting recipes that bring back that joy, especially for those navigating dairy sensitivities or embracing a plant-based lifestyle. The quest for a truly satisfying frozen dessert, one that doesn’t compromise on texture or vibrant flavor, has been a passion of mine.
What I discovered is that achieving that perfect balance is entirely possible without any dairy at all. This recipe for dairy free sherbet is a testament to that journey. It’s a bright, tangy, and surprisingly creamy treat that captures the essence of summer in every spoonful. Forget the icy, bland alternatives you might have encountered; this homemade version is a revelation. It’s packed with natural fruit goodness, offering a guilt-free pleasure that both kids and adults will adore. You’ll find it’s far superior to many store-bought options, which often contain artificial flavors and excessive sugars. This is about pure, unadulterated fruit flavor, transformed into a silky-smooth dessert. Get ready to experience a refreshing delight that genuinely satisfies.
Why You’ll Love This Easy Dairy Free Sherbet Recipe
Here’s the thing: I’ve spent years perfecting frozen desserts. This dairy free sherbet recipe stands out for its sheer simplicity and vibrant taste. It delivers that classic sherbet texture – light, tangy, and utterly refreshing – without any dairy.
What I love about this recipe is how effortlessly it fits into various dietary needs. If you’re looking for dairy free sugar free ice cream, a simple swap to a sugar substitute works beautifully. For those needing gluten and dairy free ice cream, this treat is naturally compliant, offering a worry-free indulgence. It’s a fantastic alternative to heavier desserts, especially when you crave something bright and fruity.
Building on this, the preparation is incredibly straightforward. You don’t need to be a pastry chef to achieve a smooth, scoopable texture. A standard ice cream maker does most of the work, making it accessible for any home cook. I always appreciate a recipe that delivers big flavor without a big fuss. This also means you can easily whip up a batch for an impromptu gathering.
The versatility of this treat is another major selling point. You can experiment with seasonal fruits, creating unique flavor profiles all year round. Whether it’s ripe berries in summer or zesty citrus in winter, this base recipe adapts beautifully. This flexibility makes it a staple in my kitchen for satisfying sweet cravings. It’s truly one of the best dairy free ice creams you can make at home.
Ingredients Overview: Crafting the Best Dairy Free Sherbet
In my kitchen, I always prioritize ingredients that deliver on both flavor and function. For this recipe, frozen fruit is truly the star. I love using a mix of berries, especially raspberries and strawberries, for their vibrant color and tangy sweetness. What I discovered is that using fruit that’s already frozen eliminates the need for ice, which often dilutes flavor and creates an icy, rather than creamy, texture. The natural sugars in ripe fruit also reduce the amount of added sweetener needed, making this a healthier alternative to many store-bought options. Always choose ripe fruit before freezing for the best flavor payoff.
Building on this, full-fat canned coconut milk is crucial for achieving that luxurious, creamy texture we all crave in a frozen treat. Unlike lighter coconut milk or other plant-based milks, the higher fat content in full-fat coconut milk prevents the formation of large ice crystals, resulting in a smooth, scoopable consistency. I always chill my can of coconut milk in the fridge overnight; this allows the thick cream to separate and rise to the top, which you can then scoop out and use for an even richer result. This is the secret to making truly decadent gluten and dairy free ice cream.
The key difference is in the sweetener. I typically reach for maple syrup or agave nectar because their liquid form helps keep the sherbet smooth and less prone to crystallization. For those looking for dairy free sugar free ice cream, a sugar substitute like erythritol or stevia can be used, though you might notice a slight difference in texture. A common mistake is adding too much sweetener; remember, the frozen fruit already provides a good base of sweetness. Adjust to your personal preference, tasting as you go.
Worth noting here, lemon or lime juice might seem like a small addition, but it plays a vital role. Just a squeeze brightens all the other flavors, cutting through the sweetness and adding a necessary zing. Without it, the sherbet can taste a bit flat. It’s like a secret weapon for balancing the entire taste profile, especially when creating something like dairy and sugar free ice cream where every flavor note counts.
Finally, while optional, a dash of vanilla extract adds a wonderful depth that elevates the overall taste, making it feel more like a gourmet dessert. A tiny pinch of salt also enhances the sweetness and balances the fruit flavors, proving that even the smallest additions can make a big impact on the final product. These seemingly minor components are what transform simple ingredients into a truly memorable non dairy sugar free ice cream experience.
Essential Equipment You’ll Need for Homemade Non Dairy Sherbet
To achieve that perfectly smooth and scoopable texture, having the right tools on hand makes all the difference. In my kitchen, preparing for a recipe like this means gathering everything beforehand. This prevents any last-minute scrambling and ensures a seamless process from start to finish.
The most critical piece of equipment for homemade non dairy sherbet is undoubtedly an ice cream maker. This appliance transforms a simple liquid base into a light, airy, and creamy frozen dessert. Without it, you’d end up with a solid block of ice rather than the delicate, scoopable consistency we’re aiming for. There are two main types: compressor models, which chill as they churn, and freezer bowl models, which require pre-chilling their inner bowl for at least 12-24 hours. Trust me on this one, always ensure your freezer bowl is completely frozen solid; otherwise, your mixture won’t set properly. This step is non-negotiable for achieving the desired outcome.
Next, you’ll need a high-speed blender or food processor. This is essential for pureeing your fruit into a perfectly smooth consistency, free from any chunks or fibrous bits. A powerful blender ensures a silky base, which is crucial for a luxurious mouthfeel in your finished treat. If your fruit isn’t blended smoothly enough, you’ll notice an icy, rather than creamy, texture in the final product. This step contributes significantly to the overall quality of your gluten and dairy free ice cream alternative.
Once your frozen dessert is churned, an airtight freezer-safe container becomes indispensable for storage. This protects your delicious creation from freezer burn and keeps it fresh, preserving its texture and flavor for longer periods. I always opt for containers with a tight-fitting lid to prevent ice crystals from forming on the surface. For precise measurements, standard measuring cups and spoons are, of course, kitchen staples. Accuracy here ensures the right balance of sweetness and tang in your non dairy sugar free ice cream. Finally, a rubber spatula is incredibly useful for scraping every last bit of mixture from your blender and transferring it efficiently to the ice cream maker, and then from the ice cream maker to your storage container. This minimizes waste and ensures you get to enjoy every spoonful of your homemade gluten dairy free ice cream.
Step-by-Step Instructions: Making Your Gluten and Dairy Free Ice Cream Dream a Reality
Here are the first three steps for your “Creamy & Refreshing Dairy Free Sherbet” recipe:
1. Prepare Your Ingredients: Begin by ensuring your full-fat coconut milk is well-chilled in the refrigerator for at least 24 hours, as this contributes significantly to the sherbet’s creamy texture; additionally, confirm that your chosen fruit (berries, mango, pineapple, etc.) is thoroughly frozen solid.
2. Blend the Base: Carefully combine your frozen fruit, chilled full-fat coconut milk, preferred sweetener (agave, maple syrup, or stevia), fresh citrus juice (lemon or lime work wonderfully), and any optional flavorings (like vanilla extract or a pinch of salt) into a high-speed blender. Blend the mixture until it is perfectly smooth and wonderfully creamy, pausing to scrape down the sides of the blender with a spatula as needed to ensure a completely uniform consistency throughout.
3. Taste and Adjust: This is a crucial step for achieving your ideal sherbet; take a small spoonful of the blended mixture and taste it, then adjust the sweetness by adding more sweetener or enhance the tartness by adding a bit more citrus juice, continuing to taste and adjust until it perfectly suits your preference before proceeding to the churning stage.
-
Churn in Ice Cream Maker: Carefully pour the prepared sherbet mixture into the pre-chilled bowl of your ice cream maker. Churn the mixture according to your appliance’s manufacturer instructions, which typically takes between 20 to 30 minutes, until it achieves a delightful soft-serve consistency.
-
Freeze to Firm Up: Once churned, transfer the soft sherbet from the ice cream maker into an airtight, freezer-safe container. Place the container in the freezer and allow it to set for at least 2 to 4 hours, or until it becomes firm enough to easily scoop, ensuring that perfect sherbet texture.
-
Serve and Enjoy: When ready to serve, remove the sherbet from the freezer and let it sit at room temperature for a few minutes to soften slightly. This will make it much easier to scoop and enjoy your creamy, refreshing dairy-free treat.
Pro Tips & Tricks for the Creamiest Dairy Free Sherbet
Achieving that perfectly smooth, scoopable texture in any frozen dessert, especially when it’s dairy free, requires a few insider secrets. I’ve spent years perfecting my technique, and these tips are what truly elevate a good sherbet to a truly memorable one. Building on this, the temperature of your ingredients before churning is paramount.
Always ensure your ice cream maker bowl has been in the freezer for at least 24 hours, ideally longer. A well-chilled bowl kickstarts the freezing process immediately, preventing large ice crystals from forming. Similarly, your sherbet base mixture should be thoroughly chilled in the refrigerator for at least 4 hours, or even overnight. This pre-chilling step makes a significant difference in the final texture, yielding a much creamier result. Trust me on this one; patience here pays off.
What I discovered is that the quality of your fruit directly impacts the flavor and sweetness of your dairy free sugar free ice cream. Opt for ripe, frozen fruit whenever possible. Ripe fruit naturally contains more sugars and intense flavor, which means you’ll need less added sweetener. For instance, perfectly ripe mangoes or berries lend a vibrant taste that artificial flavorings simply cannot replicate. If using fresh fruit, freeze it in a single layer before blending for the best texture.
A common mistake is overfilling your ice cream maker. Remember, the mixture expands as it churns and air is incorporated. Fill the churner only to about two-thirds capacity to allow for this expansion. Overfilling can lead to a less uniform texture and can even damage your machine. This simple guideline ensures your gluten and dairy free ice cream has enough room to become light and airy.
The secret is achieving the right balance of sweetness and tartness before churning. Freezing tends to dull flavors, so what tastes perfectly balanced when liquid might taste a little flat once frozen. Always taste your base mixture before it goes into the machine. Adjust the sweetener or a touch of lemon/lime juice until it tastes slightly sweeter or tarter than you’d prefer. This anticipation of flavor dulling is crucial for a perfectly balanced non dairy sugar free ice cream.
For those seeking a truly soft, scoopable texture right out of the freezer, especially if you’re making a dairy free sugar free ice cream with less sugar, consider adding a tiny splash of a neutral spirit like vodka. Alcohol has a lower freezing point than water, which helps prevent the sherbet from freezing rock-solid. Just a tablespoon or two per batch is usually sufficient; you won’t taste it, but you’ll appreciate the improved texture. For more on how alcohol affects freezing points in desserts, you can read about it on Serious Eats.
Finally, proper storage is key to maintaining the quality of your homemade treat. Once churned, transfer your gluten dairy free ice cream to an airtight container. Before sealing, press a piece of plastic wrap directly onto the surface of the sherbet. This creates a barrier that prevents air from reaching the surface, which is the primary cause of ice crystal formation. This extra step ensures your dairy and sugar free ice cream stays smooth and delicious for longer.
Enjoyed this recipe? Share it with a friend or save it to your board for later. Leave a comment below — I love hearing how it turned out!
You May Also Enjoy





You Might Also Love These 🍽️
Recipes picked just for you based on what you’re cooking