Crispy GF Beer-Battered Fish: Top Brands Revealed!
Discover how to make crispy gluten-free beer-battered fish using the best gluten free beer brands. Our comprehensive gluten free beer list guides you to delicious results!
- 1Introduction: Savoring Flavor Without Gluten – Your Guide to Gluten-Free Beer Brands
- 2Why You’ll Love This Gluten-Free Beer-Battered Fish Recipe
- 3Ingredients Overview: Crafting Your Crispy Batter with the Best Gluten Free Beer List
- 4Essential Equipment You’ll Need for Perfect Gluten-Free Frying
- 5Step-by-Step Instructions: Achieving Golden, Crispy Gluten-Free Beer Batter
- 6Pro Tips & Tricks for the Crispiest Gluten-Free Beer-Battered Fish
Ingredients
For the Fish
- 1.5 lbs white fish fillets (cod, haddock, tilapia), about 4-6 fillets
- 1/2 tsp salt
- 1/4 tsp black pepper
- Oil for deep frying (canola, vegetable, or peanut)
For the Gluten-Free Beer Batter
- 1 cup gluten-free all-purpose flour blend (with xanthan gum)
- 1/4 cup cornstarch
- 1 tsp baking powder
- 1/2 tsp salt
- 1/4 tsp black pepper
- 1 (12 oz) bottle very cold gluten-free beer (e.g., a gluten free lager)
Instructions
Instructions
Pat fish fillets very dry with paper towels; season lightly with salt and pepper.
Instructions
In a large bowl, whisk together GF flour, cornstarch, baking powder, salt, and pepper.
Instructions
Pour the cold gluten-free beer into the dry ingredients. Whisk gently until just combined. A few lumps are fine; do not overmix.
Instructions
Heat at least 2-3 inches of oil in a large heavy-bottomed pot or Dutch oven to 350-375°F (175-190°C). Use a deep-fry thermometer.
Instructions
Working in batches, dip one fish fillet at a time into the batter, ensuring it's fully coated. Let any excess batter drip off.
Instructions
Carefully lower the battered fish into the hot oil. Do not overcrowd the pot.
Instructions
Fry for 4-6 minutes per side, or until golden brown and the fish is cooked through and flakes easily.
Instructions
Remove fried fish with a slotted spoon or spider skimmer and transfer to a wire rack set over paper towels to drain excess oil.
Instructions
Repeat with remaining fish. Serve immediately with your favorite sides.
Equipment You'll Need
Here's what I use to make this recipe perfectly every time:
- Large, heavy-bottomed pot or Dutch oven — For safe, even frying. → Buy Now
- Deep-fry thermometer — Critical for temperature control. → Buy Now
- Whisk — For smooth, airy batter. → Buy Now
- Shallow dishes — For easy dredging and battering. → Buy Now
- Slotted spoon or spider skimmer — For safe removal of fish. → Buy Now
- Wire rack with paper towels — For draining and maintaining crispness. → Buy Now
- Tongs — Useful for handling and turning. → Buy Now
- Cutting board and sharp knife — For fish preparation. → Buy Now
Recipe FAQs
What is the best gluten free beer for beer batter?
Can I make this recipe dairy-free?
Why is my gluten-free beer batter not crispy?
Do I need to use a specific type of gluten-free flour?
Can I air fry gluten-free beer-battered fish?
What kind of fish is best for gluten-free beer batter?
Crispy GF Beer-Battered Fish: Top Brands Revealed!
Discover how to make crispy gluten-free beer-battered fish using the best gluten free beer brands. Our comprehensive gluten free beer list guides you to delicious results!
Prep Time
15 min
Cook Time
20 min
Total Time
35 min
For the Fish
- 1.5 lbs white fish fillets (cod, haddock, tilapia), about 4-6 fillets
- 1/2 tsp salt
- 1/4 tsp black pepper
- Oil for deep frying (canola, vegetable, or peanut)
For the Gluten-Free Beer Batter
- 1 cup gluten-free all-purpose flour blend (with xanthan gum)
- 1/4 cup cornstarch
- 1 tsp baking powder
- 1/2 tsp salt
- 1/4 tsp black pepper
- 1 (12 oz) bottle very cold gluten-free beer (e.g., a gluten free lager)
Introduction: Savoring Flavor Without Gluten – Your Guide to Gluten-Free Beer Brands
The satisfying crunch of perfectly battered fish, followed by tender, flaky white meat, is a culinary delight many believe is off-limits on a gluten-free diet. I always hear sighs of longing for that classic pub-style experience. For years, folks thought sacrificing gluten meant saying goodbye to such comforting indulgences. But what if I told you that you don’t have to miss out? In my kitchen, I’ve spent countless hours perfecting a recipe that brings that beloved dish back to the table, completely gluten-free. The secret weapon? Quality gluten free beer brands. Trust me on this one.
Gone are the days when gluten-free options meant bland substitutes or compromise. The landscape of dietary alternatives has evolved dramatically, especially when it comes to ingredients like beer. What I love about this recipe is how it leverages the unique properties of gluten-free beer to create a batter that’s light, crispy, and full of flavor, mirroring its traditional counterpart. This isn’t just a passable alternative; it’s genuinely delicious. We’re talking about achieving that golden-brown exterior and airy texture that makes beer-battered fish so iconic. You’ll notice that the right choice of liquid in your batter makes all the difference, providing both lift and a nuanced depth of flavor. This recipe isn’t merely about avoiding gluten; it’s about crafting an exceptional meal that stands on its own. Get ready to rediscover a classic.
Why You’ll Love This Gluten-Free Beer-Battered Fish Recipe
I always hear from readers who miss classic comfort foods after going gluten-free. This recipe brings back that joy. You’ll achieve that coveted golden-brown, shatteringly crisp crust, completely free of gluten. What I love about this dish is how it doesn’t just mimic the original; it truly stands on its own.
The subtle malty notes imparted by the right gluten-free beer elevate the flavor profile significantly. This isn’t just a plain batter; it’s a symphony of textures and tastes. It allows those with celiac disease or gluten sensitivities to enjoy a beloved classic without compromise. In my kitchen, this recipe has become a staple for exactly that reason.
Here’s the thing: many assume gluten-free cooking is complicated, but this recipe proves otherwise. It uses simple steps and readily available ingredients, making it surprisingly easy to whip up even on a busy weeknight. Trust me on this one; you don’t need a culinary degree to master this. The trick is in the ingredient selection, ensuring quality gluten free beer brands are chosen for the best results.
This fried fish is incredibly versatile, pairing wonderfully with a variety of sides, from classic chips to fresh coleslaw. It becomes a true crowd-pleaser, satisfying everyone at the table. You’ll notice that the batter holds up beautifully, staying crisp from the first bite to the last, a common challenge with some gluten-free alternatives. This recipe truly delivers on both flavor and texture, making it a reliable choice for any occasion.
Ingredients Overview: Crafting Your Crispy Batter with the Best Gluten Free Beer List
In my kitchen, selecting the right ingredients is paramount for a successful dish. Each component plays a vital role in achieving that coveted crispy, flavorful gluten-free beer-battered fish. Understanding these elements helps you replicate this recipe perfectly every time.
First, let’s talk about the white fish fillets. I always opt for firm, flaky white fish. Cod and haddock are classic choices, offering a mild flavor that won’t overpower the delicate batter. Tilapia or pollock also work beautifully if you prefer a more budget-friendly option. What I discovered is that fresh fish yields the best results, providing a cleaner taste and better texture. If using frozen, ensure it’s completely thawed and patted very dry before you begin. Excess moisture can lead to a soggy batter, and nobody wants that.
Next up, the gluten-free all-purpose flour blend. This is the foundation of our batter. Many excellent commercial blends are available, often containing a mix of rice flour, tapioca starch, and potato starch. These starches are crucial for creating a light, airy texture. If your chosen blend doesn’t already contain xanthan gum, I recommend adding about half a teaspoon per cup of flour. Xanthan gum acts as a binder, mimicking the elasticity of gluten and preventing the batter from crumbling. It’s truly essential for a cohesive, crisp coating.
Cornstarch is another secret weapon for achieving that extra crispiness. Adding a portion of cornstarch to the flour blend creates a delicate, shattering crust when fried. It also helps to prevent the batter from becoming too dense. This ingredient contributes significantly to the irresistible crunch you’re aiming for.
For leavening, we use baking powder. This chemical leavening agent reacts with the liquid in the batter, producing carbon dioxide bubbles. These bubbles expand during frying, creating a light, puffy, and airy texture that is characteristic of traditional beer-battered fish. Without baking powder, the batter would be flat and heavy.
Of course, no dish is complete without proper seasoning. A good pinch of salt and freshly cracked black pepper enhances all the other flavors. Don’t be shy with the salt; it brings out the best in both the fish and the batter.
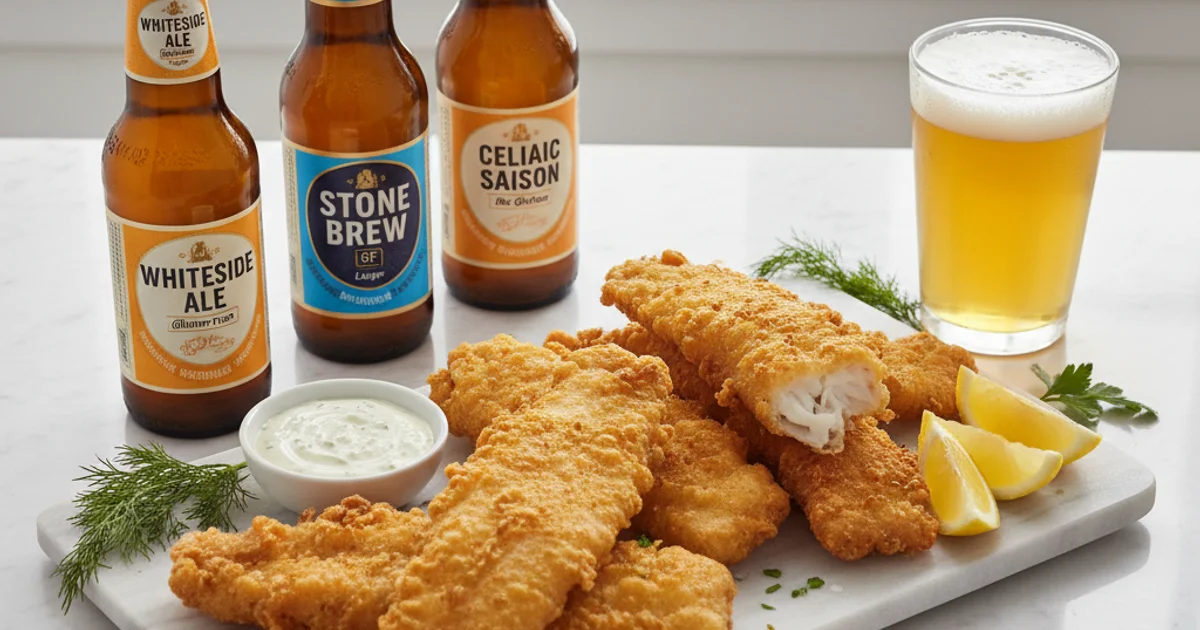
Now, for the star of the show: the gluten-free beer. This is where the magic happens. The carbonation in the beer creates additional bubbles in the batter, contributing to its airy lightness. Beyond texture, the beer imparts a subtle, complex flavor that elevates the entire dish. I’ve experimented with many gluten free beer brands over the years. For a classic taste, a gluten free lager works wonders. Brands like Glutenberg Blonde or Omission Lager offer clean, crisp notes that complement the fish beautifully. If you prefer something with a bit more character, Ghostfish Brewing’s Grapefruit IPA can add a lovely citrusy zing, while Stone Delicious IPA provides a bolder, hoppy profile. Even Daura Damm or New Grist are excellent choices for a reliable, widely available option. Each of these gluten free beer brands brings its own unique contribution to the batter’s flavor.
Finally, you’ll need the right oil for frying. Choosing an oil with a high smoke point is critical for successful deep-frying. Canola oil, vegetable oil, or peanut oil are all excellent choices. These oils can withstand high temperatures without breaking down or imparting off-flavors to your food. Using the correct oil ensures an evenly cooked, golden-brown crust without any greasy residue.
Essential Equipment You’ll Need for Perfect Gluten-Free Frying
In my kitchen, having the right tools makes all the difference for a successful frying experience. You don’t need a professional deep fryer, but a few key pieces of equipment will ensure your gluten-free beer-battered fish turns out perfectly crisp every time. Building on this, proper preparation of your workspace is just as important as the ingredients themselves.
First, you’ll need a large, heavy-bottomed pot or Dutch oven. This provides ample space for the oil and helps maintain a consistent temperature, which is vital for even cooking. A wide, sturdy pot prevents overcrowding and minimizes oil splatters. I always opt for something with high sides to keep things safe.
Next, a deep-fry thermometer is non-negotiable. Trust me on this one; guessing the oil temperature leads to greasy fish or burnt batter. Maintaining the ideal temperature ensures a golden, crispy crust and fully cooked fish. This small tool truly elevates your frying game.
For the batter itself, a good whisk is essential. It helps you achieve a smooth, lump-free consistency, incorporating air for a lighter batter. You want that airy texture to adhere well to the fish.
You’ll also need several shallow dishes. One for any pre-dredging flour (if using), and another for the prepared batter. This setup makes the coating process efficient and clean.
To safely retrieve your beautifully fried fish, a slotted spoon or spider skimmer is necessary. These tools allow you to lift the fish without bringing along excess oil. Their design lets oil drain away quickly.
Finally, a wire rack placed over paper towels is crucial for draining. As the fish comes out of the hot oil, placing it on a rack allows air to circulate, preventing the bottom from getting soggy. The paper towels catch any residual oil, ensuring maximum crispness. Here’s the thing, skipping this step often results in a less-than-crispy final product. Proper draining is key to that satisfying crunch. You’ll notice that this simple setup makes a big difference in the texture. This ensures your hard work with a great gluten free beer list pays off. A sturdy cutting board and a sharp knife are also important for preparing your fish fillets neatly.
- Large, heavy-bottomed pot or Dutch oven: For safe, even frying.
- Deep-fry thermometer: Critical for temperature control.
- Whisk: For smooth, airy batter.
- Shallow dishes: For easy dredging and battering.
- Slotted spoon or spider skimmer: For safe removal of fish.
- Wire rack with paper towels: For draining and maintaining crispness.
- Tongs: Useful for handling and turning.
- Cutting board and sharp knife: For fish preparation.
Having these items ready before you start will make the entire process smoother and more enjoyable.
Step-by-Step Instructions: Achieving Golden, Crispy Gluten-Free Beer Batter
-
Prepare the Fish: Begin by thoroughly patting your fish fillets dry on all sides with paper towels to ensure a crispy batter. Once dry, season them lightly with salt and pepper to taste, preparing them for the delicious coating.
-
Mix Dry Ingredients: In a large mixing bowl, combine the gluten-free all-purpose flour, cornstarch, baking powder, a pinch of salt, and a dash of black pepper, ensuring all dry ingredients are well-incorporated.
-
Add Wet Ingredients: Gradually pour your chosen gluten-free beer into the dry mixture, whisking gently until the batter is just combined and smooth, taking care not to overmix as this can lead to a tough batter.
-
Heat the Oil: Pour enough oil into a deep, heavy-bottomed skillet or Dutch oven to reach a depth of about 2-3 inches. Heat the oil over medium-high heat until it reaches a temperature of 350-375°F (175-190°C), using a deep-fry thermometer to ensure accuracy.
-
Batter the Fish: Carefully dip each fish fillet into the prepared gluten-free beer batter, ensuring it is fully coated on all sides. Allow any excess batter to drip off back into the bowl before proceeding.
-
Fry the Fish: Gently place the battered fish fillets into the hot oil, working in batches to avoid overcrowding the pan, which can lower the oil temperature. Fry for 4-6 minutes per side, or until the fish is a beautiful golden brown and cooked through, with the flesh flaking easily.
-
Carefully remove the fried fish from the oil using tongs and transfer them to a wire rack generously lined with paper towels to drain any excess oil, ensuring a crispy finish.
-
Serve the gluten-free beer-battered fish immediately, as it is best enjoyed hot to savor its optimal crispness and flavor.
Pro Tips & Tricks for the Crispiest Gluten-Free Beer-Battered Fish
Getting that truly crispy, golden exterior on your gluten-free beer-battered fish requires a few insider secrets. I always approach frying with a sense of precision, because small details make a big difference. One of the most important aspects is to never overmix your batter. You might be tempted to whisk away every single lump, but trust me on this one: a few small lumps are perfectly fine. Overmixing, even with gluten-free flours, can develop starches too much, leading to a tougher, less airy batter. The goal is a light, delicate coating, not a dense one. Think of it like pancake batter; a slightly lumpy consistency is often preferred for tenderness. Building on this, another crucial factor is the temperature of your frying oil. This is where many home cooks go wrong. If the oil is too cool, your fish will absorb too much of it, resulting in a greasy, soggy mess. Conversely, if it’s too hot, the batter will burn on the outside long before the fish cooks through, leaving you with a raw center. I always use a reliable thermometer to maintain a consistent temperature, typically between 350-375°F (175-190°C). This range ensures that satisfying sizzle and even cooking.
Here’s the thing about moisture: it’s the enemy of crispiness. Therefore, it’s absolutely essential to pat your fish fillets thoroughly dry before dipping them into the batter. Any excess water on the surface of the fish will create steam, which prevents the batter from adhering properly and achieving that desired crunch. I use paper towels and press gently but firmly on both sides of each fillet until they feel completely dry to the touch. This simple step makes a massive impact on the final texture. What I discovered is that crowding the pan is another common pitfall. Always fry in batches; resist the urge to pack too many pieces of fish into the fryer at once. Overloading the pan causes the oil temperature to drop significantly, leading to the same greasy, undercooked results as starting with oil that’s too cool. Give each piece of fish ample space to fry evenly and maintain that crucial oil temperature. This might take a little longer, but the superior quality of the end product is well worth the extra time.
The secret to a truly light and airy batter often lies in the temperature of your liquid. Use very cold beer for your batter. The thermal shock created when the cold batter hits the hot oil causes the batter to puff up more dramatically, resulting in a lighter, crispier crust. I even pop my bottle of gluten free beer brands, or specifically a gluten free lager, into the freezer for 15-20 minutes before I start mixing. Worth noting here is that proper seasoning extends beyond just the batter. Season both the fish and the batter for layers of flavor. A light sprinkle of salt and pepper on the dried fish fillets before battering enhances the overall taste profile. A common mistake is relying solely on the batter for seasoning. In practice, you want every component to contribute to the flavor. Finally, while not strictly necessary, allowing the batter to rest for 10-15 minutes can make a difference. This short rest period gives the starches in the flour time to fully hydrate, which can lead to a smoother, more consistent batter and an even better fry. This brief pause in preparation offers a subtle improvement to the batter’s texture. For more detailed insights into achieving the perfect fry, Serious Eats offers excellent deep-frying techniques.
Enjoyed this recipe? Share it with a friend or save it to your board for later. Leave a comment below — I love hearing how it turned out!
You May Also Enjoy





You Might Also Love These 🍽️
Recipes picked just for you based on what you’re cooking