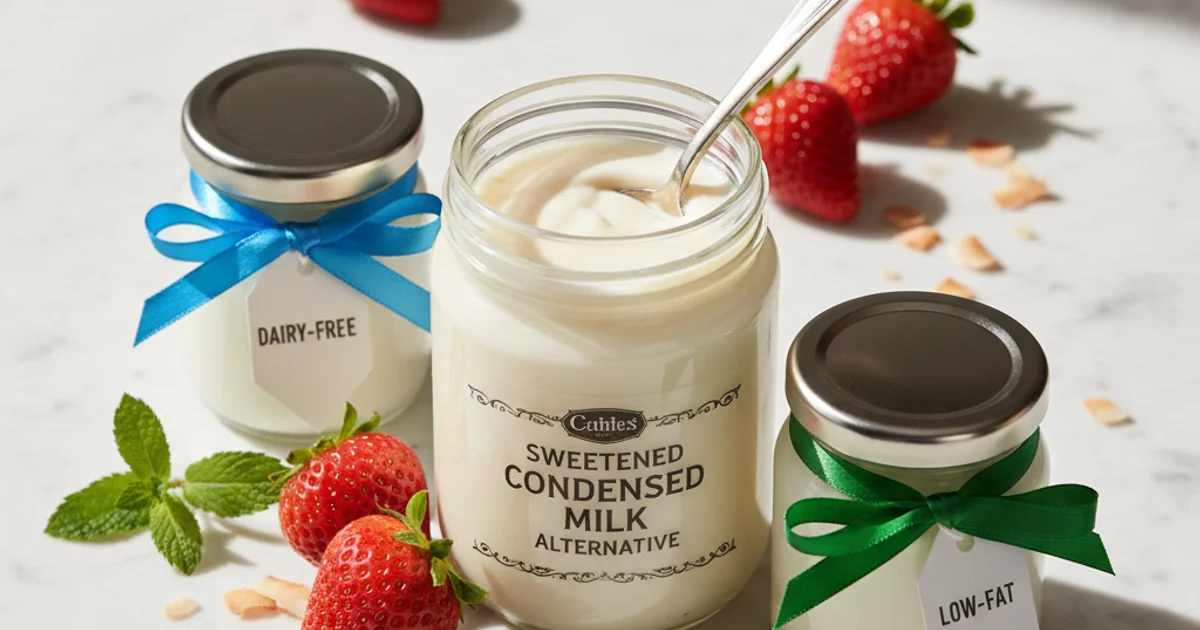
Your Ultimate Dairy-Free Sweetened Condensed Milk
Craving a creamy treat but need a sweetened condensed milk alternative? This recipe offers delicious dairy-free & low-fat options for all your baking needs!
- 1Introduction: Why You Need a Sweetened Condensed Milk Alternative in Your Kitchen
- 2Why You’ll Love This Homemade Condensed Milk Replacement
- 3Ingredients Overview: Crafting Your Perfect Sweetened Condensed Milk Alternative
- 4Essential Equipment You’ll Need for Homemade Condensed Milk
- 5Step-by-Step Instructions: Making Your Sweetened Condensed Milk from Evaporated Milk (or Milk!)
- 6Pro Tips & Tricks for the Perfect Sweetened Condensed Milk Alternative
- 7Pro Tips & Tricks for the Perfect Sweetened Condensed Milk Alternative
Ingredients
Standard Version
- 2 cups whole milk (or non-dairy milk of choice)
- 3/4 cup granulated sugar
- 2 tablespoons unsalted butter (or coconut oil for dairy-free)
- 1 teaspoon vanilla extract
- Pinch of salt
Low-Fat Version
- 2 cups skim milk
- 3/4 cup granulated sugar
- 1 teaspoon vanilla extract
- Pinch of salt
Instructions
Instructions
Combine milk, sugar, and butter (if using) in a heavy-bottomed saucepan.
Instructions
Heat over medium-low, stirring constantly until sugar dissolves.
Instructions
Bring mixture to a gentle simmer, do not boil rapidly.
Instructions
Reduce heat to low and continue to simmer, stirring frequently, for 15-25 minutes.
Instructions
Cook until mixture has reduced by about half and coats the back of a spoon.
Instructions
Remove from heat and stir in vanilla extract and salt.
Instructions
Pour into a heat-proof jar and let cool completely at room temperature.
Instructions
Cover and refrigerate for at least 4 hours, or until fully chilled and thickened.
Recipe FAQs
Can I use any type of non-dairy milk for this recipe?
How do I know when my sweetened condensed milk alternative is thick enough?
My homemade condensed milk is too thin, what went wrong?
Can I make a sugar-free sweetened condensed milk alternative?
Is this substitute for sweetened condensed milk dairy free suitable for baking?
How long does homemade sweetened condensed milk last?
Your Ultimate Dairy-Free Sweetened Condensed Milk
Craving a creamy treat but need a sweetened condensed milk alternative? This recipe offers delicious dairy-free & low-fat options for all your baking needs!
Prep Time
10 min
Cook Time
20 min
Total Time
30 min
Standard Version
- 2 cups whole milk (or non-dairy milk of choice)
- 3/4 cup granulated sugar
- 2 tablespoons unsalted butter (or coconut oil for dairy-free)
- 1 teaspoon vanilla extract
- Pinch of salt
Low-Fat Version
- 2 cups skim milk
- 3/4 cup granulated sugar
- 1 teaspoon vanilla extract
- Pinch of salt
Introduction: Why You Need a Sweetened Condensed Milk Alternative in Your Kitchen
Are you tired of skipping your favorite dessert recipes because of dietary restrictions or concerns about ingredients? Maybe you’re dairy-intolerant, vegan, or simply looking for a healthier twist on a classic. I’ve been there! In my kitchen, I always strive for flexibility and deliciousness, especially when it comes to staples. That’s why mastering a truly effective sweetened condensed milk alternative has been a game-changer for me. It means no more last-minute grocery runs or compromising on taste.
This recipe isn’t just about avoiding dairy; it’s about empowerment. You get to control the sugar content, choose your preferred milk base, and customize it to fit your exact needs. What I love about this is how it opens up a world of possibilities for baking, coffee enhancements, and even simple sweet treats. It’s incredibly satisfying to whip up such a versatile ingredient from scratch using simple pantry items. Whether you’re making fudge, Vietnamese coffee, or a creamy pie, this homemade version delivers that rich, sweet consistency you crave without any of the usual drawbacks. Building on this, let’s dive into why this particular recipe will become a permanent fixture in your culinary repertoire.
Why You’ll Love This Homemade Condensed Milk Replacement
What I discovered is that creating your own sweetened condensed milk alternative opens up a world of culinary freedom. I always found it frustrating to search for specific dietary options in stores. This recipe empowers you to control exactly what goes into your food, making it perfect for various needs.
Building on this, you can easily tweak the sweetness level to your preference. Perhaps you like things a little less sweet for your coffee, or extra sweet for a rich dessert. This adaptability makes it a truly personalizable ingredient. For those managing dietary restrictions, this homemade version shines, offering a reliable non dairy sweetened condensed milk solution. It eliminates the need to scrutinize labels at the grocery store.
Here’s the thing, achieving a low fat sweetened condensed milk is also incredibly straightforward with this method. You choose your base milk, instantly making it a healthier option without sacrificing that familiar texture. In my kitchen, I love how quickly this comes together; often, it’s ready before I even finish prepping my other ingredients. It truly is a simple and quick condensed milk replacement, using ingredients you likely already have. This versatility means it seamlessly integrates into any recipe calling for its traditional counterpart.
Ingredients Overview: Crafting Your Perfect Sweetened Condensed Milk Alternative
Building on this, let’s dive into the components that make this sweetened condensed milk alternative truly shine. Understanding each ingredient’s purpose is key to mastering this recipe. I always find that knowing the why behind each addition empowers you in the kitchen.
For the milk base, you have several excellent options, each bringing its own nuances. Whole milk yields a classic, rich texture that closely mimics traditional condensed milk. If you’re aiming for a low fat sweetened condensed milk, skim milk works beautifully, though you might notice a slightly thinner consistency. For those needing a substitute for sweetened condensed milk dairy free, unsweetened oat milk is my top recommendation due to its creamy body and neutral flavor. Almond milk also works, resulting in a lighter texture, while full-fat canned coconut milk will give you a distinctly tropical flavor and a very thick, luscious result, perfect for specific desserts. What I discovered is that the fat content of your chosen milk directly impacts the final product’s thickness and mouthfeel.
Next, the sweetener plays a crucial role. Granulated sugar is the standard, dissolving smoothly and providing that familiar sweetness. However, if you’re looking to experiment, maple syrup or agave nectar can be used. These liquid sweeteners will impart their own unique flavor notes – a warm, caramel-like hint from maple syrup, or a lighter, more neutral sweetness from agave. Keep in mind that using liquid sweeteners might slightly alter the final thickness, requiring a touch more reduction time. The key difference is that granulated sugar contributes more body, while liquid sweeteners primarily add flavor and sweetness.
Regarding fat, it’s an optional but highly recommended addition, especially if you’re using a lower-fat milk. A tablespoon of unsalted butter adds a luxurious mouthfeel and contributes to the stability of the condensed milk replacement. For a non dairy sweetened condensed milk, unrefined coconut oil is an excellent choice, providing similar richness without any dairy. This fat helps achieve that silky, smooth texture we all love.
Finally, vanilla extract isn’t just for flavor; it rounds out the sweetness and adds aromatic depth. A good quality vanilla makes all the difference. Just a pinch of salt is also essential. It doesn’t make the mixture salty, but rather acts as a flavor enhancer, balancing the sweetness and preventing the final product from tasting one-dimensional. Trust me on this one; it truly elevates the overall profile of this homemade delight.
Essential Equipment You’ll Need for Homemade Condensed Milk
Building on this, having the right tools makes all the difference in the kitchen. I always tell aspiring home cooks that good equipment is an investment in successful cooking. For this recipe, you don’t need anything fancy or expensive, just a few basics that most kitchens already have.
The most crucial piece of equipment is a heavy-bottomed saucepan. Trust me on this one; a thin pan will scorch your milk in an instant, leading to a burnt taste and wasted ingredients. A heavy bottom ensures even heat distribution, preventing hot spots and allowing for gentle, consistent simmering. This slow, steady reduction is what creates that signature thick, creamy texture we’re aiming for. You’ll notice that without a good pan, the bottom will stick and brown too quickly.
You’ll also need a whisk. This simple tool is essential for continuous stirring, especially in the initial stages. It helps dissolve the sugar completely and prevents any lumps from forming. Consistent whisking also keeps the milk solids from settling and sticking to the bottom of the pan. A heat-proof spatula is great for scraping down the sides of the pan, ensuring all the liquid reduces evenly and nothing dries out or burns along the edges. Accuracy is key in baking and cooking, so measuring cups and spoons are non-negotiable for precise ingredient ratios. These ensure your condensed milk replacement has the correct balance of sweetness and thickness every time. Finally, an airtight container or jar is vital for proper storage once your delicious concoction is ready. This keeps it fresh and prevents it from absorbing other fridge odors. For those who want an extra silky smooth texture, a fine-mesh sieve can be a useful optional tool to strain out any tiny undissolved bits, though it’s not strictly necessary for a great outcome. Having these tools ready streamlines the entire process.
Step-by-Step Instructions: Making Your Sweetened Condensed Milk from Evaporated Milk (or Milk!)
- Combine Ingredients: In a medium-sized, heavy-bottomed saucepan, whisk together your chosen milk (dairy-free or low-fat), sugar, and optional fat (like coconut oil or vegan butter for richness) until the sugar is fully dissolved and the mixture is well combined.
- Bring to a Simmer: Place the saucepan over low to medium heat, ensuring the mixture heats gently and evenly. Stir constantly with a whisk or heat-proof spatula to prevent scorching on the bottom and to encourage the sugar to fully integrate without crystalizing.
- Reduce & Thicken: Continue to cook the mixture, maintaining a gentle simmer, stirring frequently, and patiently allowing it to reduce and thicken. You’ll know it’s ready when it coats the back of a spoon thickly and has significantly reduced in volume, typically by about one-third to one-half, taking on a rich, syrupy consistency.
Here are steps 4 and 5 for your recipe article:
-
Stir in Flavorings: Once the mixture has reached your desired consistency, remove it from the heat and stir in the vanilla extract and a pinch of salt. The vanilla adds a classic sweetness and aroma, while the salt balances the flavors and prevents the alternative from tasting overly sweet.
-
Cooling Process: Transfer the mixture to a clean, airtight container and allow it to cool completely to room temperature before refrigerating. This cooling period is crucial as the sweetened condensed milk alternative will thicken considerably as it cools, achieving its optimal consistency for use in recipes.
Pro Tips & Tricks for the Perfect Sweetened Condensed Milk Alternative
Pro Tips & Tricks for the Perfect Sweetened Condensed Milk Alternative
Building on this, mastering the art of creating a creamy, rich sweetened condensed milk alternative involves a few crucial techniques. My kitchen has seen its share of experiments, and I’ve learned that patience truly is a virtue here. Rushing the process often leads to burnt bottoms or an inconsistent texture.
The secret is to always cook this mixture low and slow. High heat can cause the sugars to caramelize too quickly, leading to scorching and a bitter taste. You want a gentle simmer, allowing the liquid to reduce gradually. This slow reduction concentrates the flavors and creates that signature thick consistency we all love. In practice, this means keeping your stovetop temperature at a medium-low setting for the duration. Worth noting here, a common mistake is cranking up the heat, thinking it will speed things up. Trust me, it won’t. You’ll end up with a ruined batch and wasted ingredients.
Constant stirring is another non-negotiable step, especially as the mixture begins to thicken. This prevents the milk solids from sticking to the bottom of the pan and burning. As the liquid evaporates, the mixture becomes denser, making it more prone to scorching. Use a silicone spatula to scrape the bottom and sides of the pan frequently. Here’s what actually works: I always keep an eye on it, stirring every minute or two once it starts to bubble. The key difference is that neglecting this step will result in a grainy texture from scorched milk.
Testing for doneness is simpler than you might think. What I discovered is the “coating the spoon” test is your best friend. Dip a cold spoon into the mixture, then pull it out. If the liquid coats the back of the spoon and you can draw a clean line with your finger through it, it’s ready. If it runs off too quickly, it needs more time to reduce. You’ll notice that the consistency will thicken further as it cools, so err on the side of slightly thinner when hot.
Adjusting the sweetness is entirely up to your personal preference. While the recipe provides a good starting point, feel free to taste and add a little more sweetener if desired. Do this before it gets too thick, as sugar dissolves better in a thinner liquid. For a non dairy sweetened condensed milk, I often find that different plant-based milks can affect the perceived sweetness, so a quick taste test is always wise.
Preventing skin formation is easy when you know how. As the alternative cools, a skin can form on the surface, which isn’t ideal for a smooth consistency. To avoid this, press a piece of plastic wrap directly onto the surface of the warm liquid. This creates an airtight seal, keeping the top moist. This technique is also useful for preventing oxidation, preserving the fresh taste of your homemade condensed milk replacement.
Troubleshooting common issues can save a batch. If your substitute sweetened condensed milk dairy free ends up too thin, simply return it to the heat and continue to reduce it, stirring constantly. If it becomes too thick after cooling, a splash of your chosen milk or water can help thin it out. Add it gradually, stirring well until you reach the desired consistency. For more on the science of milk reduction, you can read about evaporation and concentration. This little fix can rescue an overly reduced batch.
Enjoyed this recipe? Share it with a friend or save it to your board for later. Leave a comment below — I love hearing how it turned out!
You May Also Enjoy





You Might Also Love These 🍽️
Recipes picked just for you based on what you’re cooking