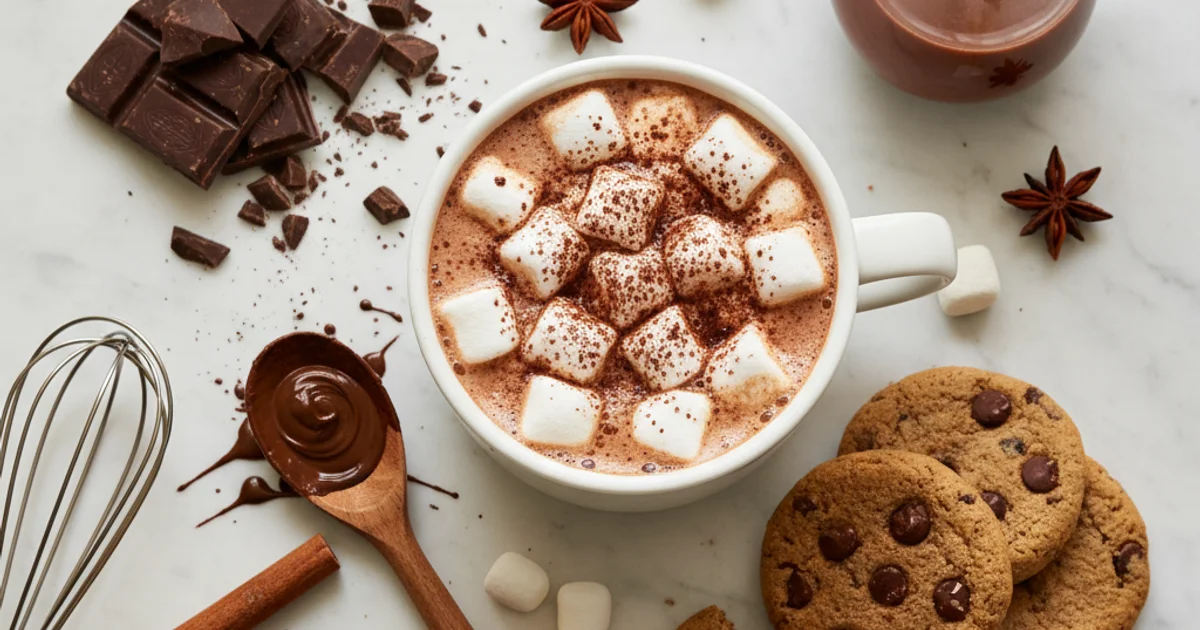
GF Hot Chocolate: Your Cozy, Creamy, Gluten-Free Fix!
Craving a warm, comforting mug? Discover if hot chocolate is gluten-free and learn to make our easy, delicious gluten-free hot chocolate recipe from scratch!
- 1Is Hot Chocolate Gluten-Free? Understanding the Basics (and Why This Recipe Matters!)
- 2Why You’ll Absolutely Love This Gluten-Free Hot Chocolate Recipe
- 3Essential Ingredients for Your Perfect Gluten-Free Hot Cocoa
- 4Equipment You’ll Need for Homemade Gluten-Free Hot Chocolate
- 5Step-by-Step Instructions: Crafting Your Perfect Gluten-Free Hot Chocolate
- 6Pro Tips & Tricks for the Best Gluten-Free Hot Cocoa Experience
Ingredients
For the Hot Chocolate
- 1/2 cup (45g) unsweetened cocoa powder (100% cacao)
- 1/2 cup (100g) granulated sugar (adjust to taste)
- Pinch of salt
- 4 cups (960ml) milk (dairy or non-dairy)
- 1 tsp pure vanilla extract
- Optional: 2 oz (56g) gluten-free chocolate chips or chopped bar for extra richness
For Serving (Optional)
- Gluten-free whipped cream
- Gluten-free marshmallows
- Chocolate shavings
- Cinnamon stick
Instructions
Instructions
In a medium saucepan, whisk together cocoa powder, sugar, and salt until well combined.
Instructions
Add about 1/4 cup of milk to the dry mixture and whisk vigorously until a smooth, thick paste forms.
Instructions
Gradually pour in the remaining milk, whisking constantly until fully incorporated.
Instructions
Place the saucepan over medium heat. Cook, whisking frequently, until the mixture is hot and steaming, but do not allow it to boil.
Instructions
Remove from heat. Stir in the vanilla extract. If using, add gluten-free chocolate chips or chopped bar and stir until melted and smooth.
Instructions
Taste and adjust sweetness or chocolate intensity as desired.
Instructions
Pour into mugs, garnish with desired toppings, and serve immediately.
Equipment You'll Need
Here's what I use to make this recipe perfectly every time:
- Medium Saucepan — A sturdy saucepan is crucial for heating your liquids and dissolving the cocoa and sugar. I always choose one with a heavy bottom to prevent scorching, ensuring even heat distribution. This helps create that perfectly smooth consistency without any burnt bits. → Buy Now
- Whisk — A good whisk is your best friend here. It’s essential for thoroughly combining all the ingredients, especially the cocoa powder, to avoid any lumps. Trust me on this one; a well-whisked mixture is key to a velvety texture. → Buy Now
- Measuring Cups & Spoons — Accuracy is important for a balanced flavor profile. Using proper measuring tools ensures you get the right proportions of sugar, cocoa, and liquid. This consistency guarantees a delicious cup every time you make this gluten free hot chocolate. → Buy Now
- Mugs — Of course, you'll need your favorite mugs ready for serving. Warm them up slightly before pouring for an even more comforting experience. This simple step keeps your drink hot longer. → Buy Now
Recipe FAQs
Is Nesquik hot chocolate gluten-free?
Can I use any type of milk for gluten-free hot chocolate?
What's the best cocoa powder for gluten-free hot cocoa?
How can I make my gluten-free hot chocolate extra thick and creamy?
Are marshmallows gluten-free?
Can I make a big batch of gluten-free hot chocolate mix to store?
GF Hot Chocolate: Your Cozy, Creamy, Gluten-Free Fix!
Craving a warm, comforting mug? Discover if hot chocolate is gluten-free and learn to make our easy, delicious gluten-free hot chocolate recipe from scratch!
Prep Time
5 min
Cook Time
8 min
Total Time
13 min
For the Hot Chocolate
- 1/2 cup (45g) unsweetened cocoa powder (100% cacao)
- 1/2 cup (100g) granulated sugar (adjust to taste)
- Pinch of salt
- 4 cups (960ml) milk (dairy or non-dairy)
- 1 tsp pure vanilla extract
- Optional: 2 oz (56g) gluten-free chocolate chips or chopped bar for extra richness
For Serving (Optional)
- Gluten-free whipped cream
- Gluten-free marshmallows
- Chocolate shavings
- Cinnamon stick
Is Hot Chocolate Gluten-Free? Understanding the Basics (and Why This Recipe Matters!)
The comforting embrace of a warm mug of hot chocolate is a universal joy, especially as the days shorten and a chill fills the air. For many, this simple pleasure evokes memories of crackling fires and cozy evenings. However, for individuals managing gluten sensitivities or celiac disease, enjoying this seemingly innocent treat can often come with a hidden layer of anxiety. The question, “is hot chocolate gluten free?” is far more complex than one might initially assume, leading to a careful scrutiny of every label.
What I discovered is that while pure, unsweetened cocoa powder is inherently gluten-free, the journey from cocoa bean to your cup often introduces unexpected gluten-containing ingredients. Many commercially prepared hot chocolate mixes, for instance, include additives like malt powder, which is derived from barley and contains gluten. Other culprits can be wheat-based thickeners used to achieve a richer consistency, or even flavorings that aren’t certified gluten-free. Trust me on this one; I’ve encountered countless instances where seemingly safe products contained hidden gluten. Furthermore, cross-contamination during manufacturing is a significant concern, even for products that don’t list gluten as an ingredient. This means shared equipment could transfer gluten from other products onto your hot chocolate mix. Building on this, the only way to truly guarantee that your hot chocolate is safe is to control the ingredients yourself. This recipe eliminates all guesswork, providing a genuinely gluten-free hot chocolate experience that is both safe and deeply satisfying. This homemade approach ensures every sip of your gluten free hot cocoa mix is pure comfort, free from hidden dangers.
Why You’ll Absolutely Love This Gluten-Free Hot Chocolate Recipe
Building on this, I always prioritize creating recipes that offer both comfort and confidence. This particular recipe for homemade hot chocolate isn’t just about a warm drink; it’s about peace of mind. You’ll never have to question if is hot chocolate gluten free when you make it yourself. Every single component here is carefully selected to ensure it fits into a gluten-free lifestyle without compromise. That means no hidden starches or cross-contamination worries often found in commercial gluten free hot chocolate mix products.
Here’s the thing, achieving that truly luxurious, velvety texture and deep chocolate flavor in a gluten free hot cocoa mix can be a challenge. Many store-bought options fall flat, tasting watery or overly sweet without the satisfying richness. What I discovered through countless kitchen experiments is that the right balance of fats and quality cocoa makes all the difference. This recipe delivers that decadent, silky smooth experience every single time. It wraps you in a comforting embrace, far superior to anything from a packet.
In my kitchen, simplicity is key, especially when craving a warm treat. This recipe is designed to be incredibly simple and quick to make, perfect for a last-minute indulgence or a cozy evening. You won’t need any fancy equipment or obscure ingredients; just common pantry staples and a few minutes of your time. It’s a low-effort, high-reward kind of recipe.
Worth noting here, the beauty of making your own is the unparalleled customizability. You are the master of your mug! Easily adjust the sweetness level to your preference, from subtly sweet to deeply indulgent. You can also dial up or down the chocolate intensity, choosing between a mild cocoa flavor or a robust, dark chocolate experience. This flexibility allows you to craft a drink that is uniquely yours, perfectly suited to your mood or dietary needs. Plus, making it at home is often far more economical than repeatedly buying specialty gluten free hot chocolate products, saving you money while treating yourself.
Essential Ingredients for Your Perfect Gluten-Free Hot Cocoa
Building on this, understanding the components of a truly delightful cup of hot cocoa begins with a careful look at each ingredient. In my kitchen, I always prioritize quality, especially when crafting something as comforting as this treat. You’ll notice that while many pre-made mixes might raise questions about “is hot chocolate gluten free,” making it from scratch puts you in complete control. Here’s what actually works for ensuring a truly gluten-free hot chocolate experience from the ground up.
The first essential component is Unsweetened Cocoa Powder (100% Cacao). This is the heart of your hot cocoa, providing that deep, chocolatey essence. It’s crucial to use pure, unsweetened cocoa powder; both natural and Dutch-processed varieties are inherently gluten-free. Natural cocoa powder offers a fruitier, slightly sharper chocolate note, often preferred for its brighter flavor profile. Conversely, Dutch-processed cocoa powder is treated with an alkali, making it darker, milder, and less acidic. This results in a smoother, more mellow chocolate taste, and it dissolves beautifully for a silky finish. Whichever you choose, ensure the label confirms 100% cacao with no added ingredients that could contain gluten.
Next, we have Granulated Sugar, which provides the necessary sweetness to balance the bitterness of the cocoa. This is naturally gluten-free, and the beauty of making your own is the ability to adjust the sweetness precisely to your preference. I always start with the recommended amount and then taste before adding more, ensuring it’s never cloyingly sweet. A Pinch of Salt might seem counterintuitive in a sweet drink, but trust me on this one – it’s a game-changer. Salt doesn’t just make things salty; it profoundly enhances the chocolate flavor, making it more vibrant and complex, while also subtly balancing the overall sweetness. It’s a tiny addition with a huge impact on the final taste profile.
For the creamy base, you’ll need Milk (Dairy or Non-Dairy). Any type of milk works wonderfully here, allowing for incredible versatility. Whole milk will yield the richest, most decadent hot chocolate, creating a truly luxurious texture. For those seeking a gluten-free hot chocolate mix alternative or a dairy-free option, almond milk, soy milk, or oat milk are excellent choices, and all are naturally gluten-free. Just ensure you check the labels, especially for flavored or sweetened non-dairy milks, to confirm no hidden gluten-containing thickeners or additives. My personal favorite for a dairy-free version is full-fat oat milk for its natural creaminess.
Finally, Vanilla Extract (Pure) adds a layer of warmth and depth that elevates the entire drink. It’s important to use pure vanilla extract, as imitation vanilla can sometimes contain alcohol derived from gluten-containing grains, though this is less common now. Always double-check the label to confirm it’s pure and thus inherently gluten-free. For an extra touch of decadence, consider adding Optional: Chocolate Chips or Bar (High-Quality). Melting in a few ounces of a good quality chocolate bar or chocolate chips will create an even richer, more intense chocolate flavor and a thicker consistency. When choosing this option, it’s absolutely vital to check the packaging for a certified gluten-free label, as some brands of chocolate chips or bars may have cross-contamination warnings or even contain small amounts of gluten. This ensures your homemade hot cocoa remains a truly gluten-free hot cocoa mix equivalent, but even better.
Equipment You’ll Need for Homemade Gluten-Free Hot Chocolate
In my kitchen, having the right tools makes all the difference when crafting a comforting mug of hot chocolate. You don’t need a professional setup; just a few basic items will ensure a smooth and satisfying result. Gathering your equipment beforehand prevents last-minute scrambling and allows you to focus on the process. This preparation also helps maintain a relaxed and enjoyable cooking experience, which is part of the joy of homemade treats.
- Medium Saucepan: A sturdy saucepan is crucial for heating your liquids and dissolving the cocoa and sugar. I always choose one with a heavy bottom to prevent scorching, ensuring even heat distribution. This helps create that perfectly smooth consistency without any burnt bits.
- Whisk: A good whisk is your best friend here. It’s essential for thoroughly combining all the ingredients, especially the cocoa powder, to avoid any lumps. Trust me on this one; a well-whisked mixture is key to a velvety texture.
- Measuring Cups & Spoons: Accuracy is important for a balanced flavor profile. Using proper measuring tools ensures you get the right proportions of sugar, cocoa, and liquid. This consistency guarantees a delicious cup every time you make this gluten free hot chocolate.
- Mugs: Of course, you’ll need your favorite mugs ready for serving. Warm them up slightly before pouring for an even more comforting experience. This simple step keeps your drink hot longer.
Worth noting here, while not strictly necessary, a frother can elevate your homemade gluten free hot cocoa mix to café-quality status. It creates a lovely, airy foam on top, adding a luxurious touch. Another optional but helpful tool is a fine-mesh sieve; I sometimes use it to sift my cocoa powder if it looks a bit clumpy. This extra step guarantees an ultra-smooth base for your gluten free hot chocolate mix, eliminating any potential graininess. Having these tools ready makes the entire process seamless and enjoyable from start to finish.
Step-by-Step Instructions: Crafting Your Perfect Gluten-Free Hot Chocolate
-
Combine Dry Ingredients: In a medium saucepan, whisk together the gluten-free cocoa powder, granulated sugar, and a pinch of salt. This crucial step ensures that the dry ingredients are thoroughly mixed before liquids are introduced, which helps prevent any unwelcome lumps from forming in your delicious hot chocolate.
-
Create a Paste: Add a small amount of milk (about 1/4 cup) to the dry mixture in the saucepan and whisk vigorously until a smooth, thick paste forms. This technique further aids in dissolving the cocoa and sugar evenly, making it even more effective at preventing lumps and ensuring a silky-smooth texture.
-
Gradually Add Remaining Milk: Slowly pour in the rest of the milk into the saucepan while continuously whisking the mixture. This gradual addition and constant stirring are essential for incorporating all ingredients completely and preventing any separation, guaranteeing a perfectly blended and creamy hot cocoa.
-
Heat Gently: Place the saucepan over medium heat. Cook the mixture, whisking frequently, until it is hot and steaming. It’s crucial not to let it boil, as this can scorch the milk and affect the flavor.
-
Stir in Vanilla & Optional Chocolate: Remove the saucepan from the heat. Stir in the vanilla extract until well combined. If you are using chocolate chips or a chopped chocolate bar for extra richness, add them now and stir continuously until they are fully melted and smoothly incorporated into the hot chocolate.
-
Taste & Adjust: Carefully taste your homemade hot chocolate. If desired, you can now adjust the sweetness by adding more maple syrup or the chocolate intensity by stirring in a little more cocoa powder until it perfectly suits your preference.
-
Serve Immediately: Pour the hot chocolate into your favorite mugs and garnish generously with whipped cream, a sprinkle of cocoa powder, chocolate shavings, or mini marshmallows for an extra decadent treat.
Pro Tips & Tricks for the Best Gluten-Free Hot Cocoa Experience
Here’s the thing: making truly exceptional homemade hot chocolate goes beyond just following the steps. Achieving that silky smooth texture and rich, deep flavor requires a few insider tricks I’ve picked up over the years. I always tell people that the little details make all the difference, especially when you’re aiming for that perfect cup. For instance, the way you combine your initial ingredients can completely change the final consistency.
What I discovered is that preventing lumps is paramount for a luxurious drinking experience. The paste method outlined in Step 2 of this recipe is your best friend here. By combining the cocoa powder and sugar with a small amount of liquid first, you create a smooth slurry that dissolves beautifully into the rest of the milk. Another simple yet effective trick is to sift your cocoa powder before adding it to the pot. This breaks up any stubborn clumps and ensures an even distribution of flavor without any powdery surprises. Trust me on this one; a few extra seconds of sifting saves you from a grainy drink.
Building on this, the temperature at which you heat your milk is crucial. Do not boil your milk. High heat can scorch the milk, leading to an unpleasant, burnt flavor that no amount of chocolate can mask. Instead, heat it gently over medium-low heat, stirring frequently until steam rises and small bubbles form around the edges of the pot. This slow, steady warming process allows the flavors to meld beautifully and prevents the milk proteins from breaking down. You’ll notice that this gentle approach yields a much creamier and more flavorful result.
The secret is always in the ingredients. Using quality ingredients matters immensely for this treat. Opt for a good quality unsweetened cocoa powder; the deeper the color and richer the aroma, the better your hot chocolate will taste. Similarly, a pure vanilla extract, rather than artificial, elevates the flavor profile significantly. A common mistake is skimping on these core components, which ultimately diminishes the overall experience. Think of it like baking; you wouldn’t use subpar flour for a special cake, and the same applies to your hot chocolate.
Adjusting the sweetness to your personal preference is also key. I always recommend starting with slightly less sugar than the recipe calls for. You can always add more, but you can’t take it away once it’s dissolved. Taste as you go, adding small increments until it’s just right for you. Some people prefer a more bittersweet experience, while others enjoy a sweeter indulgence. This flexibility ensures your homemade hot chocolate is perfectly tailored.
For an extra layer of decadence and creaminess, consider adding a splash of heavy cream or even a small pat of butter at the very end, just before serving. This enriches the texture and mouthfeel, making it feel incredibly luxurious. It’s a trick I learned from a French patisserie chef, and it truly makes a difference. This simple addition transforms a good hot chocolate into an extraordinary one, without making it overly heavy.
If you enjoy a cafe-style drink, using a handheld frother before serving is a game-changer. After pouring your hot chocolate into mugs, give it a quick whisk with the frother for a minute or two. This creates a beautiful, airy foam on top, adding to the sensory experience. It’s a small step that brings a touch of professional flair to your homemade beverage, making it feel extra special.
Finally, for those who love to plan ahead, you can easily create a gluten free hot chocolate mix. Simply combine all the dry ingredients – cocoa powder, sugar, and a pinch of salt – in a clean, airtight jar. When you’re ready for a cup, just whisk the desired amount of this gluten free hot cocoa mix with hot milk. This makes for quick and easy preparation on a chilly evening, and it’s also a thoughtful homemade gift. For more insights on the science of chocolate, you can check out this detailed article on cocoa processing.
Enjoyed this recipe? Share it with a friend or save it to your board for later. Leave a comment below — I love hearing how it turned out!
You May Also Enjoy





You Might Also Love These 🍽️
Recipes picked just for you based on what you’re cooking