Perfect Gluten-Free Corn Tortillas at Home!
Curious if corn tortillas are gluten-free? Yes, they are! Learn how to make delicious, authentic gluten-free corn tortillas at home with our easy recipe.
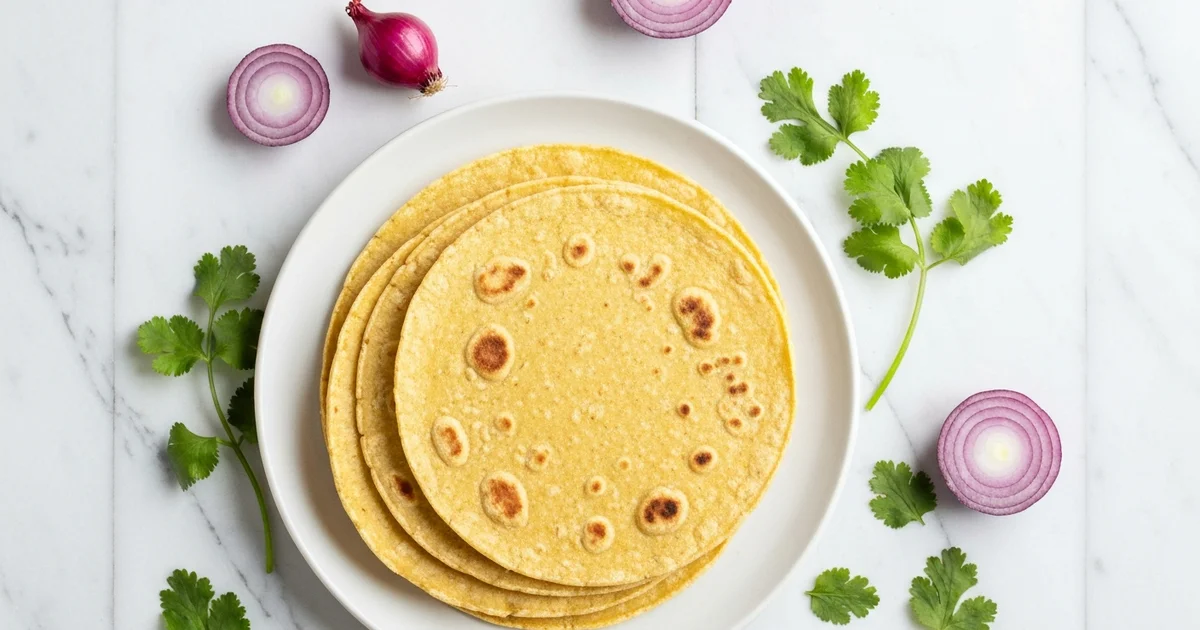
- 1Are Corn Tortillas Gluten Free? Demystifying the Gluten-Free Tortilla Question
- 2Why You’ll Love Making These Delicious Gluten-Free Corn Tortillas
- 3Essential Ingredients for Authentic Gluten-Free Corn Tortillas
- 4Equipment You’ll Need for Perfect Homemade Gluten-Free Tortillas
- 5Step-by-Step Instructions: Crafting Your Own Gluten-Free Corn Tortillas
- 6Pro Tips & Tricks for Perfect Gluten-Free Corn Tortillas
Ingredients
For the Gluten-Free Corn Tortillas
- 2 cups Masa Harina (e.g., Maseca, ensuring it's pure corn and gluten-free)
- 1 ½ - 1 ¾ cups Warm Water (approx. 100-110°F / 38-43°C)
- ½ teaspoon Salt (or to taste)
Instructions
Instructions
Combine Masa Harina and salt in a large bowl. Whisk to combine.
Instructions
Gradually add 1 ½ cups of warm water, mixing with your hands until a shaggy dough forms. Add more water, a tablespoon at a time, until the dough comes together and feels like soft play-dough. It should not be sticky or crumbly.
Instructions
Knead the dough gently for 1-2 minutes until smooth. Cover the bowl with a damp cloth or plastic wrap and let it rest for 10-15 minutes.
Instructions
Heat a cast iron skillet or comal over medium-high heat. While it heats, divide the dough into 12 equal portions (about 1.5 oz or 40-45g each) and roll them into smooth balls.
Instructions
Line your tortilla press with two pieces of plastic wrap (or a cut-open Ziploc bag). Place one dough ball in the center, close the press, and gently press to flatten into a 5-6 inch disc. Don't press too hard.
Instructions
Carefully peel the pressed tortilla from the plastic wrap. Immediately place it on the hot skillet/comal.
Instructions
Cook for 30-60 seconds on the first side until the edges dry and it easily peels off the surface.
Instructions
Flip the tortilla and cook for 1-2 minutes on the second side. You should see it start to puff up. If it doesn't puff, gently press it with a spatula.
Instructions
Flip once more and cook for another 30 seconds to a minute, until lightly browned spots appear and it's fully cooked through.
Instructions
Transfer the cooked tortilla to a tortilla warmer or a plate covered with a damp kitchen towel to keep it warm and pliable. Repeat with the remaining dough balls, adjusting heat as needed.
Equipment You'll Need
Here's what I use to make this recipe perfectly every time:
- Tortilla Press — → Buy Now
- Cast Iron Skillet or Comal — → Buy Now
- Large Mixing Bowl — A sturdy, **large mixing bowl** is essential for combining your ingredients. It gives you ample space to mix the **masa harina**, water, and salt thoroughly. This ensures your dough is well-hydrated and consistently blended. I prefer a bowl that’s wide enough for easy kneading. → Buy Now
- Measuring Cups and Spoons — → Buy Now
- Plastic Wrap or Cut-Open Ziploc Bags — → Buy Now
- Damp Kitchen Towel or Tortilla Warmer — → Buy Now
Recipe FAQs
Are corn tortillas really gluten free?
Is masa harina always gluten free?
What's the difference between corn flour and masa harina, and are both gluten free?
Can I make these gluten-free corn tortillas without a tortilla press?
How do I prevent my homemade corn tortillas from cracking?
Can I freeze homemade gluten-free corn tortillas?
Perfect Gluten-Free Corn Tortillas at Home!
Curious if corn tortillas are gluten-free? Yes, they are! Learn how to make delicious, authentic gluten-free corn tortillas at home with our easy recipe.
Prep Time
15 min
Cook Time
20 min
Total Time
35 min
For the Gluten-Free Corn Tortillas
- 2 cups Masa Harina (e.g., Maseca, ensuring it's pure corn and gluten-free)
- 1 ½ - 1 ¾ cups Warm Water (approx. 100-110°F / 38-43°C)
- ½ teaspoon Salt (or to taste)
Are Corn Tortillas Gluten Free? Demystifying the Gluten-Free Tortilla Question
You’ve likely wondered, are corn tortillas gluten free? This is a question I hear often in my kitchen. The direct answer is a resounding yes, when made purely from corn. Traditionally prepared, these versatile wraps are naturally free from gluten.
Here’s the thing: corn itself is a naturally gluten-free grain. Unlike wheat, barley, or rye, corn does not contain the protein complex known as gluten. This inherent quality makes pure corn-based products safe for those avoiding gluten. What I love about this is the simplicity.
It is crucial to distinguish between different types of tortillas. Wheat flour tortillas, common in many cuisines, contain gluten. If you’re pondering “is there gluten in tortillas” generally, the answer depends entirely on the flour used. Many assume all tortillas are alike.
Commercially produced corn tortillas require careful scrutiny. While the base ingredient is gluten-free, manufacturing practices pose risks. Some brands might use shared equipment with wheat products, causing cross-contamination. Always check labels meticulously for a “gluten-free” certification. Even additives can sometimes contain hidden gluten.
To ensure true gluten-free safety, especially for severe sensitivities, consider these points:
- Read labels carefully: Look for “certified gluten-free” statements.
- Check ingredients: Avoid any hidden wheat starches or modified food starches.
- Inquire at restaurants: Confirm preparation methods and ingredients if dining out.
The key ingredient for authentic corn tortillas is masa harina. This traditional Mexican corn flour is made from dried corn kernels. The corn undergoes a process called nixtamalization. This process ensures that is masa harina gluten free and creates the perfect texture for tortillas. In my kitchen, I always reach for certified gluten-free masa harina.
This specific choice guarantees a truly gluten-free corn tortilla. It completely avoids any cross-contamination worries. Making them at home ensures both purity and incredible freshness. You’ll notice that the flavor and texture surpass store-bought versions.
Why You’ll Love Making These Delicious Gluten-Free Corn Tortillas
In my kitchen, homemade always wins. There’s truly nothing like the warmth of a freshly griddled tortilla. The aroma of toasted masa fills your space with comfort.
Here’s the thing: you get an unmatched level of freshness and flavor with this recipe. Store-bought options simply cannot compare to that satisfying sizzle. You will notice the perfect golden brown edges and pliable texture.
What I love about making these tortillas at home extends beyond just taste. It offers a peace of mind and flexibility that store-bought versions often lack. This recipe empowers you in several key ways:
- Guaranteed Gluten-Free: You gain total control over your ingredients, eliminating hidden gluten or cross-contamination concerns entirely. No more guessing if your corn tortillas gluten free status is truly secure when you craft them yourself. This complete control instills absolute confidence in every single delicious bite.
- Incredibly Easy & Rewarding: The process is surprisingly simple, transforming minimal ingredients into a foundational food item. Even beginners will quickly achieve impressive results, finding genuine satisfaction in this ancient craft. The rewarding feeling of creating something so essential from scratch is immense; watching simple masa transform into soft, warm tortillas is truly satisfying. It makes every meal feel special and personal.
- Versatile & Customizable: These pliable tortillas form the perfect base for countless meals beyond basic tacos. I always encourage adapting this dish to your preference; try adding a pinch of smoked paprika for extra depth or a hint of garlic powder. This flexibility allows for endless culinary creativity, enabling you to experiment with different masa types or add finely minced herbs directly to the dough for unique flavors. These small touches elevate your culinary experience significantly.
- Cost-Effective: Crafting your own tortillas at home is often far more economical than consistently buying specialty gluten-free options. This method saves you significant money over time, especially if you enjoy them frequently as I do. It’s a smart investment in both superior quality and your household budget.
Ultimately, making your own tortillas is an investment in superior flavor, health, and profound culinary joy. You’ll never look back once you taste the remarkable difference this recipe makes.
Essential Ingredients for Authentic Gluten-Free Corn Tortillas
Authentic, pliable corn tortillas begin with a short and sweet list of ingredients, proving that sometimes, less truly is more. Each component is vital for creating that perfect, flexible wrapper for your favorite fillings.
The undisputed star of this show is masa harina. This isn’t your average corn flour; masa harina is crafted from corn kernels that have undergone nixtamalization – a traditional process where corn is cooked and steeped in an alkaline solution, then ground into a fine flour. This unique treatment unlocks the corn’s nutritional value and is precisely what gives the dough its incredible pliability, distinct earthy flavor, and the ability to form a flexible, tear-resistant tortilla. Without nixtamalization, regular corn flour simply won’t yield the same magical results. And for those wondering, “are corn tortillas gluten free?” with masa harina as your base, the answer is a confident yes! Masa harina, whether referred to as masa flour or corn masa, is pure nixtamalized corn, naturally free from gluten. It’s crucial to distinguish it from standard corn flour, which, while also gluten-free, behaves entirely differently in tortilla making.
Next, we have warm water – a deceptively simple yet absolutely critical ingredient. Its primary role is to properly hydrate the masa harina, bringing it to life and transforming it into a cohesive, workable dough. I aim for water that feels comfortably warm to the touch, never hot or cold. Water that’s too hot can prematurely cook the masa, while water that’s too cold prevents the flour from fully absorbing, resulting in a crumbly, unmanageable dough. The right temperature ensures your masa dough is smooth, pliable, and a joy to work with.
A small dash of salt is often overlooked but truly makes a world of difference. It significantly enhances and balances the natural sweetness of the corn, elevating the overall flavor of your tortillas. Don’t skip this humble ingredient; a little salt transforms them from good to truly great.
Finally, a tiny touch of oil (like avocado or vegetable oil) is an optional addition. While not strictly traditional, a small amount can contribute to extra pliability and a slightly softer texture in the finished tortilla. Even without oil, using just masa, water, and salt will still result in wonderfully authentic, naturally gluten-free corn tortillas that are truly delicious.
Now that you know the essentials, let’s turn those simple ingredients into a stack of warm, homemade glory. Here’s how to craft your own perfect gluten-free corn tortillas:
How to Make Perfect Gluten-Free Corn Tortillas
- Prepare the Dough: In a large bowl, combine 2 cups of masa harina with 1 ½ cups of warm water and ½ teaspoon of salt. Begin mixing with your hands, gradually incorporating the water until a cohesive dough forms. You might need to adjust the water slightly – add a tablespoon more if it feels too dry and crumbly, or a sprinkle of masa if it’s too sticky. Knead for about 2-3 minutes until the dough is smooth, pliable, and doesn’t show cracks when pressed.
- Rest and Hydrate: Cover the bowl with a damp cloth or plastic wrap and let the dough rest for at least 15-20 minutes. This crucial step allows the masa harina to fully hydrate, making your tortillas even more pliable and less prone to cracking.
- Form Dough Balls: Divide the dough into 16-18 equal portions, rolling each into a smooth ball, roughly the size of a golf ball. Keep the unpressed dough balls covered with a damp cloth to prevent them from drying out.
- Ready Your Press: Line your tortilla press with two squares of plastic wrap or a cut-open gallon-size Ziploc bag. This lining prevents sticking and makes releasing the tortilla effortless.
- Pressing Perfection: Place one dough ball slightly off-center towards the hinge of the press. Close the press firmly and evenly, applying good pressure. Open it carefully to reveal a perfectly round, thin tortilla. Aim for about 1/16th of an inch thick – not too thin that it tears, but thin enough to cook quickly.
- Heat Your Comal (or Skillet): Place a cast-iron comal or heavy-bottomed skillet over medium-high heat. Allow it to preheat for at least 5 minutes until it’s very hot but not smoking. You want a consistent, even heat for proper cooking.
- Cook the Tortillas: Gently peel the tortilla from the plastic liner and carefully lay it onto the hot comal. Cook for about 30-45 seconds on the first side until the edges start to dry and lift slightly, and you see a few small brown spots developing.
- First Flip: Flip the tortilla over. Cook for another 60-90 seconds on the second side. This is often when the magic happens – the tortilla should puff up like a balloon, indicating it’s cooking through evenly. If it doesn’t puff, don’t worry, it will still taste amazing!
- Final Flip & Finish: Flip it one last time for about 15-30 seconds to finish cooking and get some final charring. The tortilla should feel light and flexible.
- Keep Them Warm: As each tortilla finishes cooking, immediately transfer it to a tortilla warmer or wrap it in a clean kitchen towel. This traps the steam, keeping them warm and soft until serving time.
- Serve & Enjoy: Serve your warm, fresh, naturally gluten-free corn tortillas immediately with your favorite tacos, fajitas, or simply enjoy them with a sprinkle of salt.
- Storage: Leftover tortillas can be stored in an airtight container or a sealed bag in the refrigerator for up to 3-4 days. Reheat gently on a dry comal or in a microwave until pliable again.
Equipment You’ll Need for Perfect Homemade Gluten-Free Tortillas
Building on this, preparing gluten-free corn tortillas at home becomes a truly rewarding experience when you have the right tools. Investing in a few key pieces of kitchen equipment will elevate your tortilla-making game. These specialized items ensure consistency, ease, and that authentic texture we all crave. Having everything ready before you start mixes the dough makes a big difference.
Here’s a breakdown of the essential equipment I always rely on in my kitchen:
-
Tortilla Press: I always recommend investing in a good quality tortilla press for making this recipe. This simple tool truly streamlines the entire process. It ensures each dough ball is pressed into a perfectly uniform, thin circle. Consistency in thickness is key for even cooking. Without it, you might end up with unevenly cooked results.
-
Cast Iron Skillet or Comal: In my kitchen, a well-seasoned cast iron skillet is non-negotiable for this dish. It distributes heat beautifully, which is vital for that signature puff. You’ll notice that the dough transforms with that satisfying sizzle. A comal, a traditional flat griddle, works equally well for cooking these gluten-free beauties. The flat surface ensures direct contact for perfect browning.
-
Large Mixing Bowl: A sturdy, large mixing bowl is essential for combining your ingredients. It gives you ample space to mix the masa harina, water, and salt thoroughly. This ensures your dough is well-hydrated and consistently blended. I prefer a bowl that’s wide enough for easy kneading.
-
Measuring Cups and Spoons: Accuracy is crucial when working with masa dough. Using precise measuring cups and spoons helps you achieve the correct dough consistency. Too much or too little water can drastically alter the final texture. Trust me on this one; consistent measurements prevent many common pitfalls. This small detail ensures success every time.
-
Plastic Wrap or Cut-Open Ziploc Bags: Here’s what actually works: using plastic wrap or cut-open Ziploc bags. These liners are critical for preventing the sticky masa dough from adhering to your press plates. They also make peeling off the delicate, freshly pressed dough incredibly easy. This step prevents frustration and ensures perfectly shaped tortillas. Cut a gallon-sized bag along its seams for two square sheets.
-
Damp Kitchen Towel or Tortilla Warmer: Keeping your cooked tortillas warm, soft, and pliable is just as important as cooking them correctly. A damp kitchen towel or a tortilla warmer is crucial for this. As each tortilla finishes cooking, immediately transfer it to the warmer. This retains their moisture and prevents them from drying out. This small detail ensures a delightful eating experience.
Step-by-Step Instructions: Crafting Your Own Gluten-Free Corn Tortillas
Let’s get those perfect, pliable gluten-free corn tortillas into your kitchen! Follow these clear steps to turn that masa harina into deliciousness.
1. Preparing the Dough for Your Tortillas Begin by whisking together the masa harina and salt in a large mixing bowl, making sure everything is evenly distributed. Next, gradually pour in the warm water, mixing with your hands. Continue until a cohesive dough forms. You’re looking for a ‘play-dough’ like consistency—it should be neither too sticky nor too crumbly. This ensures the dough is wonderfully pliable and ready for pressing.
2. Knead and Rest for Perfection Gently knead the dough right in the bowl for 1 to 2 minutes, using your hands to work it until it becomes visibly smooth and uniform in texture. Once kneaded, cover the bowl tightly with a damp cloth or a piece of plastic wrap and allow the dough to rest undisturbed for 10 to 15 minutes. This crucial resting period is vital for the masa harina to fully hydrate, ensuring your tortillas will be flexible, less prone to crumbling, and absolutely delightful.
3. Setting Up Your Tortilla Press Before you start pressing, prepare your tortilla press for success! Line both the top and bottom plates with two pieces of plastic wrap or a cut-open plastic bag. This simple trick prevents sticking and makes peeling off your beautifully pressed tortillas a breeze, ensuring they remain perfectly intact.
4. Form Dough Balls and Press Away! Now, divide your prepared dough into equal portions. For standard tacos, aiming for about 12 portions, each roughly 1.5 ounces, works perfectly. Roll each portion firmly into a smooth, compact ball. Place one dough ball directly in the center of your lined tortilla press. Gently close the press and apply firm, even pressure to flatten the dough into a consistent 5-6 inch disc, being careful not to over-press and make it too thin. Open the press and gently peel the thin tortilla disc from the plastic lining, handling it with utmost care to prevent tearing. Set it aside or directly onto your cooking surface.
5. Cooking Your Homemade Corn Tortillas Place a cast iron skillet or comal over medium-high heat until it’s very hot but not smoking.
- Cook First Side: Carefully place one tortilla onto the hot cooking surface. Cook for 30-60 seconds, until the edges begin to dry slightly and the tortilla easily lifts from the surface.
- Flip & Cook Second Side: Using a spatula, flip the tortilla to the other side. Cook for 1-2 minutes, during which you should observe it puffing up; this is a wonderful sign it’s cooking well! You can gently press with a spatula if needed to encourage further puffing.
- Flip Again & Finish: Flip the tortilla one last time and cook for another 30 seconds to a minute, until you see light brown spots forming and the tortilla is fully cooked and wonderfully pliable.
6. Keep Them Warm and Soft Transfer each cooked tortilla immediately to a tortilla warmer or stack them on a plate and cover them with a damp kitchen towel. This method is crucial for maintaining that perfect tender and pliable texture while you continue cooking the remaining tortillas.
7. Serving Suggestions Your freshly made corn tortillas are truly versatile! Serve them warm alongside your favorite tacos, enchiladas, or fajitas. They’re also perfect for dipping into guacamole, salsa, or a hearty bowl of chili. The authentic flavor and fresh texture will elevate any meal.
8. Storing Leftovers Should you be lucky enough to have any leftover tortillas, allow them to cool completely. Stack them and place them in an airtight bag or container. They will keep well in the refrigerator for 3-5 days. To reheat, simply warm them gently on a dry skillet over medium heat for about 15-30 seconds per side, or microwave them briefly wrapped in a damp paper towel until soft and warm again. Enjoy them fresh, and enjoy them often!
Pro Tips & Tricks for Perfect Gluten-Free Corn Tortillas
The secret is in understanding the nuances of masa, not just following steps blindly. I’ve learned over years in my kitchen that tiny adjustments make all the difference. Mastering these pro tips ensures your homemade tortillas achieve that authentic texture.
Dough Consistency is Paramount
The foundation of a great tortilla is perfect dough. It should feel like soft, pliable play-dough, neither sticky nor crumbly. If your dough feels too wet, add a small sprinkle of masa harina, a quarter teaspoon at a time. Work it in thoroughly before assessing again.
Conversely, if the dough is too dry, it will crack at the edges when you try to form it. Add water very sparingly, perhaps half a teaspoon at a time, until the texture is just right. This careful balance prevents common issues like cracking or crumbling during cooking. For a deeper dive into masa hydration, check out this comprehensive guide on Serious Eats.
The Rest Period Matters
Once your dough is perfectly mixed, don’t skip the rest period. I always cover the dough with a damp towel and let it sit for 10-15 minutes. This seemingly small step is critical for allowing the masa harina to fully hydrate. Proper hydration makes the dough more pliable.
You’ll notice that rested dough is much easier to work with. It’s less prone to tearing and results in a smoother, more flexible tortilla. This rest ensures your tortillas are strong and hold together beautifully.
Tortilla Press Technique
A good tortilla press is invaluable, but technique makes it shine. I always line my press with two pieces of heavy-duty plastic wrap. This prevents sticking and makes releasing the delicate tortillas effortless. Place a dough ball slightly off-center towards the hinge.
Press down firmly and evenly with the handle. Avoid over-pressing, which can make tortillas too thin and fragile. You want an even thickness, ensuring consistent cooking across the surface. This careful approach prevents unevenly cooked spots.
Proper Comal/Skillet Temperature
Maintaining a consistent medium-high heat on your comal or cast-iron skillet is crucial. Too low, and your tortillas will dry out, becoming stiff and brittle. Too high, and they’ll burn on the outside before cooking through. A few drops of water should sizzle instantly and evaporate quickly.
This steady temperature ensures even heat distribution for that satisfying sizzle. It also helps achieve the ideal balance of cooked texture and slight charring. Trust me, temperature control is a game-changer.
The ‘Puff’ – A Sign of Success
One of the most rewarding sights is watching your tortilla puff up on the comal. This “puff” indicates excellent hydration and proper cooking. It signifies a perfectly cooked, airy texture within. Don’t worry if every single one doesn’t puff; many factors influence it.
To encourage a puff, gently press the tortilla with a spatula after its second flip. This releases steam, encouraging it to inflate like a balloon. Even without a full puff, your tortillas will still be delicious.
Keeping Them Warm & Moist
After cooking, your tortillas need a warm, moist environment. I always stack them directly into a tortilla warmer lined with a damp cloth. If you don’t have a warmer, a kitchen towel or foil works perfectly. This traps steam and heat.
This warmth and moisture are vital for maintaining their softness and pliability. It prevents them from drying out and becoming stiff. This ensures your are corn tortillas gluten free creation remains tender and ready for filling.
Don’t Overcook
Overcooking is a common pitfall that can ruin your homemade tortillas. Overcooked tortillas quickly become stiff, dry, and brittle, losing all their desirable flexibility. You are aiming for soft and pliable, with just a few golden brown edges and slight charring. Each side typically needs about 30-60 seconds.
Remove them from the heat when they are still soft to the touch. They will continue to firm slightly as they cool. This prevents a crispy, unyielding result.
Enjoyed this recipe? Share it with a friend or save it to your board for later. Leave a comment below — I love hearing how it turned out!
You May Also Enjoy





You Might Also Love These 🍽️
Recipes picked just for you based on what you’re cooking