Crispy Gluten-Free Soda Crackers: Snack Perfection!
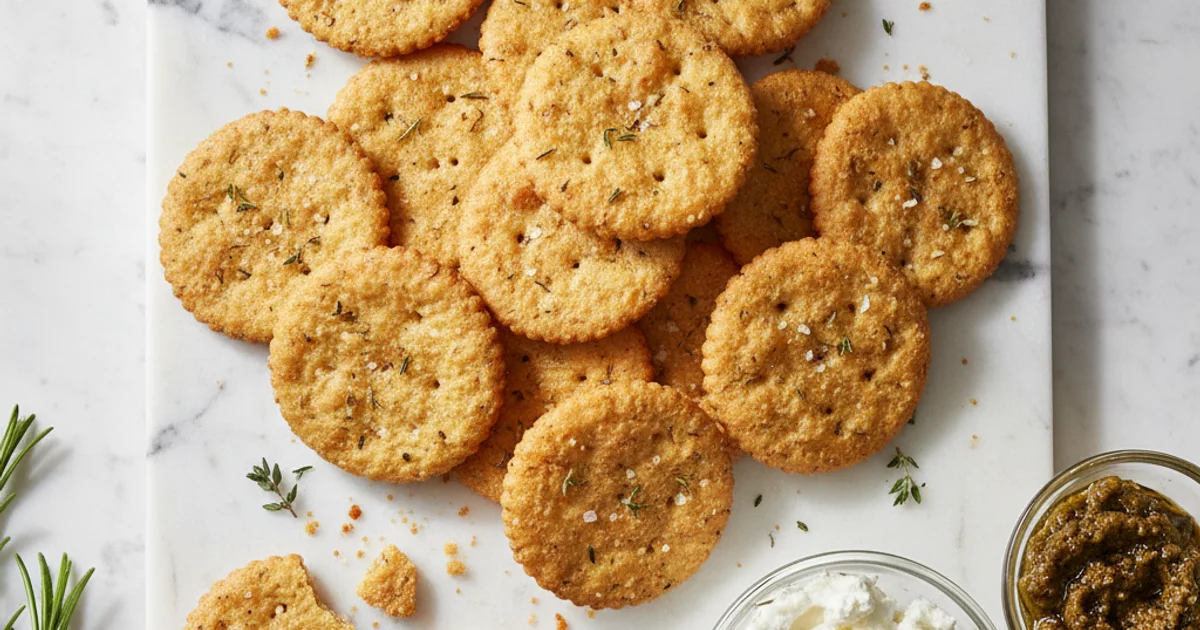
Craving classic soda crackers but need them gluten free? Learn how to make crispy, buttery gluten free soda crackers that taste just like your favorite store-bought kind. Perfect for snacking!
- 1Introduction: The Quest for Perfect Gluten Free Soda Crackers
- 2Why You’ll Absolutely Love This Gluten Free Cracker Recipe
- 3Ingredients Overview: Crafting the Best GF Crackers
- 4Essential Equipment You’ll Need for Homemade Gluten Free Soda Crackers
- 5Step-by-Step Instructions: Making Your Own Gluten Free Soda Crackers
- 6Pro Tips & Tricks for the Crispiest Gluten Free Crackers
Ingredients
Cracker Dough
- 2 cups gluten-free all-purpose flour blend (with xanthan gum)
- 1 tsp baking powder
- 1 tsp fine sea salt
- 1/2 cup (1 stick) unsalted butter, very cold and cut into small cubes
- 1/2 cup ice water (plus 1-2 tbsp more if needed)
For Topping (Optional)
- Flaky sea salt
Instructions
Instructions
Whisk together dry ingredients: GF flour, baking powder, and salt.
Instructions
Cut in cold butter using a pastry blender or food processor until pea-sized crumbs form.
Instructions
Gradually add ice water, mixing until a shaggy dough forms. Do not overmix.
Instructions
Gather dough, form into a disc, wrap, and chill for 30 minutes.
Instructions
Preheat oven to 375°F (190°C). Line baking sheets with parchment paper.
Instructions
Divide dough in half. Roll one half very thinly (1/16 to 1/8 inch) between two sheets of parchment paper.
Instructions
Score dough into desired cracker shapes (squares, rectangles) and prick each cracker several times with a fork.
Instructions
Carefully transfer parchment with dough to a baking sheet. Sprinkle with flaky sea salt if desired.
Instructions
Bake for 12-18 minutes, or until golden brown and crisp. Rotate baking sheet halfway through.
Instructions
Remove from oven and immediately separate crackers along scored lines if needed.
Instructions
Transfer to a wire rack to cool completely. Repeat with remaining dough.
Recipe FAQs
Can I use any gluten-free flour blend for these soda crackers?
My crackers aren't as crispy as I'd like. What went wrong?
How do these homemade gluten free soda crackers compare to store-bought options like Ritz?
Can I make the dough ahead of time?
What's the best way to cut the crackers for even baking?
Why do I need to prick the crackers with a fork?
Crispy Gluten-Free Soda Crackers: Snack Perfection!
Craving classic soda crackers but need them gluten free? Learn how to make crispy, buttery gluten free soda crackers that taste just like your favorite store-bought kind. Perfect for snacking!
Prep Time
20 min
Cook Time
15 min
Total Time
35 min
Cracker Dough
- 2 cups gluten-free all-purpose flour blend (with xanthan gum)
- 1 tsp baking powder
- 1 tsp fine sea salt
- 1/2 cup (1 stick) unsalted butter, very cold and cut into small cubes
- 1/2 cup ice water (plus 1-2 tbsp more if needed)
For Topping (Optional)
- Flaky sea salt
Introduction: The Quest for Perfect Gluten Free Soda Crackers
Finding truly satisfying gluten free soda crackers at the grocery store can feel like an impossible quest. Many commercial options fall short, often crumbly, flavorless, or possessing an odd, gritty texture. I’ve spent years in my kitchen experimenting, trying to replicate that classic, crisp snap and subtle saltiness we all remember from traditional soda crackers. It’s a challenge to achieve that perfect delicate balance without gluten. What I discovered is that making them at home isn’t just possible; it’s incredibly rewarding. This recipe delivers a cracker that stands up to hearty dips, complements a slice of cheese beautifully, and provides that comforting crunch alongside a warm bowl of soup. You gain complete control over the ingredients, ensuring purity and freshness. Plus, the aroma of these baking fills your home with a nostalgic warmth that store-bought simply can’t replicate. Say goodbye to disappointing alternatives and hello to your new go-to snack. This recipe for homemade gluten free soda crackers will change your snack game forever.
Why You’ll Absolutely Love This Gluten Free Cracker Recipe
Here’s the thing, finding truly satisfying gluten-free crackers at the grocery store can feel like a quest. Many options are either too dense, too crumbly, or lack that signature snap. This recipe changes all of that. What I love about this particular approach is how it delivers on texture; you’ll achieve that perfect crisp, flaky bite that’s often elusive in store-bought alternatives. It’s incredibly satisfying to pull a batch of these golden squares from the oven.
Moreover, the simplicity of the ingredients and the straightforward process make this recipe accessible to everyone, even those new to gluten-free baking. You don’t need any fancy equipment or obscure flours. This means you can whip up a batch whenever a craving strikes, without a lengthy shopping trip. Building on this, the versatility of this cracker is remarkable. They are robust enough to hold up to a creamy dip, delicate enough for a light cheese, and sturdy for soup. No longer will you ponder, “are ritz crackers gluten free?” or scrutinize “ritz cracker ingredients” on packaging. You’ll have complete control over every component, ensuring a pure, wholesome snack. The secret is in the careful balance of flours and minimal handling. This also makes them a far more economical choice than repeatedly purchasing specialty “best gf crackers” from the store. You’ll find yourself reaching for these often.
Ingredients Overview: Crafting the Best GF Crackers
Building on this, let’s talk about what actually goes into making these exceptional crackers. In my kitchen, I’ve found that ingredient quality truly shines through in the final product. Understanding each component ensures your gluten free soda crackers achieve that desired crispness and flavor.
First, the gluten-free all-purpose flour blend is paramount. Not all blends are created equal; look for one that specifically includes xanthan gum. Xanthan gum acts as a binder, mimicking the elasticity that gluten provides, which is crucial for preventing crumbly crackers. Without it, your dough can be difficult to work with and the final texture might be too brittle. I always opt for a blend that has a good balance of rice flour, tapioca starch, and potato starch for the best overall texture and taste. This combination helps achieve a delicate yet sturdy cracker.
Next up is cold butter, which is non-negotiable for achieving that signature flakiness. Just like in pie crusts or biscuits, cold butter creates steam pockets as it melts in the oven. These pockets are what give the crackers their airy, layered texture. Using room temperature butter will result in a tougher, less desirable cracker. I always cube my butter and pop it back in the fridge for a few minutes if it starts to soften too much while I’m preparing other ingredients.
Ice water plays a supporting role to the cold butter. It helps maintain the butter’s chill throughout the mixing process, further contributing to those flaky layers. Adding just enough water to bring the dough together, without making it sticky, is the trick. Too much water can make the crackers hard, while too little will make the dough crumbly and difficult to roll.
For a subtle lift and tender crumb, a small amount of baking powder is included. This isn’t about making them puffy like biscuits, but rather contributing to a lighter, more delicate bite. It prevents the crackers from becoming too dense.
Finally, salt is essential for enhancing all the flavors. It balances the richness of the butter and brings out the subtle nutty notes from the flour blend. I prefer a fine sea salt for even distribution. You might also consider a sprinkle of flaky sea salt on top before baking for an extra burst of flavor and visual appeal. While some classic crackers, like certain varieties of Ritz, contain sugar for browning and a slight sweetness, I usually omit it for a more traditional soda cracker profile. This recipe focuses on simple, clean flavors, contrasting with the often more complex ritz cracker ingredients or ingredients in ritz crackers which can include high fructose corn syrup and artificial flavors. You won’t find those here, ensuring these are truly best gf crackers. Knowing the role of each ingredient ensures success with this recipe.
Essential Equipment You’ll Need for Homemade Gluten Free Soda Crackers
In my kitchen, having the right tools makes all the difference, especially when tackling a new baking project. For these homemade gluten free soda crackers, a few essential pieces of equipment will ensure your success. You don’t need a professional setup, just some basic items that most home cooks already possess. The goal is to make the process smooth and enjoyable, leading to that satisfying crunch you crave.
First, a large mixing bowl is indispensable. This provides ample space to combine your dry and wet ingredients without any spills. I always opt for one that’s at least 4 quarts to give me plenty of room to work. Next up, you’ll need something to incorporate the cold butter into your flour mixture. A pastry blender works beautifully for this, creating those pea-sized crumbles that are key to flaky crackers. Alternatively, a food processor can achieve the same result in seconds, pulsing the butter and flour until just combined. This method is particularly useful if your kitchen tends to be warm, as it minimizes handling the dough.
A rolling pin is absolutely crucial for achieving the signature thinness of this recipe. The thinner you roll the dough, the crisper your crackers will be. I prefer a French-style rolling pin without handles for better control, but any type will do. To prevent sticking and make transferring your delicate dough a breeze, parchment paper is your best friend. I always line my baking sheets with it. Speaking of baking sheets, having two on hand allows for continuous baking, which is a real time-saver. Finally, a fork or a cracker docker is essential for pricking the dough; this prevents the crackers from puffing up like pita bread and ensures an even bake. A pizza cutter or a sharp knife will give you clean, uniform cracker shapes, and a wire cooling rack is non-negotiable for achieving ultimate crispness as they cool. Each piece plays a vital role in crafting the best gf crackers.
Step-by-Step Instructions: Making Your Own Gluten Free Soda Crackers
-
In a large mixing bowl, thoroughly whisk together the gluten-free all-purpose flour blend, baking powder, baking soda, and salt until well combined and lump-free.
-
Add the cold, cubed butter to the dry ingredients and, using a pastry blender or your fingertips, quickly cut it into the mixture until it resembles coarse crumbs with some pieces no larger than a small pea.
-
Gradually add the ice water, one tablespoon at a time, mixing with a fork or your hands until the dough just comes together into a shaggy, cohesive mass.
-
Gather the dough into a ball and then gently flatten it into a disc. Wrap the disc tightly in plastic wrap and refrigerate for at least 30 minutes, or up to 2 hours, to allow the gluten-free flours to fully hydrate and the dough to firm up, making it easier to roll.
-
Once chilled, remove the dough from the refrigerator. Place the dough disc between two sheets of parchment paper. Using a rolling pin, roll the dough out as thinly as possible, aiming for about 1/16th of an inch thick; the thinner the dough, the crisper your crackers will be.
-
Carefully remove the top sheet of parchment paper. Using a pizza cutter or a sharp knife, score the dough into desired cracker shapes (squares or rectangles work well) without cutting all the way through. Then, use a fork to prick holes evenly across the entire surface of the dough; this prevents the crackers from puffing up excessively during baking and ensures an even crispness.
-
Bake in the preheated oven for 15-20 minutes, or until the crackers are beautifully golden brown and delightfully crisp, rotating the baking sheets halfway through for even cooking.
-
Carefully transfer the hot crackers to a wire rack and allow them to cool completely to room temperature, which will ensure they achieve their ultimate crispy texture.
Pro Tips & Tricks for the Crispiest Gluten Free Crackers
In my kitchen, achieving that perfect snap in homemade crackers always comes down to a few critical details. Cold ingredients are paramount for flaky textures. I always make sure my butter is straight from the fridge, diced small, and my water is ice-cold. This prevents the butter from melting too quickly into the flour, creating those desirable pockets of steam during baking.
Building on this, the thickness of your dough directly impacts the final crispiness. You want to roll your dough as thin and evenly as possible. I aim for almost paper-thinness; if you can see your countertop faintly through the dough, you’re on the right track. An uneven roll means some crackers will be perfectly crisp while others remain slightly chewy. Use a light dusting of gluten-free flour on your work surface and rolling pin to prevent sticking.
Here’s the thing: pricking the dough with a fork isn’t just for show. This crucial step allows steam to escape during baking. Without it, your crackers will puff up like balloons and won’t bake evenly or achieve that flat, characteristic shape. I prick each cracker square several times, ensuring good air circulation. This detail makes a significant difference in texture.
What I discovered is that oven watching is non-negotiable for crackers. They can transition from beautifully golden to burnt in a matter of seconds. Keep a close eye on them, especially during the last few minutes of baking. Ovens vary, so your exact baking time might differ from the recipe. Look for uniform golden-brown edges as your signal.
The secret is to cool completely on a wire rack before even thinking about tasting them. Warm crackers will feel soft, and you might mistakenly think they aren’t done. As they cool, moisture evaporates, and they firm up, developing their true crisp texture. Patience here is truly a virtue.
A common mistake is overworking the dough, especially with gluten-free flours. While a stand mixer can be helpful for initial mixing, a food processor can really speed up the dough-making process without over-developing the starches. Pulse the ingredients until just combined, forming a shaggy dough, to keep it tender. For more on proper dough handling, check out this guide on the science of gluten-free baking.
Here’s what actually works if your crackers turn out soft: they likely need more baking time or a slightly higher temperature. If they’re too hard, you might have rolled them too thick or over-baked them. Adjust your next batch accordingly for that ideal snap.
Enjoyed this recipe? Share it with a friend or save it to your board for later. Leave a comment below — I love hearing how it turned out!
You May Also Enjoy





You Might Also Love These 🍽️
Recipes picked just for you based on what you’re cooking