Homemade Gluten-Free Licorice: Your Sweet Fix!
Craving gluten free licorice? Learn how to make your own delicious gluten free black licorice from scratch with this easy recipe. Say goodbye to 'do Twizzlers have gluten?' worries!
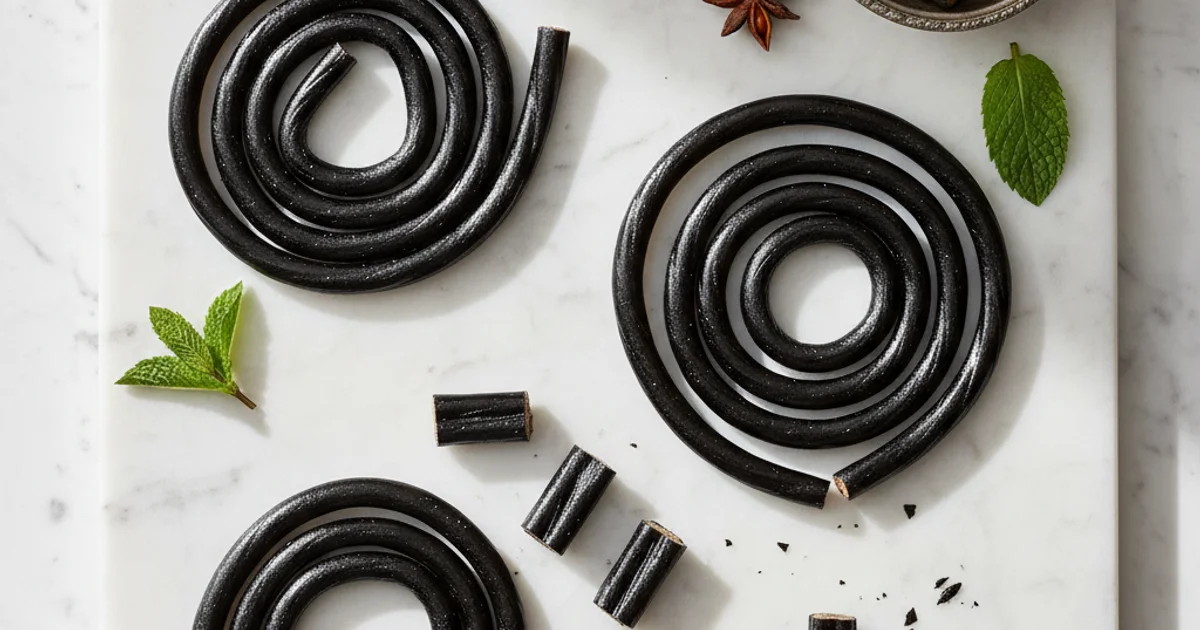
- 1Say Goodbye to Gluten: Why This Homemade Licorice Recipe Matters
- 2Why You’ll Love This Easy Gluten Free Black Licorice Recipe
- 3Unpacking the Ingredients: What Makes Our Gluten Free Licorice Shine
- 4Essential Equipment for Perfect Gluten-Free Licorice Every Time
- 5Step-by-Step Guide: Crafting Your Own Gluten Free Licorice
- 6Pro Tips & Tricks for Superior Gluten-Free Black Licorice
- 7Pro Tips & Tricks for Superior Gluten-Free Black Licorice
Ingredients
Wet Ingredients
- 1 cup (240ml) water
- 1 cup (240g) blackstrap molasses
- 1 cup (200g) granulated sugar
- 2 tbsp (30g) unsalted butter or coconut oil
- 1.5-2 tsp anise extract (or to taste)
Dry Ingredients
- 1/2 cup (60g) gluten-free all-purpose flour blend (with xanthan gum)
- 1/4 cup (30g) cornstarch or arrowroot powder
- 1/2 tsp salt
Instructions
Instructions
Prepare baking surface: Line a large baking sheet with parchment paper or a silicone mat, lightly grease.
Instructions
Combine wet ingredients: In a heavy-bottomed saucepan, whisk together water, molasses, sugar, and butter/coconut oil. Bring to a boil over medium-high heat, stirring until sugar is dissolved.
Instructions
Add dry ingredients: Reduce heat to medium-low. Gradually whisk in the gluten-free flour blend, cornstarch, and salt until smooth and no lumps remain.
Instructions
Cook to temperature: Insert a candy thermometer. Continue to cook, stirring frequently, until the mixture reaches 235-240°F (118-120°C) (soft-ball stage). This may take 15-20 minutes.
Instructions
Remove from heat and flavor: Remove the saucepan from heat. Stir in the anise extract.
Instructions
Cool slightly: Pour the hot mixture onto the prepared baking sheet. Let it cool for about 10-15 minutes, or until it's cool enough to handle but still pliable.
Instructions
Knead the mixture: Lightly grease your hands and knead the mixture on the parchment paper for 5-7 minutes. It will become more elastic and less sticky.
Instructions
Form and cut: Divide the dough into several portions. Roll each portion into a long rope, about 1/4 to 1/2 inch thick. Using a sharp knife or pizza cutter, cut the ropes into desired lengths (e.g., 1-inch pieces).
Instructions
Dry the licorice: Arrange the cut licorice pieces on a clean piece of parchment paper or wire rack. Allow them to air dry at room temperature for 12-24 hours, or until they reach your desired chewiness. Flip occasionally for even drying.
Instructions
Store: Once dried, store in an airtight container at room temperature.
Equipment You'll Need
Here's what I use to make this recipe perfectly every time:
- Heavy-bottomed Saucepan — This is non-negotiable. A thick-bottomed pan distributes heat evenly and prevents the sugar mixture from scorching. Scorched sugar tastes bitter and will ruin the entire batch. → Buy Now
- Whisk — A sturdy whisk is crucial for thoroughly combining the ingredients, especially in the initial stages. You want a smooth, lump-free mixture before it starts to thicken. → Buy Now
- Candy Thermometer — → Buy Now
- Parchment Paper or Silicone Mat — These are vital for a non-stick surface. Once the mixture is cooked, you'll be rolling it out, and sticking is your enemy. Either will make cleanup and handling much easier. → Buy Now
- Rolling Pin — An even thickness is key for consistent cooking and a uniform final product. A good rolling pin will help you achieve this effortlessly. → Buy Now
- Sharp Knife or Pizza Cutter — For clean, precise cuts. A dull knife will drag and tear the licorice, making for messy pieces. A pizza cutter works surprisingly well for long, straight strips. → Buy Now
- Small Offset Spatula (optional but recommended) — This handy tool can help spread the warm licorice mixture evenly onto your prepared surface before rolling. It allows for more control than a regular spatula. → Buy Now
Recipe FAQs
Is licorice naturally gluten free?
Do Twizzlers have gluten?
Are Red Vines gluten free?
What can I use if I don't have anise extract?
Why is my homemade licorice too sticky/hard?
Can I make this recipe sugar-free?
Homemade Gluten-Free Licorice: Your Sweet Fix!
Craving gluten free licorice? Learn how to make your own delicious gluten free black licorice from scratch with this easy recipe. Say goodbye to 'do Twizzlers have gluten?' worries!
Prep Time
15 min
Cook Time
25 min
Total Time
40 min
Wet Ingredients
- 1 cup (240ml) water
- 1 cup (240g) blackstrap molasses
- 1 cup (200g) granulated sugar
- 2 tbsp (30g) unsalted butter or coconut oil
- 1.5-2 tsp anise extract (or to taste)
Dry Ingredients
- 1/2 cup (60g) gluten-free all-purpose flour blend (with xanthan gum)
- 1/4 cup (30g) cornstarch or arrowroot powder
- 1/2 tsp salt
Say Goodbye to Gluten: Why This Homemade Licorice Recipe Matters
Finding genuinely gluten free black licorice in stores can feel like a treasure hunt with no map. Many popular brands, unfortunately, include wheat flour as a binder or filler. This can be incredibly frustrating for anyone with celiac disease or a gluten sensitivity. I remember countless times scrutinizing labels, only to be disappointed.
What I discovered is that many people ask, “Are Red Vines gluten free?” or “Do Twizzlers have gluten?” The answer, sadly, is often no. These iconic candies, while beloved, typically contain wheat. This recipe changes all of that, offering a delightful solution. It empowers you to enjoy a classic candy without worry.
This recipe provides a simple, satisfying way to create your own. You control every ingredient, ensuring it meets your dietary needs. The unique, subtly sweet, and anise-flavored profile of this homemade treat is truly special. You’ll be surprised by how straightforward it is to achieve that distinctive chew and taste.
Building on this, the joy of making something from scratch is immense. Knowing exactly what goes into your food brings peace of mind. This is especially true for those navigating dietary restrictions. You don’t have to miss out on classic sweets anymore. This recipe brings back the simple pleasure of a good piece of licorice.
Why You’ll Love This Easy Gluten Free Black Licorice Recipe
You might be wondering, “Why bother making gluten free licorice at home?” Here’s the thing: store-bought options can be tricky. Many commercial brands, like popular red vines or licorice twists, contain wheat flour as a primary ingredient, making them off-limits for those avoiding gluten. Even black licorice often includes wheat. This recipe bypasses that concern entirely. I always aim for recipes that deliver on taste and safety. This particular recipe captures that deep, unmistakable anise flavor that true licorice lovers crave. You won’t find any compromises on authenticity here.
Building on this, I’ve designed this recipe using simple, accessible ingredients. You likely have many of them in your pantry already. No obscure flours or hard-to-find binders are required. This makes the process much less intimidating, even for beginner candy makers. What I love about this recipe is its flexibility. You can easily adjust the amount of anise extract to suit your preference for a stronger or milder flavor profile. You can also play with the cooking time to achieve a chewier or firmer texture. This customization ensures that the end product is exactly what you envision. Knowing exactly what goes into your treats brings such peace of mind. This homemade version offers a safe and genuinely satisfying way to enjoy your favorite classic candy without any gluten worries. It’s a delightful experience from start to finish.
Unpacking the Ingredients: What Makes Our Gluten Free Licorice Shine
Here’s the thing: crafting the perfect chew and authentic flavor for this recipe starts with understanding each component. I always approach ingredient selection with precision, especially when dealing with gluten-free baking. Every item plays a crucial role in achieving that classic gluten free black licorice texture and taste.
Molasses, particularly blackstrap molasses, is non-negotiable for this recipe. It’s not just about sweetness; it’s the backbone of that deep, complex licorice flavor and rich, dark color. While regular molasses can work in a pinch, blackstrap offers a more intense, slightly bitter note that truly mimics traditional licorice. You’ll notice that lighter molasses varieties, like fancy or mild, won’t deliver the same depth. Trust me on this one; the darker, the better for that authentic profile. This ingredient is key to distinguishing homemade licorice from commercial alternatives, especially when considering concerns like “are red vines gluten free?” and seeking a true licorice experience.
Next up, anise extract or anise oil is where the magic happens for the distinctive licorice aroma and taste. Anise oil is significantly more potent than extract, so adjust quantities carefully. If using oil, start with a very small amount, perhaps half a teaspoon, and add more to taste. Extracts are less concentrated, requiring a higher volume for the same impact. A common mistake is underestimating the power of anise oil, which can quickly overpower the other flavors. The secret is to introduce it gradually, tasting as you go, to hit that sweet spot without it becoming medicinal.
For the structure and chew, we rely on a gluten-free flour blend combined with cornstarch or arrowroot powder. What I discovered is that a pre-mixed gluten-free blend, often containing rice flour, tapioca starch, and potato starch, provides a balanced structure. Using individual flours can lead to a crumbly or gummy texture. If your blend doesn’t include xanthan gum, you’ll need to add a small amount (usually 1/4 to 1/2 teaspoon per cup of flour) to provide elasticity and prevent the licorice from becoming too brittle. This gum acts as a binder, mimicking the properties of gluten. Cornstarch or arrowroot powder further contributes to the chewiness and helps prevent stickiness, ensuring the finished product isn’t a gooey mess.
Sweetness comes from a combination of granulated sugar and sometimes a touch of brown sugar. Granulated sugar provides clean sweetness, while brown sugar adds a subtle caramel note and helps with moisture retention. The key difference is that brown sugar also contributes to a slightly chewier texture due to its molasses content. Water is essential for dissolving the sugars and molasses, creating the syrup base that everything else will be cooked into. It’s the medium that allows all the flavors to meld together.
Finally, butter or coconut oil adds richness and pliability, making the licorice easier to work with and giving it a pleasant mouthfeel. Butter lends a classic, slightly creamy flavor, while coconut oil offers a dairy-free alternative that still contributes to the desired texture. Both help prevent the licorice from becoming too hard or dry. A small amount of salt is crucial for balancing all these sweet and intense flavors. It heightens the anise and molasses, preventing the final product from tasting one-dimensional. In practice, a tiny pinch makes a huge difference in the overall flavor profile of this treat.
Essential Equipment for Perfect Gluten-Free Licorice Every Time
In my kitchen, having the right tools makes all the difference, especially when venturing into candy making. For this recipe, a few key pieces of equipment are absolutely essential to ensure your homemade licorice turns out perfectly. Trust me on this one, trying to eyeball temperatures or mix with a fork will lead to frustration and less-than-ideal results.
- Heavy-bottomed Saucepan: This is non-negotiable. A thick-bottomed pan distributes heat evenly and prevents the sugar mixture from scorching. Scorched sugar tastes bitter and will ruin the entire batch.
- Whisk: A sturdy whisk is crucial for thoroughly combining the ingredients, especially in the initial stages. You want a smooth, lump-free mixture before it starts to thicken.
- Candy Thermometer: Here’s the thing, achieving the correct temperature is paramount for the right texture. This isn’t a “close enough” situation. A reliable candy thermometer ensures you hit the exact soft-ball stage, which is critical for that characteristic chewiness. Without it, your licorice could be too hard or too sticky.
- Parchment Paper or Silicone Mat: These are vital for a non-stick surface. Once the mixture is cooked, you’ll be rolling it out, and sticking is your enemy. Either will make cleanup and handling much easier.
- Rolling Pin: An even thickness is key for consistent cooking and a uniform final product. A good rolling pin will help you achieve this effortlessly.
- Sharp Knife or Pizza Cutter: For clean, precise cuts. A dull knife will drag and tear the licorice, making for messy pieces. A pizza cutter works surprisingly well for long, straight strips.
- Small Offset Spatula (optional but recommended): This handy tool can help spread the warm licorice mixture evenly onto your prepared surface before rolling. It allows for more control than a regular spatula.
Using these specific tools will streamline the process and significantly increase your chances of success with this recipe, ensuring a delightful treat every time.
Step-by-Step Guide: Crafting Your Own Gluten Free Licorice
-
Preparation: Begin by thoroughly greasing two large baking sheets with butter or a neutral oil, then line them with parchment paper, ensuring the paper extends slightly beyond the edges to create a small overhang for easier handling; accurately measure out all of your dry and wet ingredients into separate bowls, setting them aside for later use.
-
Making the Syrup: In a large, heavy-bottomed saucepan, combine the water, molasses, brown sugar, honey, and anise extract, stirring gently over medium heat until the sugar has completely dissolved; bring the mixture to a rolling boil, maintaining this boil for approximately 5 minutes without stirring, allowing the syrup to thicken slightly.
-
Adding Dry Ingredients: Gradually whisk in the gluten-free flour blend, cocoa powder, and salt into the boiling syrup, adding only a few tablespoons at a time to prevent lumps; continue stirring vigorously with a heat-resistant spatula or whisk until the mixture is completely smooth and thick, resembling a very stiff batter.
-
Cook to Temperature: Place the saucepan over medium heat. Stir the mixture constantly with a heat-resistant spatula, ensuring it doesn’t stick to the bottom. Insert a candy thermometer into the mixture, making sure the tip doesn’t touch the bottom of the pan. Continue cooking and stirring until the thermometer registers between 235-240°F (118-120°C), which is the soft-ball stage; this precise temperature is crucial for the licorice’s final texture.
-
Cool and Knead: Once the mixture reaches the desired temperature, immediately remove the saucepan from the heat. Carefully pour the hot licorice mixture onto a lightly oiled heat-resistant surface, such as a silicone mat or a marble slab. Allow the licorice to cool for about 5-10 minutes, or until it’s cool enough to handle but still warm and pliable. Lightly oil your hands and begin to knead the licorice like dough for 5-10 minutes, stretching and folding it until it becomes smooth, shiny, and elastic.
-
Form the Ropes: Divide the kneaded licorice into several smaller, manageable portions. Working with one portion at a time, roll it out evenly into a long, thin rope, approximately 1/4 to 1/2 inch (0.6 to 1.3 cm) in diameter, depending on your desired thickness. Use a sharp, lightly oiled knife or a pastry cutter to cut the ropes into bite-sized pieces, typically 1 to 2 inches (2.5 to 5 cm) long, and then repeat with the remaining licorice.
-
Allow the licorice to air dry at room temperature for at least 24-48 hours, or up to several days, flipping occasionally, until it reaches your desired level of chewiness.
Pro Tips & Tricks for Superior Gluten-Free Black Licorice
Pro Tips & Tricks for Superior Gluten-Free Black Licorice
Achieving that perfect chew and deep flavor in your homemade black licorice requires a few insider secrets. I always approach candy making with patience. Trust me on this one: rushing leads to disappointment. The first and most crucial element is temperature control. You need to hit precisely 245°F (118°C) – the firm ball stage – for the sugars to caramelize correctly and achieve the right consistency. Investing in a reliable candy thermometer is non-negotiable here; eyeballing it simply won’t cut it. Going too low results in a sticky, soft mess, while too high makes it brittle and hard. This precise temperature ensures the sugars reach their optimal structure, forming the characteristic chewiness.
Building on this, once your mixture is off the heat and cooled slightly, kneading is key. Many skip this step, but it’s vital for developing the proper texture. Think of it like dough: kneading helps align the sugar crystals and distribute the flavors evenly. It also prevents your licorice from being crumbly or overly stiff. I always knead for at least 5-7 minutes, until the mass becomes smooth and pliable. You’ll notice that it transforms from a sticky blob into a more manageable, elastic dough. This process also helps incorporate air, giving it a slightly softer bite. Without adequate kneading, your finished product might lack that satisfying chewiness we all crave.
Here’s the thing: even thickness is essential for consistent drying and texture. When rolling out your licorice ropes, aim for uniform dimensions. If some pieces are thicker than others, they will dry at different rates, leading to some being too soft and others too hard. I often use a ruler or even a pasta machine on a low setting to ensure each strand is perfectly even. A common mistake is free-handing it, which often results in irregular shapes and sizes. This uniformity also makes for a more aesthetically pleasing treat.
Humidity plays a significant role in drying time and the final texture of this recipe. Humidity control is often overlooked but can make or break your batch. If your kitchen is very humid, your licorice will take much longer to dry and might remain stickier. Conversely, a very dry environment can cause it to dry out too quickly, becoming brittle. I always try to dry my licorice in a relatively cool, dry spot, away from direct sunlight or excessive moisture. Sometimes, I even use a fan on a low setting to circulate air, which aids in even drying. For more insights on candy making, check out this guide on sugar stages in candy making.
The secret is flavor intensity. Anise extract is the star here, but personal preference varies widely. Start with the recommended amount, but don’t be afraid to adjust it in future batches. Some people prefer a bolder, more intense anise kick, while others like it subtle. You can always add a tiny bit more to the cooled, kneaded dough if you feel it needs it, but remember, a little goes a long way. Too much can become overpowering and medicinal. What I love about this flexibility is that you can truly customize the taste to your liking, making it uniquely yours.
Finally, preventing stickiness is key for enjoyable handling and storage. Once your licorice is dried, a light dusting of powdered sugar or a very fine gluten-free flour, like tapioca starch, works wonders. This creates a barrier that keeps the individual pieces from clinging together. Don’t overdo it, or you’ll alter the flavor profile significantly. Just a light dusting is enough to make them easy to handle and store. This simple step ensures your efforts result in perfectly separated, ready-to-enjoy pieces.
Enjoyed this recipe? Share it with a friend or save it to your board for later. Leave a comment below — I love hearing how it turned out!
You May Also Enjoy





You Might Also Love These 🍽️
Recipes picked just for you based on what you’re cooking