Perfect GF Egg Noodles: Your Homemade Guide
Master homemade gluten-free egg noodle! Ditch store-bought for fresh, tender pasta that's perfect for any dish. Easy, delicious, and naturally GF.
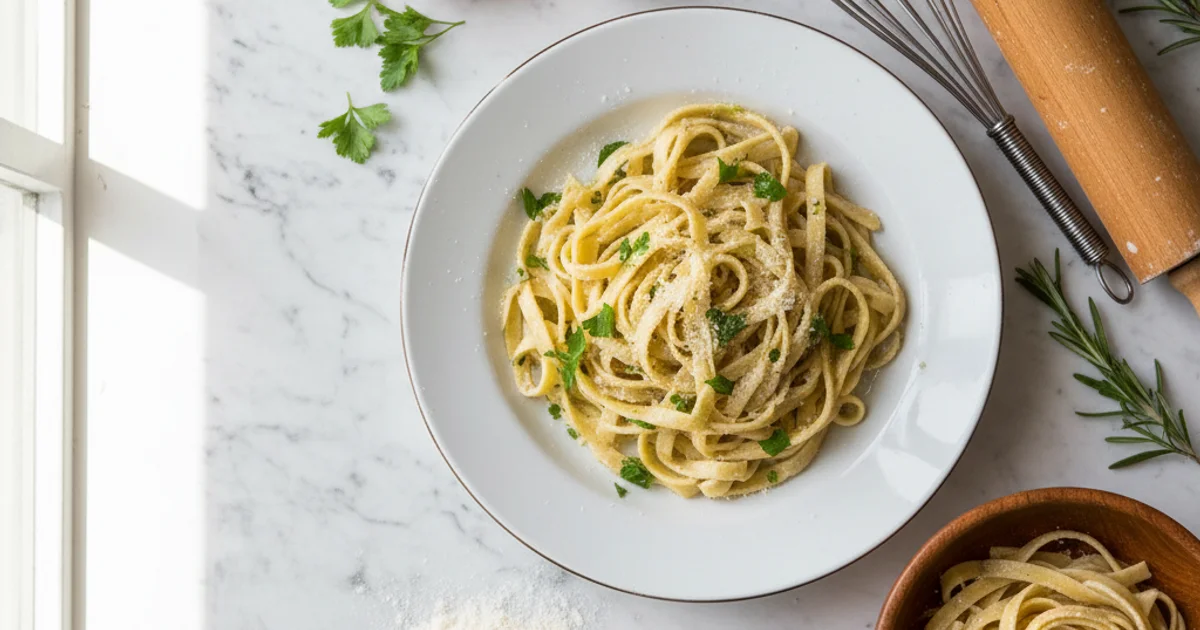
- 1Introduction: Why Homemade Gluten-Free Egg Noodles Are a Game Changer
- 2Why You’ll Absolutely Love This Gluten-Free Egg Noodle Recipe
- 3Ingredients Overview: Crafting Your Perfect Gluten-Free Egg Noodles
- 4Essential Equipment You’ll Need for Homemade GF Pasta
- 5Step-by-Step Instructions: Crafting Your Gluten-Free Egg Noodles
- 6Pro Tips & Tricks for Perfect Gluten-Free Egg Noodles
Ingredients
Gluten-Free Egg Noodles
- 2 cups gluten-free all-purpose flour blend (with xanthan gum)
- 1/2 teaspoon salt
- 3 large eggs
- 1-2 tablespoons water (as needed)
Instructions
Instructions
Whisk together flour and salt in a large bowl.
Instructions
Create a well in the center and add eggs.
Instructions
Gradually incorporate flour into eggs, then knead until a cohesive dough forms, adding water if too dry.
Instructions
Wrap dough in plastic wrap and rest for 30 minutes.
Instructions
Divide dough, roll thinly on a floured surface (or use pasta machine).
Instructions
Cut into desired noodle shapes (fettuccine, pappardelle, etc.).
Instructions
Dust with GF flour and let dry for 15-30 minutes.
Instructions
Cook in boiling salted water for 2-4 minutes until al dente.
Instructions
Drain and serve immediately.
Recipe FAQs
Can I make gluten-free egg noodles without a pasta machine?
What's the best gluten-free flour blend for egg noodles?
Why are my gluten-free egg noodles falling apart?
How long do homemade gluten-free egg noodles need to cook?
Can I make this recipe egg-free?
How do I prevent my gluten-free pasta from becoming gummy?
Perfect GF Egg Noodles: Your Homemade Guide
Master homemade gluten-free egg noodle! Ditch store-bought for fresh, tender pasta that's perfect for any dish. Easy, delicious, and naturally GF.
Prep Time
25 min
Cook Time
5 min
Total Time
30 min
Gluten-Free Egg Noodles
- 2 cups gluten-free all-purpose flour blend (with xanthan gum)
- 1/2 teaspoon salt
- 3 large eggs
- 1-2 tablespoons water (as needed)
Introduction: Why Homemade Gluten-Free Egg Noodles Are a Game Changer
For years, I endured the disappointment of store-bought gluten-free pasta. It often turned mushy, broke apart during cooking, or possessed a tell-tale gritty texture that no amount of sauce could mask. This frustration amplified when searching for a decent gluten-free egg noodle. Most options on the market simply couldn’t replicate that comforting, chewy bite we all associate with traditional egg pasta. The delicate balance of tenderness and resilience seemed impossible to achieve without gluten. I yearned for a noodle that held its shape, absorbed flavors beautifully, and truly elevated my favorite comfort foods.
What I discovered through countless kitchen experiments was that the secret to truly exceptional gluten-free pasta, especially egg noodles, lies in making them yourself. The process might seem daunting at first, but it’s surprisingly straightforward and incredibly rewarding. You gain complete control over the ingredients, ensuring a fresh, wholesome product free from additives. The difference in taste and texture between homemade and store-bought is simply incomparable. Imagine a noodle that’s tender yet firm, with a rich, eggy flavor that complements hearty stews and creamy sauces alike.
Building on this, I found that mastering a homemade gluten-free egg noodle recipe opens up a world of culinary possibilities. No more compromising on texture or flavor in your favorite dishes. These noodles offer a superior eating experience, transforming everyday meals into something special. They are robust enough for long simmering in soups and delicate enough for a quick butter and herb toss. Get ready to banish bland, brittle pasta from your pantry forever and embrace the joy of truly satisfying, homemade noodles.
Why You’ll Absolutely Love This Gluten-Free Egg Noodle Recipe
In my kitchen, I’ve spent years perfecting the art of gluten-free pasta. What I love about this particular recipe is how it transforms simple ingredients into something truly special. You’ll notice the moment you take your first bite that the texture is simply unbeatable. We’re talking about a real al dente experience, a far cry from the often-gummy texture of many store-bought gluten free pasta options. This recipe delivers a satisfying chew that holds up beautifully in any sauce.
Here’s the thing: the rich flavor is another standout quality. The generous use of eggs infuses the noodles with a depth and savory quality that elevates any dish. It’s a flavor profile that complements everything from a simple butter sauce to a robust ragu, making it ideal for a wide range of gluten free pasta dishes. Many home cooks shy away from making pasta from scratch, but I promise you, this recipe is surprisingly easy. It demystifies the process, proving that delicious homemade pasta is accessible even for beginners. You don’t need fancy equipment, just a willingness to get your hands a little floury.
Building on this, the versatility of these noodles is truly remarkable. They are perfect for simmering in a comforting chicken soup, layering into a baked casserole, or serving as the hearty foundation for a rich Bolognese. Forget searching for specific shapes like gluten free spaghetti noodles or gluten free penne pasta; these can be cut to your desired width and length. This adaptability means you can use them in virtually any gluten free pasta meals you can imagine. Finally, this recipe is incredibly customizable. Whether you want to add herbs to the dough or experiment with different gluten-free flour blends, it’s a forgiving base that encourages culinary creativity.
Ingredients Overview: Crafting Your Perfect Gluten-Free Egg Noodles
Here’s the thing: understanding your ingredients is the first step to mastering any recipe, especially when venturing into gluten-free baking. For this recipe, each component plays a vital role in achieving that coveted chewy, tender texture. We aren’t just throwing things into a bowl; every item contributes to the final, delightful result.
The foundation of our dough is a gluten-free all-purpose flour blend. I always recommend a high-quality commercial blend that typically combines several flours and starches. Look for blends containing rice flour, tapioca starch, and potato starch. Rice flour provides structure, while tapioca and potato starches contribute to the dough’s elasticity and tenderness. Using a blend is crucial because single flours, like just rice flour, would result in a brittle dough, far from the pliable texture we seek in gluten free pasta dishes. These blends often include xanthan gum, which is a non-negotiable ingredient in gluten-free baking. Its role is to mimic gluten, providing elasticity and preventing the dough from crumbling. This is why you can’t simply substitute regular wheat flour with a single gluten-free option and expect the same results for gluten free spaghetti noodles or gluten free penne pasta.
Next up, the eggs are truly the stars of these noodles. They bind everything together, providing richness, a beautiful golden color, and crucial elasticity to the dough. Without sufficient eggs, your noodles would lack that signature chewiness. I always use large eggs at room temperature; they incorporate more easily into the flour blend. The fat in the egg yolks also contributes to a smoother dough and a more tender final product, which is essential for perfect gluten free pappardelle.
If your chosen gluten-free flour blend doesn’t already contain it, adding a small amount of xanthan gum separately is essential. This hydrocolloid acts as a binder and thickener, giving the dough the necessary structure and preventing it from falling apart during rolling and cooking. Think of it as the glue that holds your gluten-free egg noodle together. Without it, your efforts might result in a pile of crumbly bits rather than elegant strands.
A pinch of salt is more than just a flavor enhancer here. It helps to strengthen the gluten-free dough structure and balances the richness from the eggs. Don’t skip it; it truly makes a difference in the overall taste profile, especially when paired with a robust gf pasta sauce. Finally, a tiny splash of water (or sometimes I use a touch of milk for extra richness, or even olive oil for pliability) is needed to bring the dough to the right consistency. You’ll notice that the exact amount can vary slightly depending on the humidity and your specific flour blend. The goal is a firm, yet pliable dough that isn’t sticky. This meticulous selection ensures your homemade pasta rivals any traditional version, making for truly satisfying gluten free pasta meals.
Essential Equipment You’ll Need for Homemade GF Pasta
Building on this, having the right tools makes all the difference when creating your own pasta. You don’t need a professional kitchen, but a few key items will simplify the process. I always find that preparation is half the battle when tackling a new recipe.
A large mixing bowl is essential for combining your dry ingredients and then incorporating the wet ones. You’ll want one big enough to handle the dough without making a mess. In my kitchen, I prefer a wide, shallow bowl for easier mixing.
Next, a pastry blender or fork helps incorporate the fats into the flour. While this specific recipe might not use butter, a fork is perfect for gently mixing the initial dry ingredients. This ensures an even distribution before liquids are added.
A good rolling pin is non-negotiable for flattening the dough. If you don’t own one, a clean wine bottle works surprisingly well in a pinch. The goal is a consistently thin sheet of dough for uniform noodles.
For cutting, a sharp knife or pizza cutter will give you clean, precise noodle strips. Dull blades tear the dough, leading to ragged edges. Trust me on this one; a sharp edge makes a huge difference.
A pasta machine is optional but highly recommended. It significantly streamlines the rolling and cutting process, especially for uniform shapes like gluten free pappardelle. While not strictly necessary, it ensures consistent thickness and shape, which is key for even cooking. What I discovered is that a pasta machine can elevate your homemade pasta experience.
Finally, you’ll need a large pot for boiling your noodles. A wide pot allows the noodles to cook without clumping. A slotted spoon or spider is perfect for safely transferring the cooked noodles from the boiling water. To dry your fresh noodles, a baking sheet lined with parchment paper prevents sticking. This simple setup helps create beautiful gluten-free pasta dishes.
Step-by-Step Instructions: Crafting Your Gluten-Free Egg Noodles
-
Prepare the Dough: In a large bowl, whisk together the gluten-free flour blend, xanthan gum (if your blend doesn’t already contain it), and salt until well combined. Create a deep well in the center of the dry ingredients. In a separate small bowl, whisk the eggs and olive oil together. Pour the wet ingredients into the well of the dry ingredients.
-
Knead the Dough: Using a fork or your hands, gradually incorporate the dry ingredients into the wet, mixing until a shaggy dough forms. Turn the dough out onto a lightly floured surface (using gluten-free flour) and gently knead for 3-5 minutes. Unlike traditional wheat dough, you are not aiming to develop gluten; instead, focus on bringing the dough together into a cohesive ball, ensuring all the flour is fully hydrated and the dough is smooth and pliable.
-
Rest the Dough: Form the dough into a ball, flatten it slightly, and wrap it tightly in plastic wrap. Place the wrapped dough in the refrigerator and let it rest for at least 30 minutes, or up to an hour; this resting period allows the flours to fully hydrate, making the dough easier to roll and less prone to tearing.
-
Roll it Out: Lightly dust your clean work surface and the dough ball with additional gluten-free flour to prevent sticking. Using a rolling pin, begin rolling the dough from the center outwards, turning it occasionally to ensure an even thickness. Aim for a very thin sheet, about 1/16th of an inch (1.5mm) for delicate noodles; for thicker, heartier noodles, you can leave it slightly thicker. If using a pasta machine, flatten a portion of the dough into an oblong shape that fits your machine’s widest setting, then pass it through, gradually decreasing the setting until you reach your desired thinness, dusting with gluten-free flour between passes as needed.
-
Cut the Noodles: Once your dough sheet is rolled to the desired thickness, you can cut your noodles. For hand-cutting, lightly dust the sheet with gluten-free flour, then carefully fold it over onto itself two or three times, creating a layered rectangle. Using a sharp knife, cut across the folded dough to your desired width – thin strips for delicate noodles or wider strips for a more substantial bite – then gently unfold the cut noodles immediately to prevent them from sticking together. If using a pasta machine, attach the appropriate cutting attachment for your desired noodle width and carefully feed the dough sheets through to create uniform strands.
-
Dry the Noodles: To prevent your freshly cut noodles from sticking together and to improve their texture when cooked, it’s crucial to dry them slightly. Carefully separate the individual noodle strands and lay them out in a single layer on a lightly floured baking sheet, a clean kitchen towel, or draped over a pasta drying rack. Allow them to air dry at room temperature for at least 15-30 minutes, or up to several hours, until they feel firm and no longer tacky to the touch, turning them occasionally to ensure even drying.
-
Cook the Noodles: Bring a large pot of generously salted water to a rolling boil. Carefully drop the fresh gluten-free noodles into the boiling water, stirring gently to prevent sticking. Cook for 2-4 minutes, or until al dente, as fresh gluten-free pasta cooks much faster than dried pasta.
Pro Tips & Tricks for Perfect Gluten-Free Egg Noodles
Building on this, mastering the nuances of gluten-free dough is an art. One of the most common pitfalls I see home cooks make is over-flouring their dough. Adding too much flour results in a dry, crumbly mass that’s impossible to work with. It will tear easily and yield tough, brittle noodles. Instead, aim for a dough that feels soft and pliable, almost like playdough.
Here’s the thing about gluten-free flours: they absorb liquid differently than wheat flour. This means hydration is key and often requires a delicate touch. If your dough feels too dry and crumbly, add a teaspoon of water at a time. Knead it in fully before adding more. Conversely, if it’s too sticky, dust with a tiny bit more gluten-free flour. You want a dough that pulls away cleanly from your hands and the bowl. Trust me on this one, the feel of the dough is your best guide.
What I discovered after countless batches is that resting time matters immensely. After kneading, wrap your dough tightly in plastic wrap. Let it rest on the counter for at least 30 minutes, or even an hour. This allows the flours to fully hydrate and the dough to relax. You’ll notice that resting makes the dough much easier to roll out. It becomes more elastic and less prone to snapping back.
The secret to truly tender noodles is thinness for tenderness. The thinner you manage to roll your dough, the more delicate the final noodle will be. I aim for almost translucent sheets, especially for dishes where the noodle’s texture is paramount. If you’re using a pasta machine, gradually decrease the settings. For hand-rolling, use consistent, firm pressure. This also helps prevent the noodles from becoming dense.
In practice, preventing sticking is crucial throughout the process. Gluten-free dough can be notorious for sticking to surfaces and itself. Generously dust your work surface, rolling pin, and even the rolled-out sheets with extra gluten-free flour. As you cut the noodles, toss them lightly in more flour. This creates a protective barrier. For extra tips on handling delicate doughs, you might find this guide on pasta dough consistency helpful.
A common mistake is overcrowding the pot when cooking. Always boil in abundant water. Use a large pot filled with plenty of salted water. This ensures the noodles have enough space to move freely and cook evenly. It also prevents them from clumping together. Sufficient water also helps maintain a rolling boil, which is essential for proper cooking.
Finally, remember to cook to al dente. Gluten-free pasta can go from perfectly cooked to gummy very quickly. Start testing your noodles a minute or two before the recommended cooking time. They should be tender but still have a slight bite. Once cooked, drain immediately and serve with your favorite gf pasta sauce.
Enjoyed this recipe? Share it with a friend or save it to your board for later. Leave a comment below — I love hearing how it turned out!
You May Also Enjoy





You Might Also Love These 🍽️
Recipes picked just for you based on what you’re cooking