Your New Favorite Gluten-Free Bars!
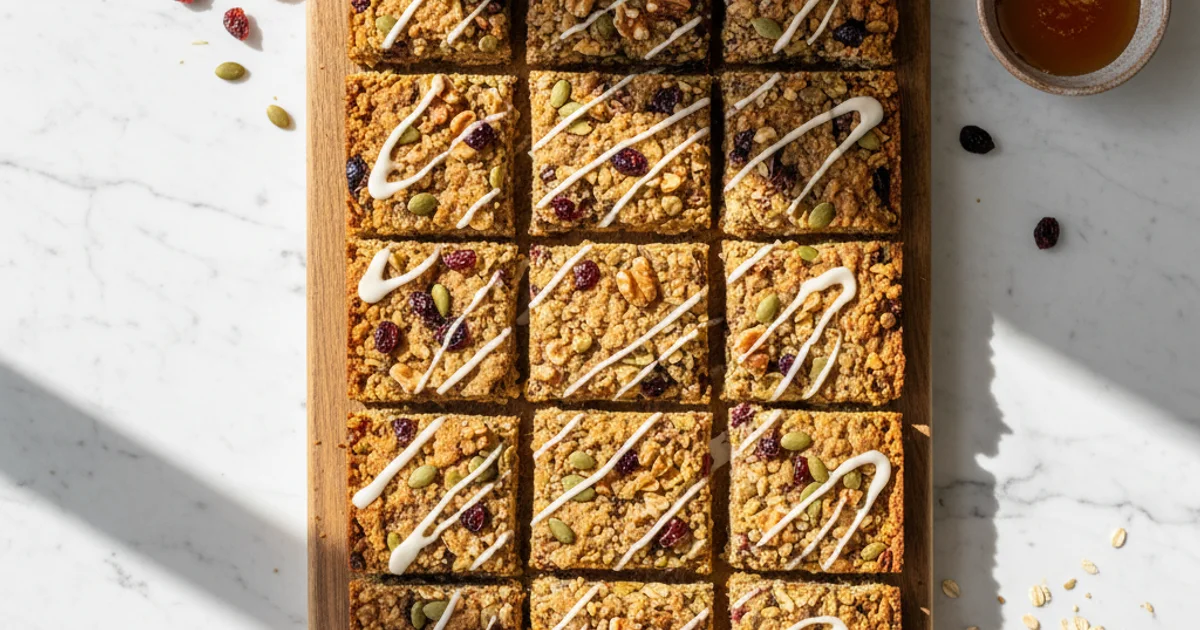
Craving a healthy, homemade snack? Learn how to make the best gluten free bars! Perfect for breakfast or a quick energy boost. Naturally delicious.
- 1Introduction: Why Homemade Gluten Free Bars Are a Game Changer
- 2Why You’ll Love This Gluten Free Bar Recipe
- 3Ingredients Overview: Crafting the Perfect Gluten-Free Snack Bars
- 4Essential Equipment You’ll Need for Homemade Gluten Free Bars
- 5Step-by-Step Instructions: Crafting Your Perfect Gluten Free Snack Bars
- 6Pro Tips & Tricks for the Best Gluten Free Breakfast Bars
Ingredients
Dry Ingredients
- 2 cups certified gluten-free rolled oats
- 1/2 cup chia seeds or ground flaxseed
- 1/4 teaspoon sea salt
- 1/2 cup add-ins (e.g., chocolate chips, chopped nuts, dried cranberries)
Wet Ingredients
- 1/2 cup creamy nut butter (almond, peanut, or sunflower seed)
- 1/2 cup honey or maple syrup
- 1/4 cup melted coconut oil or unsalted butter
- 1 teaspoon vanilla extract
Instructions
Instructions
Preheat oven to 350°F (175°C) and line an 8x8 inch baking pan with parchment paper, leaving an overhang.
Instructions
In a large bowl, combine gluten-free rolled oats, chia seeds (or flaxseed), and sea salt. Stir well.
Instructions
In a microwave-safe bowl or small saucepan, combine nut butter, honey (or maple syrup), and coconut oil. Heat gently until melted and smooth (about 30-60 seconds in microwave or over low heat on stove). Stir in vanilla extract.
Instructions
Pour the wet ingredient mixture into the dry ingredient mixture. Stir until everything is thoroughly combined and the oats are well coated.
Instructions
Fold in your chosen add-ins (chocolate chips, nuts, dried fruit).
Instructions
Transfer the mixture to the prepared baking pan. Using the back of a spoon or your hands (lightly dampened), press the mixture down very firmly and evenly into the pan. This is crucial for bars that hold together.
Instructions
Bake for 20-25 minutes, or until the edges are lightly golden brown. (For no-bake, skip this step and refrigerate for at least 2 hours).
Instructions
Let the bars cool completely in the pan on a wire rack before attempting to cut them. This allows them to firm up properly.
Instructions
Once completely cool, use the parchment paper overhang to lift the slab out of the pan. Cut into 12 bars or squares with a sharp knife.
Recipe FAQs
Do granola bars have gluten?
Can I make these gluten free bars without baking?
How do I make sure my oats are truly gluten-free?
My bars are falling apart, what went wrong?
Can I use steel-cut oats for these bars?
Are these gluten free breakfast bars suitable for kids?
Your New Favorite Gluten-Free Bars!
Craving a healthy, homemade snack? Learn how to make the best gluten free bars! Perfect for breakfast or a quick energy boost. Naturally delicious.
Prep Time
15 min
Cook Time
25 min
Total Time
40 min
Dry Ingredients
- 2 cups certified gluten-free rolled oats
- 1/2 cup chia seeds or ground flaxseed
- 1/4 teaspoon sea salt
- 1/2 cup add-ins (e.g., chocolate chips, chopped nuts, dried cranberries)
Wet Ingredients
- 1/2 cup creamy nut butter (almond, peanut, or sunflower seed)
- 1/2 cup honey or maple syrup
- 1/4 cup melted coconut oil or unsalted butter
- 1 teaspoon vanilla extract
Introduction: Why Homemade Gluten Free Bars Are a Game Changer
Finding truly satisfying and wholesome gluten-free snacks in the supermarket can feel like a quest, can’t it? So often, I’ve picked up a package, only to find a long list of unpronounceable ingredients, hidden sugars, or an eye-watering price tag. It’s a common frustration for anyone navigating dietary restrictions or simply seeking cleaner eating options. What I discovered is that many commercial gluten-free products sacrifice nutrition and natural flavors for shelf stability, leaving you with a less-than-stellar experience. This struggle often leads to a pantry full of disappointments and a lighter wallet.
Here’s the thing: you don’t have to compromise on taste, health, or your budget when it comes to wholesome treats. That’s precisely why I started experimenting in my own kitchen, determined to create something better. My goal was to develop a recipe that was not only genuinely delicious but also incredibly simple to make, using ingredients you can actually recognize. This recipe for homemade gluten free bars offers the perfect solution, providing a customizable, budget-friendly option that blows store-bought versions out of the water. They are versatile enough for a quick breakfast, a midday snack, or even a healthier dessert, proving that homemade truly is best. You’ll find that crafting these treats from scratch gives you complete control over what goes into your body, ensuring every bite is packed with goodness and flavor. This approach transforms snack time into a delightful, guilt-free experience.
Why You’ll Love This Gluten Free Bar Recipe
Here’s the thing: crafting your own snacks offers unparalleled control and satisfaction. This recipe stands out because it uses readily available, natural ingredients, ensuring a wholesome treat without any mystery additives. You won’t find yourself hunting for obscure flours or binders; the magic happens with simple pantry staples. I always prioritize recipes that deliver maximum flavor with minimal fuss, and this one truly excels.
Building on this, the preparation time is remarkably short. From mixing bowl to oven, you’re looking at a quick process, making this an ideal option for those hectic weekdays or when unexpected hunger strikes. What I love about this is how effortlessly it fits into a busy lifestyle, providing a homemade option that genuinely competes with convenience foods. It’s a fantastic alternative to store-bought options, especially when considering gluten free breakfast bars.
Worth noting here, this recipe is incredibly adaptable. Whether you’re a fan of nuts, seeds, dried fruit, or even a hint of chocolate, the base welcomes experimentation. This flexibility means you can tailor each batch to your current cravings or dietary requirements. The secret is understanding the core structure, then letting your creativity take over. Plus, making your own bars is significantly more economical than purchasing pre-packaged gluten free snack bars, which often come with a premium price tag. You’ll notice that the cost savings add up quickly, especially if these become a regular fixture in your snack rotation. This recipe definitively answers the question, “do granola have gluten?” by providing a delicious, safe alternative.
Ingredients Overview: Crafting the Perfect Gluten-Free Snack Bars
Here’s the thing, every ingredient in this recipe plays a crucial role. Understanding each component helps you achieve that perfect texture and flavor. I always choose ingredients carefully for both taste and function.
Let’s start with the foundation: gluten-free rolled oats. These are non-negotiable for our gluten-free snack bars. I specifically call for rolled oats because their larger, flatter flakes provide a chewier texture. Instant oats, while convenient, can make the bars too mushy. It’s absolutely vital to ensure your oats are certified gluten-free. While oats are naturally gluten-free, they are often processed in facilities that also handle wheat, barley, and rye, leading to cross-contamination. Look for a clear “certified gluten-free” label on the packaging to avoid any issues. This attention to detail ensures our bars are truly safe for those with sensitivities.
Next up, we have our binder and flavor powerhouse: nut butter. I typically opt for natural almond butter or peanut butter, but cashew butter also works beautifully. The choice impacts the final flavor profile significantly. Almond butter offers a milder, slightly sweet note, while peanut butter brings a more robust, classic taste. Whichever you choose, ensure it’s natural, meaning the only ingredients are nuts and maybe a touch of salt. Avoid varieties with added sugars or oils, as these can alter the consistency and sweetness of the bars. The fat content in nut butter is essential for binding everything together and contributing to a satisfying chewiness.
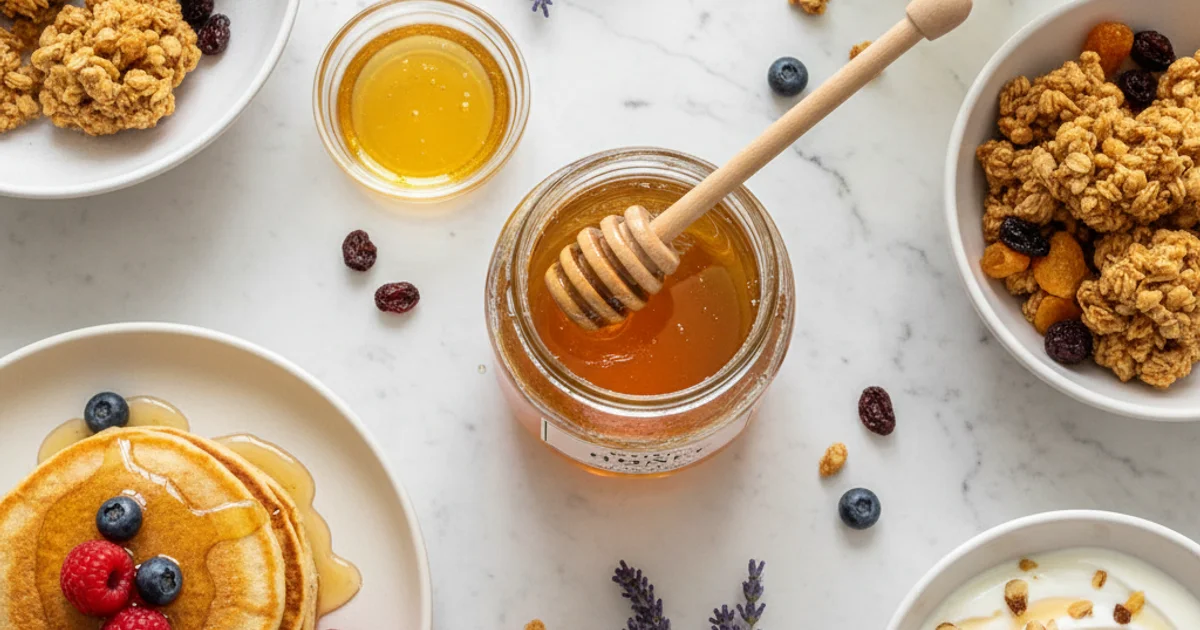
For sweetness and additional binding, we rely on a natural sweetener. My go-to options are pure maple syrup or honey. Both provide a lovely, complex sweetness that complements the other ingredients. Maple syrup offers a slightly richer, more nuanced flavor, while honey adds its distinctive floral notes. You can use either interchangeably, depending on your preference and what you have on hand. These liquid sweeteners are key to creating a cohesive mixture that holds its shape once chilled. They also contribute to the overall moisture content, preventing dry, crumbly bars.
Coconut oil is another essential component for moisture and structure. When melted, it helps bind the ingredients, and as it chills, it solidifies, making the bars firm. You can also use unsalted butter if you prefer, but coconut oil offers a slightly lighter, tropical note. The key is to melt it gently before incorporating it into the mixture. This ensures even distribution and prevents lumps. The amount used is crucial for achieving that perfect balance between firm and chewy.
To boost nutrition and enhance binding, I often add chia seeds or ground flax seeds. These tiny powerhouses absorb moisture and create a gel-like consistency, further helping to hold our bars together. They also pack a punch of omega-3 fatty acids and fiber. You can use either, or a combination of both. I find that a tablespoon or two makes a noticeable difference in the bar’s texture and nutritional profile without overpowering the flavor.
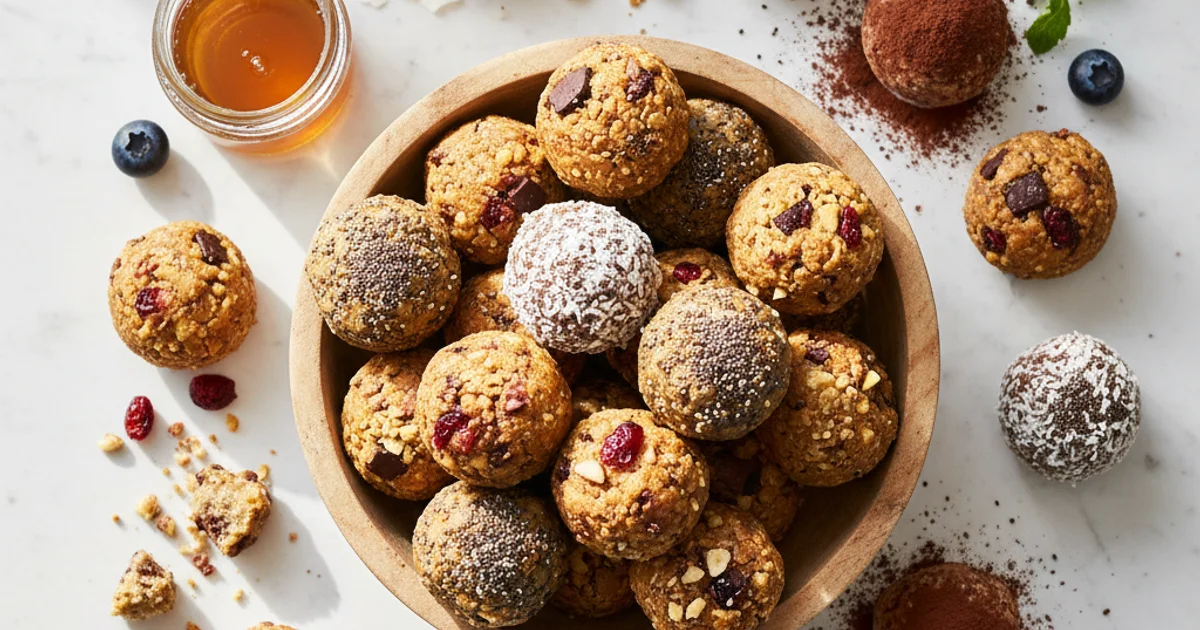
Finally, we get to the fun part: mix-ins. This is where you can truly personalize your gluten free breakfast bars. My favorites include mini chocolate chips (always check for a gluten-free label if you’re strict), chopped dried fruit like cranberries or apricots, and various nuts or seeds such as pumpkin seeds or chopped walnuts. These additions provide texture, bursts of flavor, and extra nutrients. When adding chocolate chips, I prefer mini ones as they distribute more evenly throughout the mixture. Dried fruit adds natural sweetness and chewiness, while nuts and seeds offer a satisfying crunch. Remember to use certified gluten-free options for any candies or processed mix-ins.
Essential Equipment You’ll Need for Homemade Gluten Free Bars
Here’s the thing: having the right tools makes all the difference in the kitchen. I always say, a well-equipped cook is a happy cook. For this recipe, you don’t need anything fancy, just a few basics that you likely already own. Gathering everything beforehand makes the process smooth and enjoyable.
First up, you’ll need a 9x13 inch baking pan. This size is ideal for achieving a standard bar thickness, ensuring they’re substantial enough without being overly dense. If you prefer thicker bars, an 8x8 inch pan works beautifully, though you might need to adjust baking time slightly. Using a smaller pan will result in a more compact, almost brownie-like consistency, which some people absolutely love for a richer treat. A common mistake is using a pan that’s too large, leading to thin, brittle bars that crumble easily, which is especially disappointing when making something as satisfying as these gluten free breakfast bars.
Next, parchment paper is your best friend. Trust me on this one; lining your pan with parchment paper, leaving an overhang on the sides, makes removing the cooled bars incredibly easy. It prevents sticking and simplifies cleanup, saving you precious time. Trying to pry sticky bars out of a pan is no fun for anyone. This simple step ensures your beautiful creation lifts out cleanly, ready for slicing.
You’ll also need a large mixing bowl. This provides ample space to combine all your dry and wet ingredients without making a mess. A sturdy bowl is best, as you’ll be doing some serious stirring. In my kitchen, I reach for my largest stainless steel bowl, as it accommodates everything comfortably.
For melting your wet ingredients, a saucepan is perfect. Alternatively, a microwave-safe bowl can be used for convenience. The trick is to melt everything gently over low heat or in short bursts in the microwave, ensuring it’s just melted and combined, not boiling. This gentle approach prevents scorching and keeps the mixture smooth.
A spatula or sturdy spoon is essential for mixing and, crucially, for pressing the mixture firmly into the pan. You want a tool that can handle a thick, sticky consistency. I always use a silicone spatula; its flexibility and durability are unmatched for this task.
Of course, measuring cups and spoons are non-negotiable. Accuracy is absolutely key in baking, even for something seemingly forgiving like these gluten free snack bars. Precise measurements ensure the right texture and sweetness balance.
Finally, a wire cooling rack is important for allowing the bars to cool completely and set properly. This air circulation prevents condensation, which can make the bottom of your bars soggy. Patience during this cooling phase is rewarded with perfectly firm bars.
Step-by-Step Instructions: Crafting Your Perfect Gluten Free Snack Bars
-
Prep Your Pan: Line an 8x8 inch baking pan with parchment paper, ensuring there is an overhang on two sides to easily lift the bars out later.
-
Melt Wet Ingredients: In a medium saucepan over low heat, combine the nut butter, maple syrup (or other liquid sweetener), and coconut oil, stirring constantly until the mixture is smooth and fully melted.
-
Combine Dry Ingredients: In a large mixing bowl, whisk together the gluten-free rolled oats, chia seeds (or other seeds), and salt until evenly distributed.
-
Combine Wet and Dry Ingredients: Pour the wet ingredient mixture into the bowl with the dry ingredients. Stir everything together thoroughly with a spatula or wooden spoon until no dry streaks remain and a cohesive dough forms.
-
Fold in Your Favorites: Gently fold in your chosen mix-ins, such as chocolate chips, chopped dried fruit, and nuts, until they are evenly distributed throughout the dough.
-
Press into Prepared Pan: Transfer the mixture to the prepared baking pan. Using the back of a spoon or your hands, press the mixture down firmly and evenly into the pan, ensuring it is well-compacted from edge to edge for optimal cohesion and a sturdy bar.
-
Chill (No-Bake) or Bake (Baked Version): For no-bake bars, transfer the pan to the refrigerator and chill for at least 2 hours, or until firm. If baking, preheat your oven to 350°F (175°C) and bake for 20-25 minutes, or until the edges are golden brown and a toothpick inserted into the center comes out clean.
-
Cool Completely: Whether chilled or baked, allow the bars to cool completely in the pan on a wire rack before attempting to cut them. This is crucial for achieving clean, firm bars that won’t crumble.
-
Cut and Serve: Once thoroughly cooled, use a sharp, warm knife (run it under hot water and wipe it dry) to cut the bars into your desired shapes and sizes. For the cleanest cuts, wipe the knife clean between each slice.
Pro Tips & Tricks for the Best Gluten Free Breakfast Bars
Here’s the thing about making gluten free breakfast bars: small details make a big difference. I always aim for that perfect balance of chewy and firm. What I discovered is that a few overlooked steps can lead to crumbly bars.
- Firm Pressing is Key: Trust me on this one, pressing the mixture firmly into the pan is non-negotiable. Use the back of a spoon or a flat-bottomed glass. This compression helps the ingredients bind together, preventing your bars from falling apart. It creates a dense, satisfying texture that holds up well.
- Don’t Rush the Cooling: Patience truly is a virtue here. Allowing the bars to cool completely, preferably in the refrigerator, solidifies the fats and binders. Cutting them too soon results in a sticky, messy crumble. You’ll notice that the texture becomes much more stable after a good chill.
- Adjust Sweetness to Taste: Every nut butter and sweetener varies in intensity. Before pressing the mixture, take a tiny taste. If you prefer a less sweet treat, reduce the maple syrup slightly. Conversely, a touch more can satisfy a sweeter craving.
- Toasting Oats (Optional, but Recommended): For an extra layer of nutty depth, lightly toast your gluten-free rolled oats before mixing. Spread them on a baking sheet and bake at 300°F (150°C) for 8-10 minutes. This simple step amplifies their flavor profile. It brings out a richer, more complex taste that elevates the entire bar.
- Greasing Parchment Paper: While parchment paper prevents sticking, a light spray of cooking oil or a thin smear of coconut oil on top of it can be beneficial. This ensures the bars lift out effortlessly. It’s especially helpful if your mixture is particularly sticky.
- Clean Cuts for Pretty Bars: For neat, professional-looking slices, use a sharp knife warmed under hot water. Wipe it dry between each cut. This technique melts through the sticky layers, resulting in clean edges.
- Ingredient Quality Matters: The quality of your nut butter and oats significantly impacts the final product. Opt for natural, unsweetened nut butters without added oils or sugars. High-quality oats provide better texture and flavor. For more on choosing quality ingredients, check out this guide on understanding food labels.
- Avoiding Over-Mixing: Once the wet and dry ingredients are just combined, stop mixing. Over-mixing can develop gluten in regular recipes, but even with gluten-free oats, it can lead to a tougher texture. Gentle folding maintains a tender crumb.
- Flavor Enhancers: A pinch of sea salt balances the sweetness beautifully. A dash of vanilla extract or almond extract can also add complexity. These small additions brighten the overall taste of your gluten free snack bars.
Enjoyed this recipe? Share it with a friend or save it to your board for later. Leave a comment below — I love hearing how it turned out!
You May Also Enjoy





You Might Also Love These 🍽️
Recipes picked just for you based on what you’re cooking