Baking Without Coconut Oil: GF Cookies & More!
Explore the best substitutes for coconut oil in baking, especially for delicious gluten-free cookies! Learn what can replace coconut oil effectively.
- 1Introduction: Navigating the World of Baking Without Coconut Oil
- 2Why You’ll Love This Recipe: Delicious & Adaptable Gluten-Free Cookies
- 3Ingredients Overview: Crafting the Perfect Cookie Dough (Even Without Coconut Oil!)
- 4Essential Equipment You’ll Need for Baking Success
- 5Step-by-Step Instructions: Mastering Your Gluten-Free Cookies
- 6Pro Tips & Tricks for Perfect Gluten-Free & Coconut-Free Baking
Ingredients
Dry Ingredients
- 2 ¼ cups (270g) Gluten-Free All-Purpose Flour Blend (with xanthan gum)
- 1 tsp Baking Soda
- ½ tsp Salt
Wet Ingredients
- ½ cup (113g) Unsalted Butter, softened (or vegan butter/shortening, see notes for other substitutes)
- ¾ cup (150g) Granulated Sugar
- ¾ cup (160g) Packed Light Brown Sugar
- 2 large Eggs (or 2 flax eggs for egg-free)
- 1 tsp Vanilla Extract
Add-ins (Optional)
- 1 cup Chocolate Chips
- ½ cup Chopped Nuts
Instructions
Instructions
Preheat oven to 375°F (190°C). Line baking sheets with parchment paper.
Instructions
In a medium bowl, whisk together gluten-free flour blend, baking soda, and salt. Set aside.
Instructions
In a large bowl, cream softened butter (or chosen substitute) and both sugars until light and fluffy (about 2-3 minutes).
Instructions
Beat in eggs (or flax eggs) one at a time, then stir in vanilla extract.
Instructions
Gradually add the dry ingredients to the wet ingredients, mixing on low speed until just combined. Do not overmix.
Instructions
Fold in chocolate chips and nuts, if using.
Instructions
Scoop rounded tablespoons of dough onto prepared baking sheets, about 2 inches apart.
Instructions
Bake for 10-12 minutes, or until edges are golden brown and centers are set. Baking time may vary slightly with different fat substitutes.
Instructions
Let cookies cool on the baking sheet for 5 minutes before transferring to a wire rack to cool completely.
Equipment You'll Need
Here's what I use to make this recipe perfectly every time:
- Large and Medium Mixing Bowls — Essential for combining wet and dry ingredients separately, then bringing them together. → Buy Now
- Electric Mixer (Stand or Hand-Held) or Sturdy Whisk — Crucial for creaming fats and sugars, incorporating air, and ensuring a smooth, cohesive dough. → Buy Now
- Measuring Cups and Spoons — Accuracy is paramount in baking, especially with gluten-free recipes. → Buy Now
- Rubber Spatula — Perfect for scraping down the sides of bowls, ensuring all ingredients are fully incorporated. → Buy Now
- Light-Colored Baking Sheets — Promote even heat distribution, preventing burnt bottoms on your cookies. → Buy Now
- Parchment Paper or Silicone Baking Mats — Prevents sticking and makes for easy cleanup after baking these delightful treats. → Buy Now
- Cooling Rack — Allows air to circulate around the cookies, preventing them from becoming soggy as they cool. → Buy Now
- Cookie Scoop (1.5-2 tablespoon capacity) — Guarantees uniform cookie size for consistent baking and appearance. → Buy Now
- Optional: Kitchen Scale — For ultimate precision, especially when measuring gluten-free flours, a scale is a baker's best friend. It helps maintain the delicate balance needed for a perfect texture, especially if you're aiming for crispy coconut cookies. → Buy Now
Recipe FAQs
What is the best all-around substitute for coconut oil in baking?
Can I use olive oil or avocado oil instead of coconut oil?
How do I prevent my cookie dough from being 'very sticky' when using liquid substitutes?
Are these 'tates gluten free cookies' truly gluten-free without coconut?
What's a good 'gluten free egg free' substitute for this recipe?
Will using a substitute change the 'crispy coconut cookies' texture?
Baking Without Coconut Oil: GF Cookies & More!
Explore the best substitutes for coconut oil in baking, especially for delicious gluten-free cookies! Learn what can replace coconut oil effectively.
Prep Time
15 min
Cook Time
12 min
Total Time
27 min
Dry Ingredients
- 2 ¼ cups (270g) Gluten-Free All-Purpose Flour Blend (with xanthan gum)
- 1 tsp Baking Soda
- ½ tsp Salt
Wet Ingredients
- ½ cup (113g) Unsalted Butter, softened (or vegan butter/shortening, see notes for other substitutes)
- ¾ cup (150g) Granulated Sugar
- ¾ cup (160g) Packed Light Brown Sugar
- 2 large Eggs (or 2 flax eggs for egg-free)
- 1 tsp Vanilla Extract
Add-ins (Optional)
- 1 cup Chocolate Chips
- ½ cup Chopped Nuts
Introduction: Navigating the World of Baking Without Coconut Oil
Finding reliable substitutes for coconut oil can feel like a culinary quest, especially when you’re navigating specific dietary needs or simply don’t enjoy its distinct flavor. I’ve been there, staring at a recipe calling for it, knowing full well my family either has an allergy or a strong aversion to coconut. Over my decade in the kitchen, I’ve seen coconut oil rise in popularity for its perceived health benefits and unique properties in baking. However, its strong flavor can sometimes overpower delicate ingredients, and for those with allergies, it’s simply off-limits. What I discovered is that a world of fantastic alternatives exists, capable of delivering the same moisture, texture, and structure without compromise. This isn’t just about avoiding an ingredient; it’s about opening up new possibilities for delicious, inclusive baking. This article dives deep into those possibilities, focusing on practical, effective swaps that maintain the integrity of your recipes. We’ll explore options that ensure your baked goods, like our upcoming crispy gluten-free cookies, achieve that perfect golden-brown edge and satisfying chew, all without a trace of coconut. My goal is to empower you to confidently adapt any recipe, turning potential dietary roadblocks into delightful culinary detours. You’ll learn how to choose the right replacement, ensuring your treats are not only safe but also incredibly tasty.
Why You’ll Love This Recipe: Delicious & Adaptable Gluten-Free Cookies
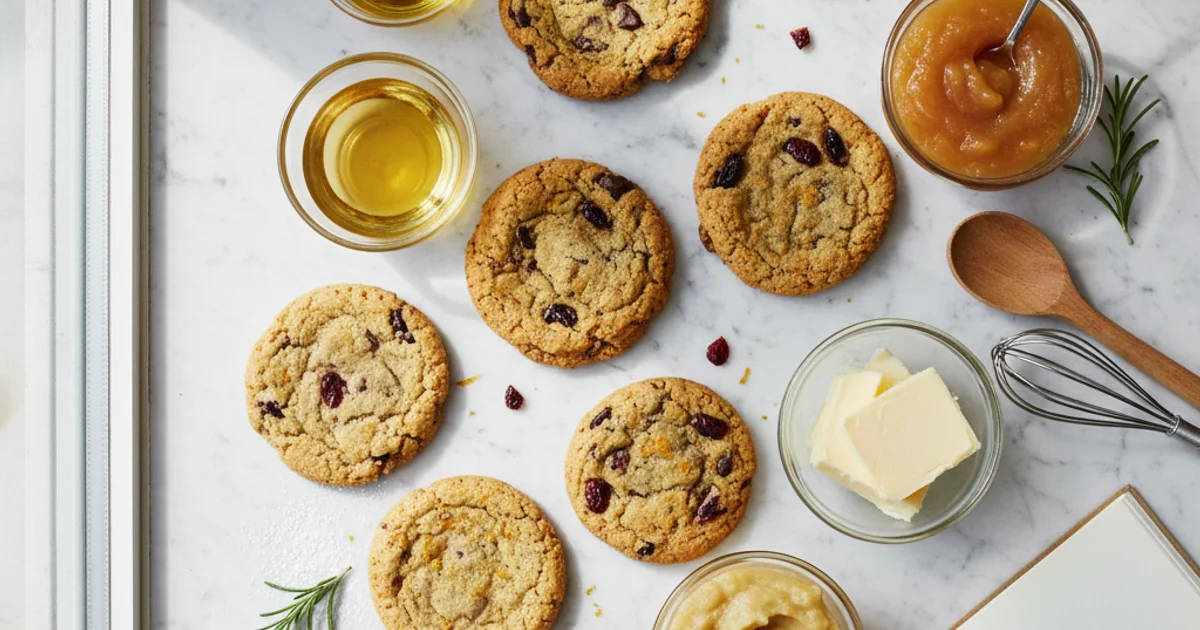
Here’s the thing: you’re looking for a cookie recipe that truly delivers, especially when navigating dietary needs. What I love about this particular recipe is its incredible adaptability. It’s not just a cookie; it’s a masterclass in how to successfully use substitutes for coconut oil without compromising on texture or flavor. You’ll notice that these cookies still achieve that desirable crispness, reminiscent of crispy coconut cookies, but without any actual coconut. This makes them a fantastic option for anyone with allergies or aversions.
Building on this, these cookies are naturally gluten-free and delicious, offering a satisfying crunch that makes them a perfect stand-in for popular brands like Tate’s gluten-free cookies. I always aim for recipes that are both inclusive and genuinely enjoyable. The trick here is in the thoughtful combination of flours and binders, ensuring a stable yet tender crumb. Furthermore, this recipe is incredibly flexible for those needing gluten-free egg-free options; simple swaps turn this into a treat for almost everyone. In my kitchen, I’ve experimented extensively to ensure these cookies come out perfectly every time. This recipe is designed to be straightforward, making it achievable for bakers of all skill levels. You won’t be left with cookie dough very sticky or difficult to handle. It proves that delicious, dietary-friendly baking doesn’t have to be complicated.
Ingredients Overview: Crafting the Perfect Cookie Dough (Even Without Coconut Oil!)
Navigating the world of gluten-free baking requires a deep understanding of each ingredient’s role. Here’s the thing: when you’re looking for an alternative to coconut oil, understanding the function of fat is paramount. This section breaks down every component in our gluten-free cookie recipe, highlighting how each contributes to the final texture and flavor, especially when making adjustments.
Gluten-Free Flour Blend: The foundation of these cookies is a well-balanced gluten-free flour blend. I always recommend using a commercial blend that contains a mix of starchy and protein-rich flours. For instance, a combination of rice flour, almond flour, and tapioca starch provides both structure and a delicate crumb. Using a single flour, like only rice flour, can result in a gritty texture, while too much tapioca starch can make the cookie gummy. This careful balance ensures your gluten-free cookies aren’t crumbly or tough. Worth noting here, while coconut itself is gluten-free, we are focusing on alternatives to its oil form in this recipe.
Fat Alternatives (The Stars!): This is where we truly shine, exploring what can replace coconut oil to achieve perfect cookies. The choice of fat significantly impacts texture, spread, and flavor.
- Unsalted Butter: My go-to for a rich, classic cookie flavor and tender crumb. It creates a crisp exterior and a chewy interior.
- Vegan Butter: An excellent plant-based option that mimics butter’s properties. Look for brands that are solid at room temperature for best results.
- Applesauce or Mashed Banana: These are fantastic for reducing fat content while adding moisture. However, they can make the cookies softer and less crisp, so adjust other liquid ingredients accordingly.
- Avocado Oil: A neutral-flavored oil that works well in baking. It contributes to a softer, chewier cookie and is great for maintaining a delicate flavor profile.
- Olive Oil: While generally not recommended for sweet baking due to its distinct flavor, a very light, mild olive oil can be used in some recipes. It will impart a slight fruity note.
- Vegetable Shortening: This provides a very tender, soft cookie with minimal spread. It’s a solid choice if you want to avoid butter and keep the cookies very soft.
Each alternative brings its own unique characteristics. For instance, butter will yield a cookie with golden brown edges, while applesauce will result in a paler, cake-like texture. In my kitchen, I often experiment with half butter and half applesauce for a balance of flavor and reduced fat.
Sweeteners: The type of sweetener affects both flavor and texture. Granulated sugar contributes to spread and crispness, creating those satisfyingly thin edges. Brown sugar, with its molasses content, adds moisture and chewiness, resulting in a softer cookie. What I discovered is that using a combination of both often yields the best results – a cookie that’s both crisp and chewy. For those preferring alternatives, maple syrup can work, but it adds liquid, so other liquid ingredients might need slight reduction.
Leavening Agents: Both baking soda and baking powder play crucial roles. Baking soda reacts with acidic ingredients (like brown sugar or buttermilk if used) to promote spread and a tender texture. Baking powder provides lift and a lighter crumb. The secret is to use fresh leavening agents; old ones can lead to flat, dense cookies.
Flavor Boosters: Simple additions like vanilla extract elevate the overall taste. A pinch of salt is vital; it balances the sweetness and enhances all other flavors, preventing the cookies from tasting bland. Optional spices such as cinnamon or nutmeg can add warmth and complexity, especially in fall-themed coconut wafers or coconut crisp cookies.
Binders/Moisture: Eggs are crucial for structure, binding the ingredients, and adding moisture. They prevent the cookies from crumbling. For gluten-free egg-free options, I often use flax eggs (1 tablespoon ground flaxseed mixed with 3 tablespoons water, rested for 5 minutes) or chia seeds to make chia cookies. These alternatives work surprisingly well, though they might slightly alter the final texture. If your cookie dough feels very sticky after adding these, a little extra flour (a tablespoon at a time) can help.
Add-ins: This is where you can truly personalize your cookies. Chocolate chips (dark, milk, or white), chopped nuts (pecans, walnuts, almonds), or dried fruit (cranberries, raisins) add texture and bursts of flavor. I always fold these in gently at the end to avoid overmixing.
Essential Equipment You’ll Need for Baking Success
In my kitchen, having the right tools makes all the difference for a smooth baking experience. Trying to bake without essential equipment can lead to frustration and inconsistent results. This is especially true when working with gluten-free flours and alternative fats, where precision truly matters.
Here’s the thing: you don’t need a professional kitchen setup, but a few key items will elevate your baking game. I always tell new bakers that investing in good quality, basic tools pays off tenfold. They ensure even baking, proper mixing, and make cleanup so much easier. Trust me on this one; a well-equipped kitchen makes baking a joy, not a chore.
What I discovered is that many common baking issues, like unevenly baked cookies or dough that’s hard to handle, often stem from not having the correct tools. For instance, using dark baking sheets can cause the bottoms of your cookies to burn before the tops are done. Similarly, trying to eyeball measurements for gluten-free flours can drastically alter the final texture of your crispy gluten-free cookies.
To achieve those perfect, uniformly shaped cookies, a cookie scoop is invaluable. It ensures each cookie bakes at the same rate, preventing some from being overdone while others are still raw. For ingredients like alternative fats, proper mixing is crucial to incorporate air and create a tender crumb. This is where a good electric mixer or a sturdy whisk comes into play. You’ll notice that having the right tools on hand streamlines the entire process, allowing you to focus on the fun part: baking delicious treats.
- Large and Medium Mixing Bowls: Essential for combining wet and dry ingredients separately, then bringing them together.
- Electric Mixer (Stand or Hand-Held) or Sturdy Whisk: Crucial for creaming fats and sugars, incorporating air, and ensuring a smooth, cohesive dough.
- Measuring Cups and Spoons: Accuracy is paramount in baking, especially with gluten-free recipes.
- Rubber Spatula: Perfect for scraping down the sides of bowls, ensuring all ingredients are fully incorporated.
- Light-Colored Baking Sheets: Promote even heat distribution, preventing burnt bottoms on your cookies.
- Parchment Paper or Silicone Baking Mats: Prevents sticking and makes for easy cleanup after baking these delightful treats.
- Cooling Rack: Allows air to circulate around the cookies, preventing them from becoming soggy as they cool.
- Cookie Scoop (1.5-2 tablespoon capacity): Guarantees uniform cookie size for consistent baking and appearance.
- Optional: Kitchen Scale: For ultimate precision, especially when measuring gluten-free flours, a scale is a baker’s best friend. It helps maintain the delicate balance needed for a perfect texture, especially if you’re aiming for crispy coconut cookies.
Step-by-Step Instructions: Mastering Your Gluten-Free Cookies
-
Preparation: Preheat your oven to 350°F (175°C) and line two baking sheets with parchment paper or silicone mats to prevent sticking.
-
Dry Ingredients: In a large bowl, whisk together your gluten-free flour blend, leavening agents (baking powder and/or baking soda), and salt until thoroughly combined.
-
Wet Ingredients & Fat Substitution: In a separate medium bowl, cream your chosen coconut oil substitute (such as softened unsalted butter, vegan butter, or shortening) with the granulated sugar and brown sugar until the mixture is light, fluffy, and pale; note that different fats may require slight adjustments in creaming time to achieve the desired texture and aeration.
-
Add Eggs/Binder: Beat in the eggs (or your prepared flax or chia egg substitute) and vanilla extract until the mixture is well combined and smooth.
-
Combine: Gradually add the dry ingredients to the wet ingredients, mixing on low speed or by hand until just combined. Be careful not to overmix, as this can develop the gluten in the flour and lead to tough cookies; if using certain oil substitutes, you may find the cookie dough to be very sticky at this stage, which is normal.
-
Add-ins: Gently fold in your desired add-ins such as chocolate chips, chopped nuts, dried fruit, or sprinkles until evenly distributed throughout the dough.
-
Scoop & Bake: Scoop rounded tablespoons of dough onto the prepared baking sheets, leaving about 2 inches between each cookie. Bake for 10-12 minutes, or until the edges are golden brown and the centers are set. For a crisper cookie, similar to traditional coconut cookies, bake for the longer duration; for a chewier texture, bake for the shorter time.
-
Cooling: Carefully transfer the baked cookies to a wire rack using a spatula and allow them to cool completely before serving.
Pro Tips & Tricks for Perfect Gluten-Free & Coconut-Free Baking
In my kitchen, I’ve learned that successful baking often comes down to the little details. When you’re working with alternatives, especially for substitutes for coconut oil, these details become even more important. Paying attention to these nuances will elevate your baking from good to truly exceptional.
Here’s the thing: temperature matters immensely when baking, particularly with fats. If you’re using unsalted butter or vegan butter as your fat, ensure it’s properly softened, not melted. Softened butter creams beautifully with sugar, creating tiny air pockets that contribute to a light, tender crumb in your gluten free cookies. Trust me on this one; melted fat will result in a denser, greasier cookie.
Measuring gluten-free flour accurately is another critical step for achieving the right texture. Unlike wheat flour, gluten-free blends can be much denser. Always use the spoon-and-level method: spoon the flour into your measuring cup, then level it off with a straight edge. Never scoop directly from the bag, as this compacts the flour and can add too much to your recipe, leading to dry, crumbly cookies. A common mistake is over-compacting flour, which throws off the delicate balance of ingredients.
Don’t overmix your cookie dough, especially when using gluten-free flours. Once the wet and dry ingredients are just combined, stop mixing. Overworking the dough develops any present gluten (even in trace amounts in some GF blends) and can make your cookies tough. What I love about this approach is it keeps the cookies tender and prevents them from becoming dense. For light, delicate gluten free egg free cookies, minimal mixing is key.
Chilling the dough is a step I never skip, especially when using liquid substitutes for coconut oil or softer fats. Even 30 minutes in the refrigerator can make a significant difference. This allows the fats to firm up, preventing the cookies from spreading too much during baking. If your cookie dough very sticky, chilling will make it much easier to handle and shape. I often chill mine for an hour for the best results.
Baking time adjustments are frequently necessary, as all ovens vary. Keep a close eye on your cookies during the last few minutes of baking. Different fat substitutes can slightly alter cook times and browning. You’ll notice that some fats might brown faster or slower than others. For consistent results, invest in an oven thermometer to ensure your oven is calibrated correctly.
Achieving that delightful crispiness without coconut is entirely possible. For crispy coconut cookies (without the coconut!), try baking them slightly longer until the edges are golden brown and the centers are just set. Another trick is to make them a bit thinner when shaping the dough. This allows for more surface area to crisp up during baking, giving you that satisfying crunch. You can learn more about the science behind crispy cookies from this excellent resource on cookie chemistry.
Finally, consider flavor enhancements to really make your cookies shine. Extracts like vanilla, almond, or even a touch of orange blossom water can add layers of complexity. Zests from citrus fruits like lemon or orange brighten the flavor profile, making your cookies taste fresh and vibrant. Spices such as cinnamon, nutmeg, or cardamom can warm up the flavor, especially in a batch of chia cookies. These small additions make a big difference.
Enjoyed this recipe? Share it with a friend or save it to your board for later. Leave a comment below — I love hearing how it turned out!
You May Also Enjoy





You Might Also Love These 🍽️
Recipes picked just for you based on what you’re cooking