NYC Pizza, Gluten-Free: A Perfect Slice Awaits!
Craving authentic New York pizza gluten free? Learn how to make gluten free pizza dough that's chewy, crispy, and delicious with our expert recipe!
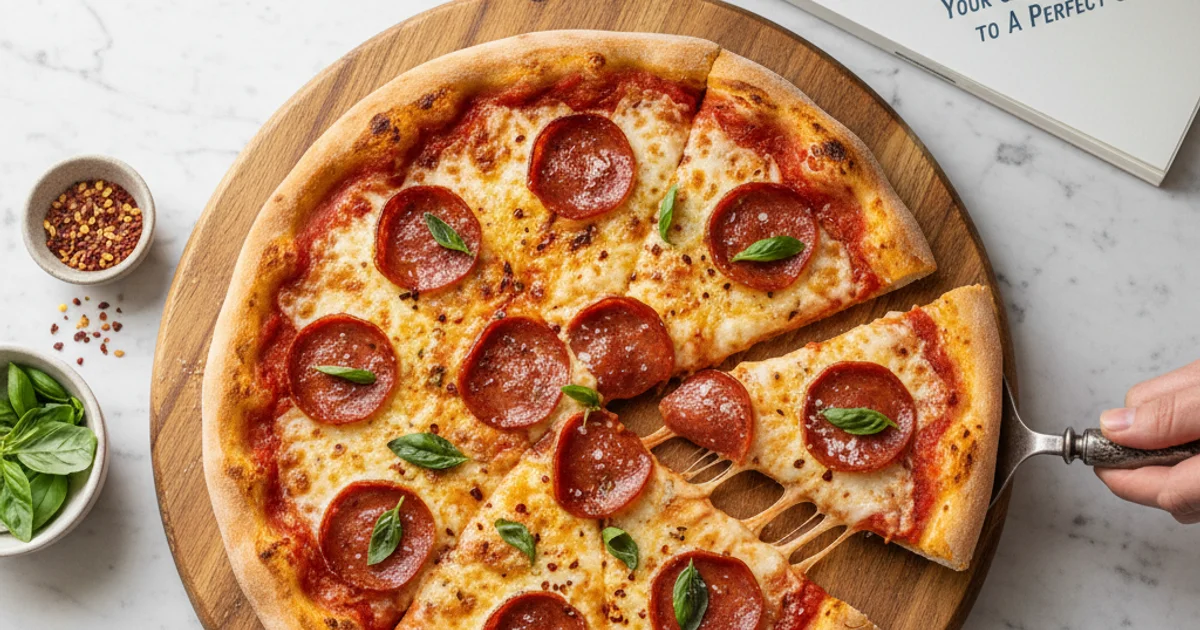
- 1Introduction: Bringing Authentic New York Pizza, Gluten-Free, to Your Kitchen
- 2Why You’ll Fall in Love with This Gluten-Free New York Pizza Recipe
- 3Ingredients Overview: Crafting the Perfect Gluten-Free Pizza Dough and Toppings
- 4Essential Equipment You’ll Need for Your Gluten-Free Pizza Journey
- 5Step-by-Step Instructions: How to Make Gluten-Free Pizza Dough and a Perfect Pie
- 6Pro Tips & Tricks for Your Best Gluten-Free New York Pizza
Ingredients
For the Gluten-Free Pizza Dough
- 1 ½ cups (360ml) warm water (105-115°F / 40-46°C)
- 2 ¼ teaspoons (1 packet) instant yeast
- 1 teaspoon granulated sugar
- 3 cups (420g) gluten-free all-purpose flour blend (with xanthan gum)
- 1 teaspoon salt
- 2 tablespoons olive oil, plus more for greasing
For the Pizza
- ½ cup (120ml) pizza sauce
- 1 ½ cups (170g) shredded low-moisture, part-skim mozzarella cheese
- Your favorite toppings (e.g., pepperoni, mushrooms, bell peppers, fresh basil)
Instructions
Instructions
Activate yeast: Combine warm water, yeast, and sugar; let sit until foamy.
Instructions
Mix dry ingredients: Whisk gluten-free flour and salt in a large bowl.
Instructions
Combine: Add activated yeast mixture and olive oil to dry ingredients. Mix until a shaggy dough forms. If using a stand mixer, mix with a paddle attachment for 2-3 minutes.
Instructions
First rise: Cover the bowl with plastic wrap and let rise in a warm place for 60-90 minutes, or until nearly doubled (GF dough won't double as much as wheat).
Instructions
Preheat oven: Place pizza stone or steel in oven and preheat to 500°F (260°C) for at least 45-60 minutes.
Instructions
Shape dough: Lightly oil hands and a piece of parchment paper. Divide dough in half. Gently stretch or roll each half into a 10-12 inch circle on the parchment paper.
Instructions
Add toppings: Spread pizza sauce evenly, leaving a 1/2-inch border. Top with mozzarella and desired toppings.
Instructions
Bake: Carefully transfer pizza (on parchment paper) to the hot pizza stone/steel. Bake for 10-15 minutes, or until crust is golden brown and cheese is bubbly and slightly charred.
Instructions
Cool & Serve: Remove pizza from oven, slide onto a cutting board. Let cool for 2-3 minutes before slicing and serving.
Recipe FAQs
What's the best gluten-free flour blend for New York style pizza?
Can I use active dry yeast instead of instant yeast for this gluten-free pizza dough?
Why is my gluten-free pizza crust soggy in the middle?
Can I make this pizza dough ahead of time and refrigerate it?
What's the secret to getting a crispy bottom on gluten-free pizza?
Can I freeze this homemade gluten-free pizza dough?
NYC Pizza, Gluten-Free: A Perfect Slice Awaits!
Craving authentic New York pizza gluten free? Learn how to make gluten free pizza dough that's chewy, crispy, and delicious with our expert recipe!
Prep Time
25 min
Cook Time
15 min
Total Time
40 min
For the Gluten-Free Pizza Dough
- 1 ½ cups (360ml) warm water (105-115°F / 40-46°C)
- 2 ¼ teaspoons (1 packet) instant yeast
- 1 teaspoon granulated sugar
- 3 cups (420g) gluten-free all-purpose flour blend (with xanthan gum)
- 1 teaspoon salt
- 2 tablespoons olive oil, plus more for greasing
For the Pizza
- ½ cup (120ml) pizza sauce
- 1 ½ cups (170g) shredded low-moisture, part-skim mozzarella cheese
- Your favorite toppings (e.g., pepperoni, mushrooms, bell peppers, fresh basil)
Introduction: Bringing Authentic New York Pizza, Gluten-Free, to Your Kitchen
For years, the quest for a truly satisfying gluten-free pizza felt like chasing a culinary unicorn. Many attempts yielded dry, crumbly crusts or dense, flavorless discs that barely resembled the real deal. This was especially true when trying to recreate that iconic New York-style experience. I craved that perfect balance: a crust thin enough to fold, yet with a delightful chew and a crispy bottom that sings with every bite. The frustration of rubbery bases and cardboard-like textures was a constant companion in my gluten-free journey.
Here’s the thing, I refused to believe that giving up gluten meant sacrificing the joy of a proper slice. The dream of a foldable, flavorful, pizza gluten free new york style masterpiece lingered. What I discovered, after countless experiments and tweaks, is that it’s entirely possible to achieve that authentic pizzeria magic right in your own kitchen. This recipe isn’t just another gluten-free alternative; it’s a celebration of texture and taste, designed to deliver on all those classic expectations. You’ll be amazed at how closely this replicates the beloved original, allowing you to enjoy all the cheesy, saucy goodness without compromise. Get ready to transform your gluten-free pizza nights forever.
Why You’ll Fall in Love with This Gluten-Free New York Pizza Recipe
For years, I searched for a gluten-free pizza that truly captured the essence of a classic New York slice. I wanted that satisfying stretch, the subtle chew, and a crust that held its own, not one that crumbled under the weight of toppings. What I discovered was that many recipes missed the mark, resulting in a dense, often dry base that barely resembled the real deal. This recipe changes all of that, bringing the vibrant flavors and textures of a classic pizzeria right into your own kitchen, all without a speck of gluten.
Here’s the thing, you’re not just getting a gluten-free pizza recipe; you’re getting a method for achieving a crust that genuinely rivals its traditional counterpart. This isn’t about compromise; it’s about culinary triumph. We’re talking about a crust with a delicate crispness on the outside, yielding to a tender, airy interior. This specific approach to how to make gluten free pizza dough focuses on hydration and a blend of flours that mimic gluten’s elasticity, ensuring your pizza doesn’t feel like an afterthought. You won’t find yourself longing for traditional pizza after tasting this.
A common mistake is thinking gluten-free means sacrificing texture. With this recipe, you’ll experience a pizza gluten free new york style crust that boasts those coveted golden-brown edges and a sturdy base that won’t flop when you pick up a slice. It’s incredibly versatile, too. Whether you’re a purist who loves a simple margherita or someone who piles on the veggies and meats, this crust stands up to any topping combination. Forget the disappointment of flimsy bases; this one provides the perfect foundation for your culinary creativity. It’s a game-changer for anyone navigating dietary restrictions without wanting to miss out on the joy of a truly great pizza night. You’ll notice that the dough handles beautifully, a far cry from sticky, unmanageable gluten-free doughs I’ve encountered in the past. This makes the entire pizza-making process enjoyable, even for beginners. It’s a testament to how far gluten-free baking has come, and this recipe is at the forefront, proving that frozen gluten free pizza dough options simply can’t compare to homemade freshness and quality.
Ingredients Overview: Crafting the Perfect Gluten-Free Pizza Dough and Toppings
Here’s the thing: crafting exceptional pizza gluten free new york style starts with understanding your ingredients. Each component plays a vital role in achieving that coveted chewy-crisp crust and balanced flavor profile. You can’t just swap out regular flour and expect the same results; the magic is in the specifics.
Let’s begin with the foundation: the Gluten-Free All-Purpose Flour Blend. In my kitchen, this isn’t just any flour. It’s a carefully formulated mix, often containing rice flour, tapioca starch, potato starch, and crucially, xanthan gum. This gum is your unsung hero, mimicking the elasticity and structure that gluten provides. Without it, your dough would be crumbly and unworkable. I always recommend using a reputable blend that already includes xanthan gum, like Bob’s Red Mill 1-to-1 Baking Flour or King Arthur Gluten-Free Measure for Measure Flour, as they are designed for direct substitution in many recipes. These blends take the guesswork out of combining individual flours and starches, ensuring a consistent and reliable outcome for your how to make gluten free pizza dough. Some blends might even specify they are suitable for a pizza dough high gluten flour texture, even without gluten, due to their specific starch ratios.
Next, Instant Yeast is essential for that airy, bubbly crust. Unlike active dry yeast, instant yeast doesn’t require proofing in warm water beforehand, though I still like to mix it with the warm water and a pinch of sugar just to ensure it’s alive and kicking. Proper storage is key here; keep it in an airtight container in the refrigerator or freezer to maintain its potency. A common mistake is using old yeast, which leads to a dense, flat crust. Warm Water is another critical element; aim for a temperature between 105-115°F (40-46°C). Water that’s too hot will kill the yeast, while water that’s too cold won’t activate it sufficiently. You’ll notice that the precise temperature makes all the difference in the dough’s rise.
Olive Oil contributes more than just flavor; it adds richness, helps tenderize the crust, and makes the dough more pliable. A good quality extra virgin olive oil will impart a subtle fruitiness that complements the other ingredients. Building on this, Sugar (or a touch of honey) isn’t just for sweetness; it’s primarily food for the yeast, helping it to activate and produce carbon dioxide, which creates those desirable air pockets in the dough. It also aids in browning the crust, giving it that beautiful golden hue. Salt is a flavor enhancer, of course, but it also plays a crucial role in controlling yeast activity, preventing it from rising too quickly and developing off-flavors.
For the topping, a high-quality Pizza Sauce is non-negotiable. I always start with canned San Marzano tomatoes, crushed by hand, seasoned simply with salt, a touch of oregano, and a drizzle of olive oil. The secret is to keep it simple, allowing the natural sweetness of the tomatoes to shine. For the cheese, Low-Moisture, Part-Skim Mozzarella Cheese is the gold standard for New York style. Pre-shredded cheese often contains anti-caking agents that can hinder its melt and browning. Trust me on this one: buy a block and shred it yourself. This ensures a superior melt and that classic stretchy texture. Shredding it yourself also avoids the slightly rubbery texture sometimes found with pre-shredded options.
What I discovered is that selecting the right Optional Toppings can elevate your pizza gluten free new york experience. Classic New York toppings include thinly sliced pepperoni that curls into little cups, fresh mushrooms sautéed lightly beforehand to remove excess moisture, finely diced onions, and fresh basil added after baking for vibrant color and aroma. Pre-cooking watery vegetables like mushrooms or spinach is a pro move to prevent a soggy crust. Each ingredient contributes to the overall balance and authenticity of this dish.
Essential Equipment You’ll Need for Your Gluten-Free Pizza Journey
To truly master this recipe, having the right tools makes all the difference. In my kitchen, I always ensure I have these essentials ready. They streamline the process and help achieve that coveted crispy crust.
First, a large mixing bowl is non-negotiable for combining your dry and wet ingredients. You need ample space to work the dough effectively without spills. Building on this, a stand mixer with a dough hook attachment is a game-changer for gluten-free dough. While not strictly mandatory, it eliminates the need for extensive hand kneading, which can be tricky with this particular dough’s texture. It ensures thorough mixing, activating the binders in your how to make gluten free pizza dough.
The key difference is that precision is paramount in gluten-free baking. Therefore, measuring cups and spoons are vital, but a kitchen scale is highly recommended for accuracy, especially when measuring different types of flour. This helps maintain the delicate balance required for a pliable dough, far more critical than with traditional pizza dough high gluten flour. An accurate weight measurement for your flour blend prevents a gummy or overly dense crust.
For that authentic New York crispness, a pizza stone or steel is indispensable. This piece of equipment preheats in the oven, providing intense, even heat directly to the bottom of your crust. This mimics a professional pizza oven, resulting in a beautifully browned and crisp base, preventing sogginess. You’ll notice that the high thermal mass of a steel often outperforms a stone for achieving maximum crispness. A pizza peel is essential for safely transferring your shaped dough onto the hot stone or steel and retrieving the finished pizza gluten free new york. Trust me on this one, trying to slide raw dough onto a scorching surface without one is a recipe for disaster.
What I discovered is that oven temperatures can vary significantly from what the dial indicates. An oven thermometer ensures your oven is precisely at the desired temperature, critical for proper crust development and cooking. This prevents undercooked or burnt crusts. Finally, a rolling pin is necessary for shaping your dough to the desired thinness. After baking, a sturdy cutting board and a sharp pizza cutter make serving neat slices a breeze, completing your pizza-making setup.
Step-by-Step Instructions: How to Make Gluten-Free Pizza Dough and a Perfect Pie
-
Activate the Yeast: In a medium bowl, combine 1 ¼ cups of warm water (105-115°F or 40-46°C), 1 tablespoon of active dry yeast, and 1 teaspoon of granulated sugar. Stir gently and let it sit for 5-10 minutes until the mixture becomes foamy, indicating the yeast is active.
-
Mix Dry Ingredients: In a large bowl, whisk together 3 cups (about 420g) of your preferred gluten-free all-purpose flour blend (ensure it contains xanthan gum or add ½ teaspoon separately if not), 1 teaspoon of salt, and 1 teaspoon of additional granulated sugar.
-
Combine Wet and Dry: Pour the activated yeast mixture into the dry ingredients. Stir with a sturdy spoon or a stand mixer with a paddle attachment on low speed until a shaggy dough forms. Note that gluten-free dough will be considerably stickier and less elastic than traditional wheat-based dough; this is normal.
-
Kneading the Dough: Unlike traditional pizza dough, gluten-free dough requires minimal kneading. If using a stand mixer, attach the dough hook and mix on low speed for 3-5 minutes until the ingredients are just combined and a shaggy dough forms; overmixing can make gluten-free dough tough. If kneading by hand, lightly flour your work surface and your hands, then gently fold and press the dough for about 5 minutes until it comes together.
-
First Rise (Proofing): Lightly oil a large bowl, place the dough in it, and turn once to coat. Cover the bowl tightly with plastic wrap or a clean kitchen towel and place it in a warm, draft-free spot (ideally around 75-80°F or 24-27°C) for 1 to 1.5 hours. Expect the dough to rise somewhat, but be aware that gluten-free dough will not double in size as dramatically as its gluten-containing counterpart, often showing only a modest increase in volume and a slightly puffy texture.
-
Preheat Oven & Pizza Stone/Steel: At least 45-60 minutes before you plan to bake your pizza, place your pizza stone or steel on the middle or upper-middle rack of your oven. Preheat your oven to its highest possible temperature, typically between 500-550°F (260-290°C), allowing ample time for the stone or steel to become thoroughly heated, which is crucial for achieving a perfectly crisp crust.
-
Shape the Dough: Gluten-free dough can be a bit stickier than traditional dough, so embrace the parchment paper method! Lightly oil your hands and a sheet of parchment paper large enough for your desired pizza size. Gently press or stretch the dough from the center outwards, forming a consistent circle or rectangle, aiming for an even thickness to ensure uniform baking.
-
Add Sauce and Toppings: Now for the fun part! Spread your favorite pizza sauce evenly over the dough, leaving a small border for the crust. Next, generously sprinkle your chosen shredded mozzarella cheese, followed by any other toppings you desire, ensuring they are distributed evenly for a balanced bite.
-
Bake: Carefully transfer the parchment paper with the topped pizza onto your preheated pizza stone or baking steel. Bake for 12-18 minutes at 475°F (245°C), or until the crust is golden brown and crispy, and the cheese is bubbly and slightly caramelized.
-
Cool and Serve: Resist the urge to cut into your masterpiece immediately; allowing the pizza to cool on a wire rack for 5-10 minutes is crucial for the cheese to set and the crust to firm up, preventing a soggy slice and ensuring a more enjoyable eating experience.
Pro Tips & Tricks for Your Best Gluten-Free New York Pizza
Here’s the thing, making exceptional gluten-free pizza isn’t just about following a recipe; it’s about understanding the nuances of the dough and the baking process. I always tell people that small adjustments can make a world of difference in the final product. Trust me on this one: these pro tips will elevate your homemade pizza from good to truly outstanding, giving you that authentic New York experience.
-
Don’t Overwork the Dough: Unlike traditional wheat dough, gluten-free dough doesn’t develop gluten. Excessive kneading won’t build structure; it can actually make it tough. Mix until just combined and smooth.
-
Use a Kitchen Scale for Flour: Precision is paramount in gluten-free baking. Flour blends vary, and even a slight difference in weight can impact the dough’s hydration and texture. I always weigh my ingredients for consistent results.
-
High Heat is Key: For that classic crispy crust, a very hot oven is non-negotiable. Preheat your oven with a pizza stone or steel for at least an hour at its highest setting. This intense heat mimics a professional pizza oven.
-
Don’t Overload Toppings: A common mistake is piling on too many toppings. This adds moisture and weight, leading to a soggy crust. Keep it simple; a thin layer allows the crust to crisp up beautifully.
-
Pre-Cook Wet Toppings: Ingredients like mushrooms, onions, or bell peppers release a lot of moisture. Sautéing them beforehand removes excess water, preventing a watery pizza. This ensures a drier, crispier base.
-
The Importance of Parchment Paper: Transferring a delicate gluten-free pizza dough to a hot stone can be tricky. Rolling and building your pizza directly on parchment paper makes sliding it into the oven effortless. You can even slide the parchment paper directly onto the stone.
-
Resting the Dough: Even without gluten development, a short rest for your shaped dough is beneficial. It allows the starches to fully hydrate and the dough to become more pliable. This brief pause makes it easier to handle.
-
Achieving the ‘Leopard Spots’: Those desirable slightly charred spots on the crust are a hallmark of a properly baked New York-style pizza. This happens when the dough directly contacts the superheated pizza stone or steel. You’ll notice that using a high oven temperature helps achieve this.
The secret is ensuring your oven and baking surface are at their absolute maximum temperature before the pizza goes in. For more insights on the science of baking, you can explore resources like Serious Eats on pizza dough. This attention to temperature control is crucial for developing the crust’s texture and flavor.
Enjoyed this recipe? Share it with a friend or save it to your board for later. Leave a comment below — I love hearing how it turned out!
You May Also Enjoy





You Might Also Love These 🍽️
Recipes picked just for you based on what you’re cooking