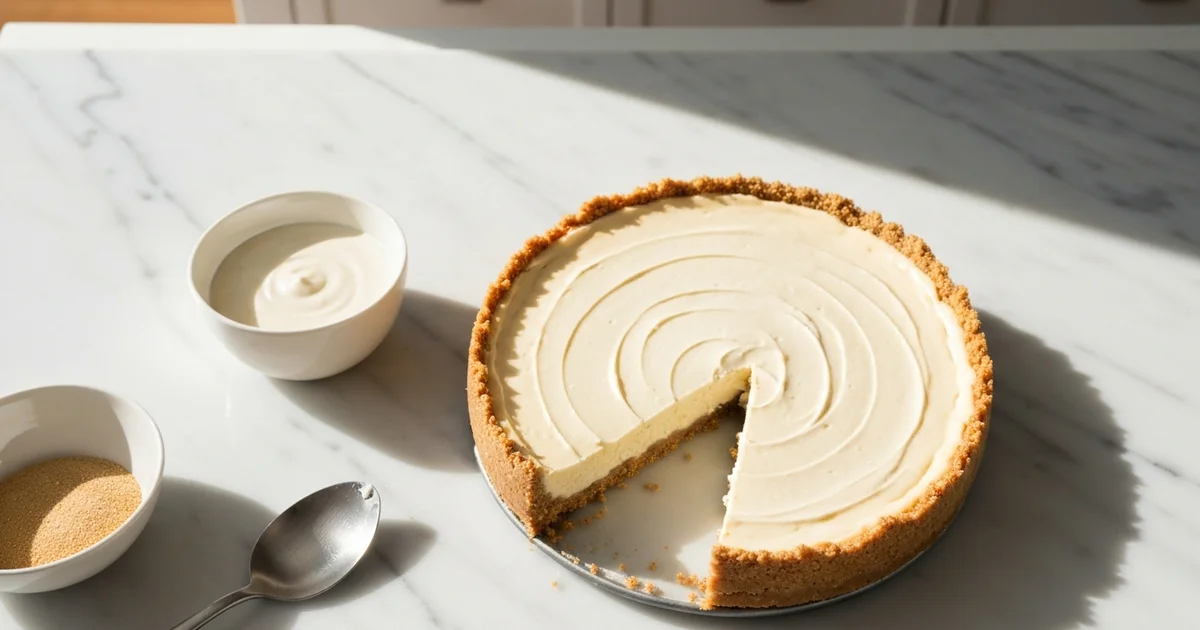
Cream Cheese & GF Cheesecake: Your Guide!
Discover if cream cheese is gluten-free and enjoy our easy, decadent gluten-free cheesecake recipe. Perfect for home cooks!
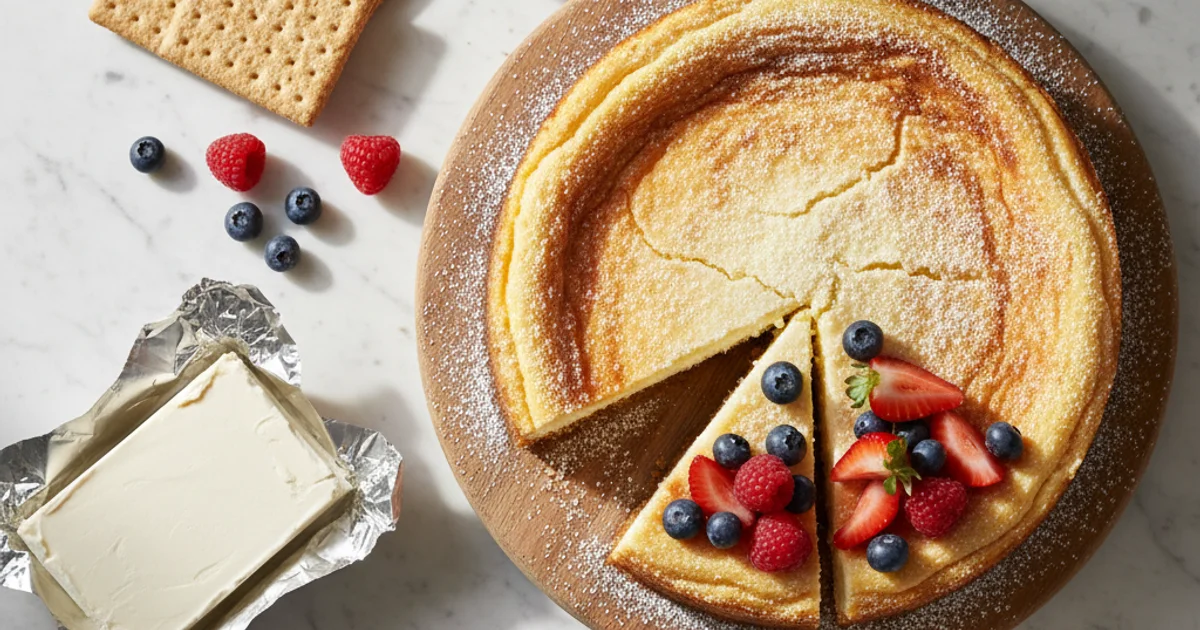
- 1Is Cream Cheese Gluten-Free? Unpacking the Dairy Delight
- 2Why You’ll Love This Gluten-Free Cream Cheese Recipe
- 3Ingredients Overview: Crafting Your Gluten-Free Cream Cheese Masterpiece
- 4Equipment You’ll Need for Your Gluten-Free Cheesecake
- 5Step-by-Step Instructions: Your Guide to a Perfect Gluten-Free Cheesecake
- 6Pro Tips & Tricks for a Flawless Gluten-Free Cheesecake
Ingredients
For the Gluten-Free Crust
- 1 ½ cups gluten-free graham cracker crumbs (or other GF cookie crumbs)
- ¼ cup granulated sugar
- 6 tablespoons unsalted butter, melted
For the Cheesecake Filling
- 3 (8-ounce) packages full-fat cream cheese, softened
- 1 ½ cups granulated sugar
- 1 teaspoon vanilla extract
- ¼ cup sour cream (full-fat) or plain Greek yogurt
- 4 large eggs, at room temperature
Optional Garnish
- Fresh berries
- Whipped cream
- Chocolate shavings
Instructions
Instructions
Preheat oven and prepare springform pan.
Instructions
Make the gluten-free crust: combine crumbs, sugar, and melted butter. Press into pan.
Instructions
Bake crust briefly, then cool.
Instructions
Prepare water bath (if using).
Instructions
Make cheesecake filling: cream softened cream cheese and sugar.
Instructions
Beat in vanilla and sour cream.
Instructions
Add eggs one at a time, mixing until just combined.
Instructions
Pour filling over cooled crust.
Instructions
Bake cheesecake in water bath.
Instructions
Cool cheesecake slowly in oven, then on counter, then refrigerate.
Instructions
Chill for at least 6 hours, or overnight.
Instructions
Garnish and serve.
Recipe FAQs
Can I use low-fat cream cheese for this gluten-free cheesecake recipe?
Do I really need a water bath for baking cheesecake?
How do I know when my gluten-free cheesecake is done baking?
Can I make this cheesecake dairy-free?
My cheesecake cracked! What went wrong?
What's the best way to get clean slices of cheesecake?
Cream Cheese & GF Cheesecake: Your Guide!
Discover if cream cheese is gluten-free and enjoy our easy, decadent gluten-free cheesecake recipe. Perfect for home cooks!
Prep Time
30 min
Cook Time
70 min
Total Time
100 min
For the Gluten-Free Crust
- 1 ½ cups gluten-free graham cracker crumbs (or other GF cookie crumbs)
- ¼ cup granulated sugar
- 6 tablespoons unsalted butter, melted
For the Cheesecake Filling
- 3 (8-ounce) packages full-fat cream cheese, softened
- 1 ½ cups granulated sugar
- 1 teaspoon vanilla extract
- ¼ cup sour cream (full-fat) or plain Greek yogurt
- 4 large eggs, at room temperature
Optional Garnish
- Fresh berries
- Whipped cream
- Chocolate shavings
Is Cream Cheese Gluten-Free? Unpacking the Dairy Delight
When I first started my gluten-free journey over a decade ago, I spent hours poring over labels. It felt like a detective mission, trying to figure out what was safe. One common question that popped up for many in my community was regarding dairy products, specifically, is cream cheese gluten free? It’s a valid concern, especially when you’re navigating a new dietary landscape.
Gluten is a protein found in wheat, barley, and rye. For individuals with celiac disease or gluten sensitivity, consuming even small amounts can trigger adverse reactions. These can range from digestive upset to more systemic issues. Understanding what gluten is helps clarify why label reading is so crucial for many of us.
Plain, unflavored cream cheese is inherently gluten-free. It’s primarily made from pasteurized milk and cream, along with cultures and stabilizers like carob bean gum. None of these core ingredients naturally contain gluten. This means you can generally enjoy your plain bagel with cream cheese without worry.
The landscape changes slightly when you venture into flavored cream cheeses. Many brands add ingredients for taste and texture. These additions can sometimes contain hidden gluten. Think about strawberry cream cheese with fruit preparations or savory varieties that might use wheat-based thickeners or flavorings. Always scrutinize the ingredient list for terms like “wheat,” “barley malt,” or “modified food starch” unless specified as corn or potato-based.
What I discovered is that cross-contamination is another factor to consider. Even if ingredients are gluten-free, processing facilities might handle gluten-containing products on the same lines. This risk is usually minimal for plain cream cheese, but it’s always something to keep in mind for highly sensitive individuals. For those with severe allergies or celiac disease, looking for a certified gluten-free label is the safest bet. This certification indicates that the product has been tested and meets strict standards for gluten content. Building on this, many brands now clearly label their products, making it easier to identify safe options.
Why You’ll Love This Gluten-Free Cream Cheese Recipe
Here’s the thing: creating a truly satisfying dessert that caters to specific dietary needs can sometimes feel like a culinary tightrope walk. But this recipe? It’s a game-changer. I always strive for recipes that deliver on both taste and ease, and this one hits every mark. You’ll quickly discover that you don’t need to compromise on richness or texture just because you’re avoiding gluten. This dessert proves that point beautifully.
What I love about this particular cheesecake is its inherent simplicity. From start to finish, the steps are logical and forgiving, making it an excellent choice even if you’re new to baking. There’s a certain joy in watching a few straightforward ingredients transform into something so elegant and comforting. In my kitchen, recipes that empower home cooks to create something special without undue stress are always a win. This one consistently delivers that feeling of accomplishment.
Building on this, the adaptability of this recipe is another huge draw. While the classic version is undeniably good, it also serves as a fantastic canvas for your own creative touches. Whether you’re thinking about seasonal fruit toppings, a swirl of chocolate, or a zesty citrus infusion, this cheesecake embraces customization. This versatility means you can make it your own, time and time again, always with a fresh twist. Trust me on this one; once you master the basic technique, a world of flavor possibilities opens up. It’s about creating a dessert that truly suits your palate and occasion, effortlessly.
Ingredients Overview: Crafting Your Gluten-Free Cream Cheese Masterpiece
Building on this, let’s talk about the components that make this cheesecake truly special. The cream cheese is, of course, the foundation of our dessert. I always opt for full-fat block cream cheese, never the spreadable kind in a tub. The higher fat content yields a far richer, denser, and smoother cheesecake texture that simply can’t be replicated with lower-fat versions. Ensure it’s softened to room temperature before mixing; this prevents lumps and creates that silky, uniform batter we all crave. Trust me on this one, cold cream cheese is the enemy of a smooth cheesecake.
Next up, the gluten-free graham cracker crumbs form the essential base. For those following a strict gluten-free diet, using certified gluten-free crumbs is non-negotiable to ensure the entire dessert remains safe. What I discovered is that not all gluten-free crackers are created equal in terms of texture once crushed. Look for brands specifically designed for pie crusts or those that crumble easily into a fine, sandy texture. If graham crackers aren’t your preference, finely ground almond flour mixed with a touch of sugar and butter makes an excellent, nutty alternative. Another option is crushed gluten-free vanilla wafers for a different flavor profile.
For sweetness, we use granulated sugar. This ingredient does more than just sweeten; it also contributes to the cheesecake’s tender crumb and helps achieve that beautiful golden-brown top. The amount I specify strikes a balance, allowing the cream cheese’s tangy notes to shine through without being overly cloying. Adjusting sweetness is always possible, but I recommend following the recipe first.
Eggs are the silent heroes in this recipe, providing structure, richness, and helping the cheesecake set beautifully. Using room temperature eggs is crucial here. They incorporate more evenly into the batter, preventing overmixing and ensuring a smooth, crack-free surface. Cold eggs can cause the batter to curdle slightly, affecting the final texture.
To add that signature tang and ensure a super creamy texture, we incorporate sour cream or Greek yogurt. I often reach for full-fat sour cream; its acidity helps tenderize the proteins in the eggs and cream cheese, resulting in a silkier mouthfeel and preventing the dreaded cheesecake cracks. If you prefer a slightly lighter tang, full-fat plain Greek yogurt works wonderfully too, adding a pleasant thickness.
Finally, vanilla extract is indispensable for enhancing all the other flavors. Don’t skimp on quality here; a good pure vanilla extract makes a noticeable difference. I find that a high-quality vanilla complements the richness of the cream cheese perfectly, adding warmth and depth to every bite. The butter for the crust acts as the binding agent, holding those crumbs together in a firm, yet tender base. Melted butter is essential here, as it coats the crumbs evenly, allowing them to compact nicely.
Equipment You’ll Need for Your Gluten-Free Cheesecake
In my kitchen, having the right tools makes all the difference. This gluten-free cheesecake recipe is no exception. You don’t need a professional setup, but a few key items will ensure a smooth baking experience.
First up, a springform pan is non-negotiable for cheesecake. I always use a 9-inch pan. Its removable sides allow for a clean, impressive presentation without flipping the cake. Trust me on this one; trying to invert a cheesecake is a recipe for disaster. If you don’t have one, consider borrowing or investing; it’s a versatile pan for many desserts.
Next, an electric mixer is your best friend here. Whether it’s a stand mixer with a paddle attachment or a handheld electric mixer, it’s crucial for achieving that silky, lump-free cream cheese filling. Whisking by hand just won’t cut it for the texture we’re aiming for. A stand mixer offers hands-free convenience, while a handheld is more compact and easier to store. Both work wonderfully.
You’ll also need a couple of large mixing bowls. I like to have at least two: one for the crust ingredients and another, larger one for the cheesecake batter itself. This keeps things organized and prevents cross-contamination of dry and wet ingredients. A sturdy set of bowls makes the mixing process much more efficient.
A rubber spatula is another essential. It’s perfect for scraping down the sides of your mixing bowls, ensuring all ingredients are incorporated. It also gently folds in any additions without deflating the mixture. Its flexibility is key for getting every last bit of batter into the pan.
Accuracy is paramount in baking, so measuring cups and spoons are a must. Don’t eyeball ingredients, especially with gluten-free baking, where ratios can be more sensitive. A good set ensures consistent results every time you bake this treat.
Finally, aluminum foil and a baking sheet are helpful. If you plan to use a water bath for a crack-free cheesecake, the foil will wrap around your springform pan. The baking sheet goes underneath to catch any potential drips, saving your oven from a sticky mess. Parchment paper is optional but highly recommended for lining the bottom of your springform pan; it guarantees easy release of the crust. These tools set you up for success.
Step-by-Step Instructions: Your Guide to a Perfect Gluten-Free Cheesecake
-
Prepare the Crust: In a medium bowl, combine 1 ½ cups of gluten-free graham cracker crumbs (ensure they are certified gluten-free) with ⅓ cup of melted unsalted butter until well mixed. Press this mixture firmly and evenly into the bottom of a 9-inch springform pan. If your recipe calls for it, pre-bake the crust at 350°F (175°C) for 8-10 minutes, then let it cool completely on a wire rack.
-
Make the Filling: In the bowl of a stand mixer fitted with the paddle attachment, or using a large bowl with an electric hand mixer, beat two (8-ounce) packages of softened, full-fat cream cheese on medium speed until smooth and creamy, scraping down the sides of the bowl as needed. Gradually add 1 cup of granulated sugar and beat until light and fluffy, about 2-3 minutes. Reduce the speed to low and beat in 4 large eggs, one at a time, mixing just until each egg is incorporated before adding the next. Finally, gently fold in ½ cup of sour cream and 1 teaspoon of pure vanilla extract until just combined, being careful not to overmix.
-
Prepare for Baking: Carefully pour the prepared cream cheese filling over the cooled (or unbaked) crust in the springform pan. To create a water bath, wrap the bottom and sides of the springform pan tightly with several layers of heavy-duty aluminum foil to prevent water from seeping in. Place the foil-wrapped springform pan into a larger roasting pan, and then carefully pour hot water into the roasting pan until it reaches halfway up the sides of the springform pan.
-
Bake the Cheesecake: Preheat your oven to 325°F (160°C). Carefully place the springform pan with the cheesecake onto a baking sheet (this helps catch any potential drips and makes it easier to transfer). Bake for 55-65 minutes, or until the edges are set and lightly golden, but the center still has a slight jiggle when gently nudged. Avoid overbaking, as this can lead to a dry cheesecake.
-
Cool Gradually: Once baked, turn off the oven but leave the cheesecake inside with the oven door ajar for 1 hour. This slow cooling prevents drastic temperature changes that can cause cracks. After an hour, remove the cheesecake from the oven and let it cool completely on a wire rack at room temperature for another 1-2 hours, or until it reaches room temperature.
-
Chill Thoroughly: Once completely cooled to room temperature, cover the cheesecake loosely with plastic wrap and transfer it to the refrigerator. Chill for at least 6 hours, or preferably overnight, to allow it to fully set and achieve its perfect creamy texture.
Pro Tips & Tricks for a Flawless Gluten-Free Cheesecake
Here’s the thing, baking a cheesecake, especially a gluten-free one, can feel intimidating. I always want to make sure my readers have all the tools for success. These pro tips are born from years of kitchen experiments and countless cheesecakes.
-
Room Temperature Ingredients: This is non-negotiable for a silky-smooth batter. Cold ingredients, especially cream cheese and eggs, won’t combine properly. They leave lumps and an uneven texture. I always take them out at least an hour before I start mixing. This ensures everything emulsifies beautifully.
-
Don’t Overmix: Overmixing is a common pitfall. Once you add the eggs, mix just until combined. Incorporating too much air can cause your cheesecake to puff up. This leads to a sunken center and cracks during cooling. A gentle, low-speed mix is all you need.
-
The Water Bath Method: This technique is a cheesecake’s best friend. A water bath, or bain-marie, provides gentle, even heat. It prevents the edges from baking too quickly. This results in a creamy, uniform texture throughout. It also helps prevent those dreaded cracks. To do it, wrap your springform pan in heavy-duty foil. Place it in a larger roasting pan. Pour hot water into the roasting pan, reaching halfway up the cheesecake pan. For a visual guide on setting up a water bath, check out this helpful article on Serious Eats.
-
Preventing Cracks: Beyond the water bath, slow cooling is essential. After baking, turn off the oven. Leave the cheesecake inside with the door ajar for an hour. This gradual temperature change minimizes stress on the delicate custard. Avoid moving it too much while it’s still warm.
-
Testing for Doneness: A perfectly baked cheesecake has a slight wobble in the center. The edges should be set, but the middle 2-3 inches will still jiggle slightly. It will continue to set as it cools. Overbaking leads to a dry, cracked dessert.
-
Achieving a Smooth Top: Before baking, give the pan a gentle tap on the counter. This releases any trapped air bubbles. These bubbles can rise to the surface and create imperfections. A smooth top is a sign of a well-made cheesecake.
Enjoyed this recipe? Share it with a friend or save it to your board for later. Leave a comment below — I love hearing how it turned out!
You May Also Enjoy





You Might Also Love These 🍽️
Recipes picked just for you based on what you’re cooking