GF Cream Cheese? Yes! Our Dreamy Cheesecake
Wondering if cream cheese is gluten-free? Yes! Dive into our irresistible gluten-free cheesecake recipe – perfect for any occasion and dietary needs.
- 1Is Cream Cheese Gluten-Free? Unlocking the World of Delicious Gluten-Free Cheesecake!
- 2Why You’ll Love This Gluten-Free Cheesecake Recipe (Beyond Just Being Gluten-Free!)
- 3Essential Ingredients Overview: Building Your Perfect Gluten-Free Cheese Cake
- 4Essential Equipment You’ll Need for Your Gluten-Free Cheesecake Journey
- 5Step-by-Step Instructions: Crafting Your Dreamy Gluten-Free Cheesecake
- 6Pro Tips & Tricks for the Best Gluten-Free Cheese Cake
Ingredients
For the Gluten-Free Crust
- 1 ½ cups (about 180g) gluten-free graham cracker crumbs (or other GF cookie crumbs)
- ¼ cup (50g) granulated sugar
- 6 tbsp (85g) unsalted butter, melted
For the Gluten-Free Cheesecake Filling
- 32 oz (907g) full-fat cream cheese, softened to room temperature (4 x 8oz blocks)
- 1 ½ cups (300g) granulated sugar
- 4 large eggs, room temperature
- 1 tsp pure vanilla extract
- ½ cup (120g) full-fat sour cream or Greek yogurt, room temperature
Optional Toppings
- Fresh berries (strawberries, blueberries, raspberries)
- Chocolate ganache
- Caramel sauce
- Whipped cream
Instructions
Instructions
Preheat oven to 325°F (160°C). Prepare a 9-inch springform pan by lining the bottom with parchment paper and greasing the sides.
Instructions
**Make the Crust:** In a medium bowl, combine gluten-free graham cracker crumbs, sugar, and melted butter. Press firmly into the bottom of the prepared springform pan. Bake for 8-10 minutes. Let cool completely.
Instructions
**Make the Filling:** In a large bowl with an electric mixer, beat the softened cream cheese on medium speed until smooth and creamy, about 2-3 minutes. Scrape down the sides of the bowl.
Instructions
Gradually add the granulated sugar, beating until just combined, about 1 minute. Do not overmix.
Instructions
Add the eggs one at a time, beating on low speed after each addition until just incorporated. Do not overmix.
Instructions
Stir in the vanilla extract and sour cream (or Greek yogurt) until just combined and smooth. Be careful not to incorporate too much air.
Instructions
**Prepare for Water Bath:** Wrap the bottom and sides of the springform pan securely with two layers of heavy-duty aluminum foil to prevent water from seeping in.
Instructions
Pour the cheesecake filling over the cooled crust in the springform pan. Smooth the top with a spatula.
Instructions
Place the foil-wrapped springform pan into a larger roasting pan. Carefully pour hot water into the roasting pan until it reaches about halfway up the sides of the springform pan.
Instructions
**Bake:** Carefully transfer the roasting pan with the cheesecake to the preheated oven. Bake for 60-75 minutes, or until the edges are set but the center still jiggles slightly when gently shaken.
Instructions
**Cooling:** Turn off the oven and leave the cheesecake inside with the oven door propped open slightly for 1 hour. This slow cooling helps prevent cracks.
Instructions
Remove the cheesecake from the water bath and roasting pan. Carefully remove the aluminum foil. Let cool completely on a wire rack at room temperature.
Instructions
**Chill:** Once completely cooled, cover the cheesecake loosely with plastic wrap and refrigerate for at least 6-8 hours, or preferably overnight, until thoroughly chilled and set.
Instructions
**Serve:** Once chilled, carefully run a thin knife around the edge of the pan before releasing the springform sides. Top with desired toppings and serve.
Equipment You'll Need
Here's what I use to make this recipe perfectly every time:
- 9-inch Springform Pan — This pan is non-negotiable for cheesecake. Its removable sides allow for effortless release. You'll get pristine slices every time. → Buy Now
- Stand Mixer or Hand Mixer — Achieving a silky, lump-free filling requires power. A mixer ensures everything is perfectly incorporated. This leads to a beautifully smooth texture. → Buy Now
- Large Mixing Bowls — You'll need at least two bowls. One for your **gluten free crusts for cheesecake**. Another for the creamy filling. → Buy Now
- Measuring Cups & Spoons — Precision in baking cannot be overstated. Accurate measurements prevent texture issues. They guarantee consistent results. → Buy Now
- Rubber Spatula — This versatile tool is indispensable. Use it to scrape down the mixer bowl. It also gently folds ingredients. → Buy Now
- Aluminum Foil — This is crucial for your water bath setup. Wrap your springform pan tightly. It prevents any leaks into your cheesecake. → Buy Now
- Parchment Paper — I love using parchment paper. Line the pan's bottom with it. It offers extra non-stick insurance. → Buy Now
- Roasting Pan (for water bath) — Choose a pan large enough. It must comfortably hold the springform pan. This creates a gentle baking environment. → Buy Now
- Oven — A properly preheated oven is vital. It ensures even baking from start to finish. Temperature consistency impacts the final texture. → Buy Now
Recipe FAQs
Is all cream cheese truly gluten-free, or do I need to check labels carefully?
Can I make this gluten-free cheesecake dairy-free as well?
What's the best gluten-free crust for cheesecake?
How do I prevent cracks in my gluten-free cheesecake?
Can I use an alternative sweetener to make this a low-sugar or keto gluten-free cheesecake?
How long does homemade gluten-free cheesecake last, and can I freeze it?
GF Cream Cheese? Yes! Our Dreamy Cheesecake
Wondering if cream cheese is gluten-free? Yes! Dive into our irresistible gluten-free cheesecake recipe – perfect for any occasion and dietary needs.
Prep Time
30 min
Cook Time
75 min
Total Time
105 min
For the Gluten-Free Crust
- 1 ½ cups (about 180g) gluten-free graham cracker crumbs (or other GF cookie crumbs)
- ¼ cup (50g) granulated sugar
- 6 tbsp (85g) unsalted butter, melted
For the Gluten-Free Cheesecake Filling
- 32 oz (907g) full-fat cream cheese, softened to room temperature (4 x 8oz blocks)
- 1 ½ cups (300g) granulated sugar
- 4 large eggs, room temperature
- 1 tsp pure vanilla extract
- ½ cup (120g) full-fat sour cream or Greek yogurt, room temperature
Optional Toppings
- Fresh berries (strawberries, blueberries, raspberries)
- Chocolate ganache
- Caramel sauce
- Whipped cream
Is Cream Cheese Gluten-Free? Unlocking the World of Delicious Gluten-Free Cheesecake!
For anyone navigating the world of gluten-free eating, a fundamental question often arises: is cream cheese gluten free? This creamy staple is the heart of so many delicious desserts, especially decadent cheesecakes, and the good news is generally reassuring. Most plain, unflavored cream cheese varieties are naturally free from gluten-containing ingredients, making them a safe bet for your culinary adventures.
However, even with this comforting knowledge, a little vigilance goes a long way. Some flavored cream cheeses or those with added stabilizers can, on occasion, introduce hidden gluten. Ingredients derived from wheat or other gluten sources might be used by manufacturers, and cross-contamination during processing is a genuine concern for those with celiac disease or severe gluten sensitivity.
When you’re at the grocery store, making a habit of turning the package over is invaluable. Always look for specific certifications and clear ingredient lists. A quick label check now prevents future disappointment and ensures peace of mind.
- Check the Ingredient List: Scrutinize for wheat, barley, rye, or malt.
- Look for Certifications: A “Certified Gluten-Free” label is your greatest assurance.
- Read Allergen Warnings: These often highlight potential cross-contamination.
Building on this understanding, embracing truly safe options brings immense joy. My goal is always to create recipes that are both comforting and accessible, ensuring you never feel deprived of classic treats. This realization led me to perfect my gluten-free cheesecake recipe, transforming it into a truly indulgent experience.
Our Dreamy Gluten-Free Cheesecake Recipe!
This dessert proves that dietary restrictions do not mean compromising on flavor. It offers that signature rich, tangy, and smooth experience, with every velvety forkful reassuring you of its pure, delightful ingredients.
Yields: 1 (9-inch) cheesecake Prep time: 30 minutes Bake time: 60-70 minutes Chill time: At least 6 hours (preferably overnight)
Ingredients:
For the Gluten-Free Crust:
- 1 ½ cups gluten-free graham cracker crumbs (about 12-14 full crackers)
- ¼ cup granulated sugar
- 6 tablespoons unsalted butter, melted
For the Creamy Cheesecake Filling:
- 32 ounces (4 blocks) full-fat cream cheese, softened at room temperature
- 1 ½ cups granulated sugar
- 4 large eggs, at room temperature
- 1 cup full-fat sour cream, at room temperature
- 1 tablespoon vanilla extract
- 1 teaspoon fresh lemon zest (optional, but adds a lovely brightness!)
Instructions:
- Prepare the Crust: Preheat your oven to 350°F (175°C). In a medium bowl, combine the gluten-free graham cracker crumbs, sugar, and melted butter until thoroughly mixed. Press the mixture firmly into the bottom of a 9-inch springform pan. You can use the bottom of a glass or your fingers to get an even layer. Bake for 10 minutes, then remove from the oven and set aside to cool slightly while you prepare the filling. Reduce oven temperature to 325°F (160°C).
- Make the Filling: In a large bowl using an electric mixer (stand mixer with paddle attachment or hand mixer), beat the softened cream cheese on medium speed until smooth and creamy, about 2-3 minutes. Scrape down the sides of the bowl. Gradually add the granulated sugar, beating until just combined and smooth, taking care not to overmix, as this can introduce too much air.
- Add Remaining Ingredients: Beat in the eggs one at a time, mixing only until each egg is just incorporated before adding the next. Stir in the sour cream, vanilla extract, and lemon zest (if using) until just blended. Avoid overmixing once the eggs are added; overmixing can cause cracks in your finished cheesecake.
- Prepare for Baking (Water Bath Method): For the smoothest, crack-free cheesecake, a water bath is highly recommended. Wrap the bottom and sides of your springform pan tightly with several layers of heavy-duty aluminum foil to prevent water from seeping in. Place the foil-wrapped springform pan into a larger roasting pan. Pour the cheesecake filling over the prepared crust.
- Bake the Cheesecake: Carefully pour hot water into the roasting pan, around the springform pan, until it comes about halfway up the sides of the springform pan. Transfer the entire roasting pan to the preheated oven (325°F/160°C). Bake for 60-70 minutes, or until the edges are set and lightly golden, but the center still has a slight wobble (about 2-3 inches) when gently shaken. Overbaking will lead to cracks.
- Cooling Process: Turn off the oven, but leave the cheesecake in the oven with the oven door ajar for 1 hour. This slow cooling helps prevent cracks. After 1 hour, remove the cheesecake from the water bath and the roasting pan, unwrap the foil, and place it on a wire rack to cool completely at room temperature for another 1-2 hours.
- Chill Thoroughly: Once completely cooled to room temperature, cover the cheesecake loosely with plastic wrap and refrigerate for at least 6 hours, or preferably overnight. Chilling is crucial for the cheesecake to firm up, develop its full flavor, and slice cleanly.
- Serve and Store: Before serving, carefully run a thin knife around the edge of the pan to help release the sides of the springform. Slice with a hot, dry knife for clean cuts. Leftover cheesecake should be stored in an airtight container in the refrigerator for up to 5-7 days. For longer storage, slices can be individually wrapped and frozen for up to 1 month. Thaw in the refrigerator before serving.
Troubleshooting Tip: If your cheesecake does develop a minor crack, don’t despair! It’s still perfectly delicious and can be easily hidden with a beautiful topping. Ensuring your ingredients are at room temperature and avoiding overmixing are your best defenses against cracks.
Optional Toppings (with suggested quantities):
- Fresh Berries: 1-2 cups mixed berries (strawberries, blueberries, raspberries)
- Fruit Compote: 1 cup prepared fruit compote (e.g., cherry, raspberry)
- Chocolate Ganache: 4 ounces good quality dark chocolate, melted with ½ cup heavy cream.
- Caramel Sauce: ½ cup store-bought or homemade caramel sauce.
Why You’ll Love This Gluten-Free Cheesecake Recipe (Beyond Just Being Gluten-Free!)
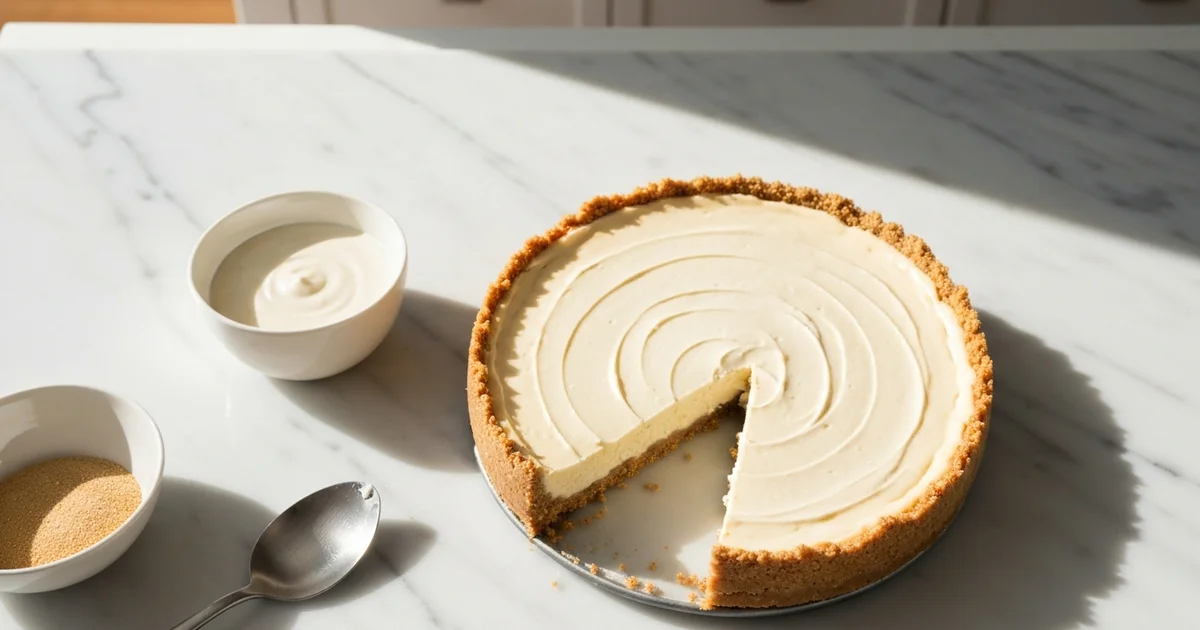
In my kitchen, I’ve always aimed to create desserts that everyone can enjoy without compromise. This recipe for gluten-free cheesecake epitomizes that philosophy. It proves that dietary needs never have to diminish rich flavor or luxurious texture. You’ll find this dessert offers a classic, creamy consistency that rivals any traditional cheesecake. The golden-brown edges of the crust beautifully frame the pale, smooth filling. It promises a truly indulgent experience with every single forkful. This particular cheesecake sets a high bar for what is cheesecake gluten free can truly achieve.
What I discovered is the secret to this creamy delight starts with its core ingredients, specifically the main dairy component. Many wonder, for instance, if is cream cheese gluten free a concern when baking for sensitive diets. The good news is, for this recipe, the inherent nature of most cream cheese simplifies things immensely. This allows you to focus on the baking process, not ingredient detective work. The trick is selecting a high-quality, full-fat cream cheese for that essential dense, velvety mouthfeel and rich flavor.
Beyond the filling itself, this recipe embraces incredible crust versatility. I always encourage adapting the base to your specific tastes and dietary needs. For example, you can create fantastic gluten free crusts for cheesecake using crushed gluten-free graham crackers, ensuring a familiar taste. Alternatively, a blend of pecans and almonds, ground finely, provides a robust, nutty foundation that adds depth. This adaptability ensures your cheesecake is tailored perfectly to any occasion or preference. Consider adding a pinch of cinnamon to a nut crust for extra warmth.
Many aspiring bakers feel daunted by the prospect of making a cheesecake from scratch. Trust me on this one; this particular recipe demystifies the entire process with clear steps. The instructions are incredibly straightforward, focusing on achievable techniques rather than complex maneuvers. We carefully guide you to avoid common pitfalls like over-mixing or sudden temperature changes, which can lead to cracks. You’ll notice how easily the ingredients come together, building anticipation for that satisfying first slice. The simple steps ensure a smooth baking journey.
This decadent cheesecake truly shines on any table, making it ideal for diverse celebrations and gatherings. It fits seamlessly into holiday meals, birthday parties, or even a simple weekend treat. What I love about this is how it ensures no one feels left out. Guests with dietary restrictions can confidently enjoy a generous portion. This recipe elevates your dessert game, proving that a truly satisfying gluten-free option is within reach for everyone.
Essential Ingredients Overview: Building Your Perfect Gluten-Free Cheese Cake
Here’s the thing: every great cheesecake starts with a foundation of quality ingredients. Understanding each component’s role ensures a silky texture and rich flavor. This applies especially when crafting a truly exceptional gluten free cheese cake.
For me, the star of any cheesecake is always the cream cheese. I always reach for full-fat block cream cheese, never the spreadable kind. The higher fat content provides that signature dense, creamy texture we all crave.
Building on this, many brands explicitly state cream cheese gluten free on their packaging. Philadelphia and Kraft are reliable choices. Trust me on this one, always double-check the label for sensitivities. This ensures your gluten free cheesecake recipes remain safe to enjoy.
Next up, granulated sugar does more than just sweeten the treat. It also plays a crucial role in the texture of the filling. The sugar crystals dissolve during baking, contributing to that incredibly smooth consistency.
In my kitchen, large eggs are the essential binder for the filling. They provide structure and emulsification. They also help prevent those unsightly cracks on the surface during baking. The trick is using room temperature eggs; they integrate more evenly into the cream cheese mixture.
A splash of vanilla extract enhances all the other flavors. I always opt for pure vanilla extract. Its warm, aromatic notes elevate the entire gluten free cheese cake experience. Artificial vanilla just doesn’t deliver the same depth.
For that perfect tangy counterpoint, I add sour cream or full-fat Greek yogurt. This ingredient introduces a beautiful hint of acidity. It also adds moisture and extra creaminess, lightening the overall richness of the filling. It prevents the cheesecake from being overly heavy.
Now, for the base. A truly satisfying gluten free crusts for cheesecake begins with certified gluten-free graham cracker crumbs. You must choose crackers or cookies clearly marked as gluten-free. Brands like Schar or Kinnikinnick offer excellent options for this.
Alternatively, you could use a simple almond flour crust. This offers a naturally gluten-free option. It creates a slightly different, nutty flavor profile. Always ensure your chosen base is cheesecake gluten free by ingredient choice.
The melted butter is the key binder for the crust. It coats the crumbs, allowing them to press together firmly. This creates a sturdy, flavorful base that holds up beautifully. I use unsalted butter to control the overall saltiness.
Finally, consider optional toppings to complete your creation. These enhance the visual appeal and flavor:
- Fresh berries, like strawberries or raspberries, add a burst of vibrant flavor and color.
- A rich chocolate ganache elevates the decadence with a glossy finish.
- Homemade fruit compotes offer a sweet, tangy contrast to the creamy filling. What I love about this is how versatile gluten free cheesecake recipes can be, allowing for endless customization.
Essential Equipment You’ll Need for Your Gluten-Free Cheesecake Journey
Building on this, having the right kitchen tools makes all the difference. For any baking project, especially a delicate gluten free cheese cake, preparation is key. Gathering your equipment beforehand ensures a smooth and stress-free process.
In my kitchen, I always lay out everything. This prevents any last-minute scrambling. Here are the essential pieces you’ll need:
- 9-inch Springform Pan: This pan is non-negotiable for cheesecake. Its removable sides allow for effortless release. You’ll get pristine slices every time.
- Stand Mixer or Hand Mixer: Achieving a silky, lump-free filling requires power. A mixer ensures everything is perfectly incorporated. This leads to a beautifully smooth texture.
- Large Mixing Bowls: You’ll need at least two bowls. One for your gluten free crusts for cheesecake. Another for the creamy filling.
- Measuring Cups & Spoons: Precision in baking cannot be overstated. Accurate measurements prevent texture issues. They guarantee consistent results.
- Rubber Spatula: This versatile tool is indispensable. Use it to scrape down the mixer bowl. It also gently folds ingredients.
- Aluminum Foil: This is crucial for your water bath setup. Wrap your springform pan tightly. It prevents any leaks into your cheesecake.
- Parchment Paper: I love using parchment paper. Line the pan’s bottom with it. It offers extra non-stick insurance.
- Roasting Pan (for water bath): Choose a pan large enough. It must comfortably hold the springform pan. This creates a gentle baking environment.
- Oven: A properly preheated oven is vital. It ensures even baking from start to finish. Temperature consistency impacts the final texture.
With these tools, you are fully prepared. You can create a stunning is cheesecake gluten free masterpiece. Every step of the process will be seamless.
Step-by-Step Instructions: Crafting Your Dreamy Gluten-Free Cheesecake
Here are the complete instructions for crafting your dreamy gluten-free cheesecake, ensuring every step leads to a perfect, creamy slice!
Crafting Your Dreamy Gluten-Free Cheesecake
1. Prepare Your Gluten-Free Crust First things first, preheat your oven to 350°F (175°C). In a medium bowl, crush approximately 1 ½ cups of your favorite gluten-free graham crackers or cookies until fine, uniform crumbs form. Now, combine them thoroughly with 6 tablespoons of luscious melted unsalted butter. Press this buttery mixture firmly and evenly into the bottom of a 9-inch springform pan. This creates the sturdy, delicious foundation for your cheesecake.
2. Bake and Cool the Crust For an extra layer of flavor and stability, bake the pressed crust briefly for 8-10 minutes, or until it’s lightly golden and wonderfully set. Remove the pan from the oven and set it on a wire rack to cool completely. Patience is key here; you want that crust perfectly chilled before adding the filling.
3. Craft the Velvety Cream Cheese Filling This is where the magic happens! Start by ensuring all your dairy ingredients – especially the cream cheese and sour cream – are at room temperature. This makes for a smooth, lump-free batter. In a large mixing bowl, beat the softened cream cheese with an electric mixer on medium speed until it’s completely smooth and wonderfully creamy. Gradually add the granulated sugar, mixing only until just combined. Then, beat in the eggs one at a time, mixing only until each is fully incorporated. The key is gentle mixing; we don’t want to incorporate too much air. Finally, gently fold in the sour cream and vanilla extract using a rubber spatula, being very careful not to overmix the batter. Overmixing can introduce too much air, which can cause cracks in your beautiful cheesecake later on.
4. Assemble and Prepare for Baking With your smooth, dreamy filling ready, carefully pour it over the cooled gluten-free crust in the springform pan. Use an offset spatula or the back of a spoon to gently smooth the top of the filling. Now, for the crucial water bath: securely wrap the bottom and sides of the springform pan with at least two layers of heavy-duty aluminum foil, ensuring no water can seep in. This is your insurance policy for a crack-free, ultra-creamy cheesecake! Place the foil-wrapped springform pan into a larger roasting pan.
5. The Water Bath Bake for Perfect Texture Preheat your oven to 325°F (160°C). Carefully pour hot water into the larger roasting pan, ensuring it reaches approximately halfway up the sides of your foil-wrapped springform pan. Gently transfer the roasting pan to your preheated oven. Bake the cheesecake for 60-75 minutes, or until the edges are set and appear slightly golden, but the very center still has a slight, delicate jiggle, like a loose Jell-O. An instant-read thermometer inserted into the center should read around 150°F (65°C). This water bath technique is truly a game-changer, crucial for achieving an evenly cooked, ultra-creamy texture, preventing cracks on the surface, and ensuring the cheesecake doesn’t dry out.
6. Cooling for Cracker-Free Perfection Once your cheesecake is baked to perfection, turn off the oven and leave the cheesecake inside with the oven door ajar for 1 hour. This gradual cool-down process is absolutely vital in preventing those pesky cracks that can form from sudden temperature changes. After its oven cool-down, carefully remove the cheesecake from the water bath (you can discard the hot water if it’s safe to do so), unwrap the aluminum foil, and transfer it to a wire rack to cool completely at room temperature for another 2-3 hours.
7. The Essential Chill for Setting Patience, my friend, is a virtue when it comes to cheesecake! Once your cheesecake is completely cool to the touch, cover it loosely with plastic wrap and refrigerate for at least 6-8 hours, or preferably overnight. This extended chill time allows the cheesecake to fully set, firm up, and achieve its signature dense, creamy, and utterly irresistible texture. Don’t rush this step – it’s key to cheesecake nirvana!
8. Slice, Serve & Savor When you’re ready to serve, run a thin, warm knife under hot water, wipe it clean, and slice your masterpiece. Repeat this process for each slice for clean, perfect cuts. Serve your dreamy cheesecake plain or enhance it with your favorite toppings! A handful of fresh berries (like 1 cup of raspberries or sliced strawberries), a dollop of whipped cream, or a drizzle of homemade chocolate ganache (made with 4 oz melted chocolate and ½ cup warm heavy cream) are always fantastic choices.
9. Storage To keep your gluten-free cheesecake tasting its best, store any leftovers in an airtight container in the refrigerator for 3-5 days. While it’s unlikely to last that long, it’s good to know!
Troubleshooting Tips for a Perfect Cheesecake
- Preventing Cracks: Beyond not overmixing, ensuring your ingredients are at room temperature (especially the cream cheese), using a water bath, and allowing for gradual cooling (in the oven, then at room temp) are your best defenses against cracks. Sudden temperature changes are the enemy!
- If a Crack Appears: Don’t despair! A small crack won’t affect the taste. Simply cover it with your favorite topping, and no one will ever know your secret!
- Undercooked Center: If the center is too jiggly, it likely needs more time in the oven. Next time, allow for a longer bake or slightly higher temperature within the recommended range. Using an internal thermometer is the most reliable method.
Pro Tips & Tricks for the Best Gluten-Free Cheese Cake
In my kitchen, success with any gluten free cheese cake begins before you even turn on the mixer. I always pull my cream cheese and eggs from the fridge well in advance. Allowing them to reach room temperature ensures a truly smooth, lump-free batter. Softened ingredients combine much more easily, preventing overmixing and maintaining the delicate texture of your filling.
A common mistake is to overbeat the cream cheese filling once everything is combined. This incorporates too much air into the mixture, which is something we want to avoid. Excess air can lead to frustrating cracks on the surface as your cheesecake bakes and cools, resulting in a less dense, smooth texture. Overmixing can also develop the gluten in traditional flour-based crusts, though this isn’t an issue for our specifically crafted gluten-free crusts for cheesecake.
For a wonderfully uniform bake, embrace the water bath technique without hesitation. This method provides gentle, even heat, protecting the delicate custard from drying out too quickly. It guarantees a luxuriously silky texture for your cheesecake, preventing any rubberiness and promoting even cooking. A water bath also helps to stabilize the oven temperature, which is key for delicate bakes like this one. Understanding why a water bath is so beneficial can truly elevate any custard-based dessert you prepare.
Beyond the water bath, preventing cracks involves careful cooling practices after baking. Once baking is complete, resist the urge to pull your cheesecake out of the oven immediately. Instead, let it cool slowly inside the turned-off oven with the door ajar for an hour or so. This gradual temperature change minimizes drastic contraction, which is a major cause of those unsightly surface cracks.
Identifying a perfectly baked gluten free cheesecake takes a keen eye and a bit of confidence. The edges should appear set and slightly puffed, indicating they are firm. The very center, about a 2-inch circle in the middle, should still have a slight jiggle when gently nudged. This slight wobble means the residual heat will continue to cook the center to perfection as it cools.
Patience is your greatest ally once your cheesecake leaves the oven and cools. Chilling isn’t merely an option; it’s absolutely essential for this treat to reach its full potential. A minimum of 6-8 hours in the refrigerator, or ideally overnight, allows the cheesecake to fully set its structure. This crucial step prevents collapse and ensures that signature dense, creamy consistency everyone loves.
Finally, for those pristine, bakery-worthy slices, remember this simple trick every time. Before each cut, run a sharp, thin knife under very hot water for several seconds. Wipe the blade completely clean and dry between every single slice to prevent sticking and maintain impeccably sharp lines. This makes serving your gluten free dairy free cheesecake (if you chose that delicious variation) a truly elegant affair.
Enjoyed this recipe? Share it with a friend or save it to your board for later. Leave a comment below — I love hearing how it turned out!
You May Also Enjoy





You Might Also Love These 🍽️
Recipes picked just for you based on what you’re cooking