Crispy GF Panko: Make Your Own!
Discover how to make your own delicious wheat-free panko at home! This recipe is perfect for healthy bread crumbs and answers 'is panko wheat free' concerns.
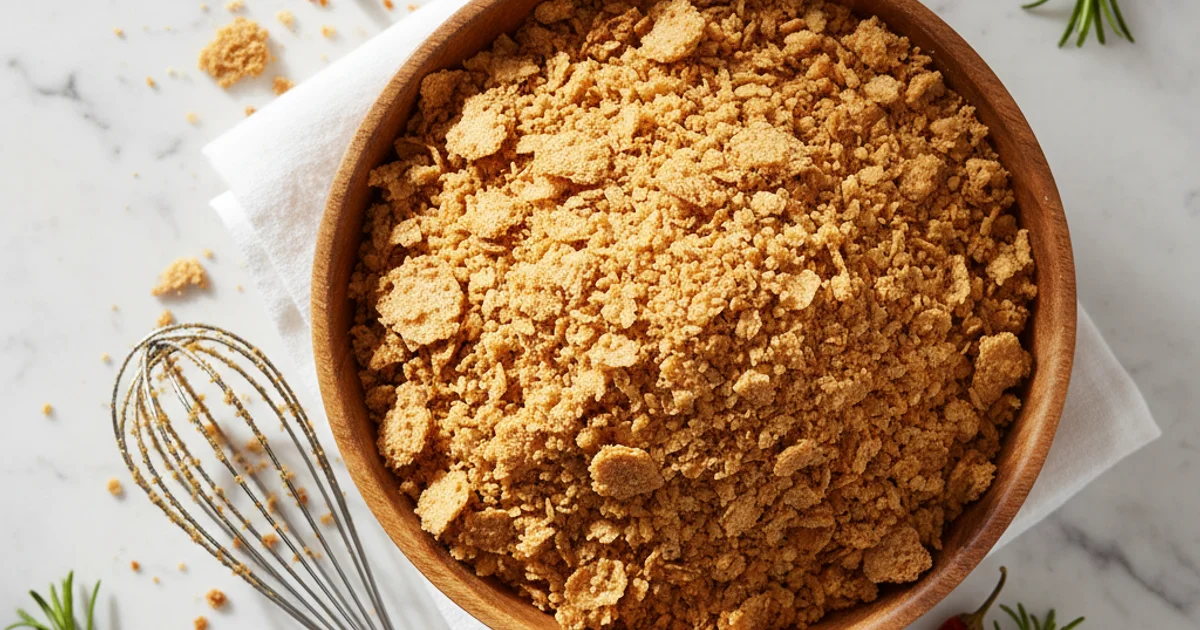
- 1Introduction: Why Homemade Wheat-Free Panko Matters for Your Kitchen
- 2Why You’ll Love This Wheat-Free Panko Recipe
- 3Ingredients Overview: Crafting Your Gluten-Free Panko Bread Crumbs
- 4Equipment You’ll Need for Perfect Wheat-Free Panko
- 5Step-by-Step Instructions: Making Your Own Wheat-Free Panko
- 6Pro Tips & Tricks for the Best Gluten-Free Panko Breadcrumbs
Ingredients
Main Ingredients
- 8 slices gluten-free bread (light, airy texture preferred)
- 1 tbsp olive oil (or other neutral oil)
- 1/2 tsp salt
Optional Seasonings
- 1/2 tsp garlic powder
- 1/4 tsp onion powder
- 1/2 tsp dried Italian herbs
- Pinch of cayenne pepper
Instructions
Instructions
Preheat oven and prepare baking sheet.
Instructions
Remove bread crusts (optional).
Instructions
Pulse bread in food processor to coarse crumbs.
Instructions
Toss crumbs with oil and seasonings.
Instructions
Spread evenly on baking sheet.
Instructions
Bake, stirring occasionally, until golden and crispy.
Instructions
Cool completely before storing.
Recipe FAQs
Are panko breadcrumbs gluten-free?
What kind of gluten-free bread is best for making wheat-free panko?
Can I make this recipe without a food processor?
How long does homemade gluten-free panko last?
Why is my homemade panko not crispy?
Can I use this wheat-free panko for frying?
Crispy GF Panko: Make Your Own!
Discover how to make your own delicious wheat-free panko at home! This recipe is perfect for healthy bread crumbs and answers 'is panko wheat free' concerns.
Prep Time
10 min
Cook Time
20 min
Total Time
30 min
Main Ingredients
- 8 slices gluten-free bread (light, airy texture preferred)
- 1 tbsp olive oil (or other neutral oil)
- 1/2 tsp salt
Optional Seasonings
- 1/2 tsp garlic powder
- 1/4 tsp onion powder
- 1/2 tsp dried Italian herbs
- Pinch of cayenne pepper
Introduction: Why Homemade Wheat-Free Panko Matters for Your Kitchen
For anyone navigating the world of gluten-free eating, the quest for truly satisfying textures can often feel like a culinary treasure hunt. We all crave that golden, crispy crunch, whether it’s on baked chicken, a vibrant vegetable gratin, or even a simple casserole. What I discovered is that traditional panko, the beloved Japanese breadcrumb, is almost always made from wheat, rendering it off-limits for those with gluten sensitivities or celiac disease. This often leads to the frustrating question: are panko breadcrumbs gluten free? The answer, unfortunately, is typically no. Store-bought gluten-free alternatives exist, of course, but they often fall short in texture, sometimes tasting more like gritty dust than light, airy crumbs. Building on this, I always found myself wishing for a truly superior solution that delivered on all fronts. That’s precisely why mastering homemade wheat free panko has become a staple in my kitchen. This recipe offers an unparalleled crispiness and a delicate, neutral flavor that enhances, rather than overwhelms, your dishes. It puts you in complete control of the ingredients, ensuring purity and freshness that store-bought options simply can’t match. You’ll notice that the texture achieved through this homemade method is distinctly lighter and airier than many commercial gluten-free breadcrumbs, making it perfect for achieving that coveted golden-brown crust. This guide will walk you through creating your own perfect batch, elevating your gluten-free cooking to new heights.
Why You’ll Love This Wheat-Free Panko Recipe
Why You’ll Love This Wheat-Free Panko Recipe
You know that satisfying crunch you crave in fried chicken, crispy fish, or a baked casserole topping? This recipe delivers exactly that, but without any wheat. What I discovered is that achieving that signature light, airy, and extra-crispy texture, so characteristic of traditional panko, is entirely possible using gluten-free bread. You’ll notice that the resulting crumbs are far superior to any store-bought gluten-free options, which often turn out dense or sandy.
The trick is using the right kind of gluten-free bread, which we’ll discuss in detail, to create those perfect flakes. Building on this, making your own wheat free panko is incredibly simple and much more economical than purchasing specialty brands. Have you ever checked the price tag on a small bag of gluten-free panko at the store? It can be quite shocking. In my kitchen, I always prefer to control the ingredients, ensuring no unnecessary additives or preservatives. This homemade version allows you to do just that, creating a truly healthy bread crumbs alternative.
Here’s the thing, this recipe is also wonderfully customizable and versatile. You can easily adapt the flavor profile with various herbs and spices, making it perfect for a wide range of dishes, from Italian to Asian-inspired meals. For instance, a pinch of garlic powder and dried oregano transforms it into an excellent topping for baked ziti, while a touch of ginger and sesame seeds makes it ideal for an Asian-style chicken cutlet. This flexibility means you’re not just making a basic ingredient; you’re crafting a tailored component for your culinary creations. The secret is in the low and slow drying process, which prevents the crumbs from browning too quickly and ensures even crispness throughout. This method answers the common query, “is panko wheat free?” with a resounding, confident yes, when you make it yourself.
Ingredients Overview: Crafting Your Gluten-Free Panko Bread Crumbs
Building on this, understanding the role of each ingredient is paramount to achieving that perfect crunchy texture. When I set out to create this recipe, I experimented with numerous combinations to ensure the resulting gluten free bread crumbs panko would mimic traditional panko’s light, airy crispness. My goal was to demystify the process and provide a clear path to homemade success, especially for those wondering, “are panko breadcrumbs gluten free” when purchased commercially.
The foundation of this recipe is, of course, the gluten-free bread. Not all gluten-free breads are created equal for this purpose. You’ll want a lighter, airier loaf, ideally one that isn’t too dense or packed with heavy seeds. Think of a classic white or light whole-grain gluten-free sandwich bread. Breads with a very tight crumb or those that are excessively moist will yield a denser, less delicate crumb, which isn’t what we’re aiming for in a true panko substitute. The quality of your bread directly impacts the final texture of your healthy bread crumbs. Avoid anything too sweet or heavily flavored, as those notes will carry through.
Next, we have olive oil. This isn’t just for coating; it’s crucial for achieving that golden-brown color and irresistible crispiness. A light, neutral olive oil works beautifully, but you could also use avocado oil or grapeseed oil if you prefer. The oil helps conduct heat evenly, ensuring each crumb gets perfectly toasted without burning. It provides a subtle richness, enhancing the overall flavor without overpowering it. The amount used is carefully calibrated to coat the crumbs lightly, preventing them from becoming greasy.
Salt is a non-negotiable flavor enhancer. A pinch of fine sea salt brings out the inherent flavors of the bread and any added seasonings. It’s important to balance the saltiness, as you can always add more to your finished dish, but you can’t take it away from the crumbs themselves. I always start with a small amount and taste a cooled crumb before adding more.
Finally, the optional seasonings are where you can really customize your healthy bread crumbs. I often include a touch of garlic powder and onion powder for an all-purpose savory crumb. For an Italian flair, dried oregano, basil, or a pinch of red pepper flakes work wonderfully. Paprika can add a lovely color and a smoky depth. These additions transform a simple topping into a flavor powerhouse, demonstrating that making your own means you control every aspect, including answering the question, “is panko wheat free” with a resounding yes, because you made it yourself.
Equipment You’ll Need for Perfect Wheat-Free Panko
In my kitchen, having the right tools makes all the difference for a smooth cooking experience. This is especially true when making homemade pantry staples. You won’t need a lot of specialized gear for this recipe, but a few key items will ensure your homemade breadcrumbs turn out perfectly. Let’s talk about what you’ll need to get started.
First and foremost, a food processor is absolutely non-negotiable for achieving the right texture. While some might attempt to crumble dried bread by hand, a food processor provides that uniform, airy crumb characteristic of traditional panko. You’ll notice that different sized food processors can handle varying batch sizes. A 7-cup model is usually sufficient for a standard loaf of bread, but if you’re planning to make larger quantities, a 12-cup processor will save you time. The trick is to pulse, not continuously blend, to avoid creating a fine powder; we’re aiming for distinct, jagged flakes that are characteristic of good gluten free bread crumbs panko.
Next, you’ll want at least one, preferably two, baking sheets. These are crucial for spreading your breadcrumbs in a single, even layer, which promotes consistent drying and toasting. I always line my baking sheets with parchment paper. This prevents sticking and makes cleanup incredibly easy. A common mistake is overcrowding the baking sheet, which steams the crumbs instead of toasting them, leading to a chewy, rather than crispy, end product. The goal is to maximize air circulation around each crumb.
Of course, an oven is essential for the drying and toasting process. Precise temperature control is important here. You want a low, steady heat to gently dry out the bread without burning it. My oven has a convection setting, which I find helps circulate the air even better, contributing to that desired crispness. If your oven tends to have hot spots, you might need to rotate your baking sheets halfway through the cooking time.
To stir and spread the crumbs, a simple spatula or wooden spoon will suffice. During the toasting process, you’ll need to gently stir the crumbs every 15-20 minutes. This ensures even browning and prevents any part from getting too dark. A flexible silicone spatula works well for scraping up any crumbs that might stick to the parchment, though with parchment, sticking is rarely an issue.
Finally, for storage, an airtight container is paramount. Once your breadcrumbs are completely cooled, transferring them to a container with a tight-fitting lid will protect them from moisture and keep them fresh. Glass jars or sturdy plastic containers work best. This ensures that all your hard work results in a product that stays crispy and ready for your next culinary creation.
Step-by-Step Instructions: Making Your Own Wheat-Free Panko
-
Prepare the Bread: For the most authentic panko-like texture, carefully remove the crusts from your wheat-free bread slices. While optional, this step significantly contributes to a lighter, crispier crumb.
-
Crumble in Food Processor: Break the de-crusted bread slices into smaller pieces and place them in a food processor. Pulse the bread in short bursts, about 5-10 seconds at a time, until coarse, irregular crumbs form. Be careful not to over-process, as this will result in a fine powder rather than the desired flaky panko texture.
-
Season and Oil: Transfer the pulsed breadcrumbs to a large bowl. Drizzle with olive oil or your preferred cooking oil, then add your desired seasonings such as salt, black pepper, garlic powder, or dried herbs. Toss thoroughly to ensure the oil and seasonings are evenly distributed amongst the crumbs.
-
Carefully spread the processed breadcrumbs in a single, even layer across the prepared baking sheet, ensuring there are no large clumps to promote uniform drying.
-
Bake for 20-25 minutes at 275°F (135°C), or until the breadcrumbs are golden brown and completely dry, which is crucial for achieving their signature crispness without burning.
-
Stir the breadcrumbs every 5-7 minutes during baking to ensure even drying and browning, preventing any sections from becoming over-toasted while others remain soft.
-
Cool Completely: Allow the wheat-free panko to cool completely on the baking sheet at room temperature. This crucial step ensures that any remaining moisture evaporates, leading to the ultimate crispness needed for perfect breadcrumbs and preventing spoilage during storage.
Pro Tips & Tricks for the Best Gluten-Free Panko Breadcrumbs
In my kitchen, creating the perfect texture is always a priority. Trust me on this one, the type of bread you start with makes a monumental difference for this recipe. I always reach for a gluten-free loaf that’s a day or two old; slightly stale bread grinds more cleanly and absorbs less moisture during the drying process. Fresh, soft bread can sometimes turn into a gummy paste in the food processor, which is definitely not what we’re aiming for here. Look for breads with a relatively neutral flavor profile that won’t overpower your final dish.
Building on this, the food processor is your best friend, but knowing how to use it correctly is vital. A common mistake is to process the bread crumbs too finely, essentially turning them into regular breadcrumbs instead of the coarse, flaky texture characteristic of this treat. The goal is to achieve irregular, jagged pieces. I use short pulses, checking the consistency frequently, to avoid over-processing. You’ll notice that the crumbs should still have some “air” to them, not be dense like flour. This coarser grind is what gives your finished dishes that satisfying crunch.
The secret is all in the drying process, which needs a low and slow approach. Patience truly is a virtue here. I set my oven to its lowest temperature, typically around 200°F (95°C), and let the crumbs dry out gradually. This slow drying ensures even moisture removal from the inside out, preventing burning on the edges while the center remains soft. I always stir them every 15-20 minutes to promote uniform drying. This constant attention prevents hot spots and guarantees every crumb becomes wonderfully crisp.
Here’s what actually works: spreading the crumbs in a single, even layer on your baking sheet. Overcrowding the pan traps steam, which can lead to soggy spots and uneven drying. I use a large baking sheet, often two, to give the crumbs plenty of space to breathe. This allows the hot air to circulate freely around each piece, ensuring maximum crispness. What I discovered is that a thin layer dries much faster and more consistently than a thick, piled-up one.
Worth noting here, cooling completely before storing is non-negotiable. Warm crumbs, even slightly warm, will release residual moisture and create condensation inside your storage container. This moisture is the enemy of crispiness and can lead to a soft, even moldy, product. I leave the dried crumbs on the baking sheet for at least an hour, or until they are completely cool to the touch, before transferring them. For more insights on proper food storage techniques, check out this guide on preserving food freshness.
Finally, don’t be afraid to experiment with flavor boosters! While plain is versatile, adding a little something extra can elevate your dishes. I sometimes stir in a tablespoon of nutritional yeast for a cheesy, umami depth, especially for vegetable gratins. Smoked paprika adds a subtle, earthy warmth, while dried herbs like oregano or thyme can lend a Mediterranean flair. Just make sure to add these after the crumbs are fully dried and cooled, so their flavors remain vibrant.
Enjoyed this recipe? Share it with a friend or save it to your board for later. Leave a comment below — I love hearing how it turned out!
You May Also Enjoy





You Might Also Love These 🍽️
Recipes picked just for you based on what you’re cooking