Crack the Code: Homemade Nilla Wafers!
Unlock the secrets of Nilla Wafers ingredients and bake your own batch of crisp, vanilla-infused cookies. Perfect for gluten-free & vegan options!
- 1Introduction: Why Understanding Nilla Wafers Ingredients Matters
- 2Why You’ll Love This Homemade Vanilla Wafers Recipe
- 3Demystifying Vanilla Wafers Ingredients: What You Need & Why
- 4Essential Equipment You’ll Need for Perfect Homemade Wafers
- 5Step-by-Step Instructions: Crafting Your Own Classic Nilla Wafers
- 6Pro Tips & Tricks for the Best Vanilla Wafers Every Time
Ingredients
Dry Ingredients
- 1 ½ cups (180g) all-purpose flour (or 1:1 gluten-free baking blend for gluten free wafers)
- 1 teaspoon baking powder
- ¼ teaspoon salt
Wet Ingredients
- ½ cup (113g) unsalted butter, softened (or vegan butter for vegan vanilla wafers)
- ¾ cup (150g) granulated sugar
- 1 large egg (or 1 flax egg for vegan vanilla wafers)
- 2 teaspoons pure vanilla extract
- 1-2 tablespoons milk (dairy or plant-based, as needed for consistency)
Instructions
Instructions
Preheat oven and line baking sheets.
Instructions
Whisk together dry ingredients.
Instructions
Cream butter and sugar until light and fluffy.
Instructions
Beat in egg and vanilla extract.
Instructions
Gradually add dry ingredients to wet, mixing until just combined.
Instructions
Add milk if dough is too stiff.
Instructions
Drop small spoonfuls of dough onto baking sheets.
Instructions
Bake until golden brown.
Instructions
Cool on baking sheets briefly, then transfer to wire rack.
Recipe FAQs
Are Nilla Wafers gluten free if I make them at home?
How do I make vegan vanilla wafers from this recipe?
What makes homemade vanilla wafers taste better than store-bought?
My wafers turned out soft instead of crispy. What went wrong?
Can I add other flavors to my homemade Nilla wafers?
How long do homemade vanilla wafers last?
Crack the Code: Homemade Nilla Wafers!
Unlock the secrets of Nilla Wafers ingredients and bake your own batch of crisp, vanilla-infused cookies. Perfect for gluten-free & vegan options!
Prep Time
15 min
Cook Time
12 min
Total Time
27 min
Dry Ingredients
- 1 ½ cups (180g) all-purpose flour (or 1:1 gluten-free baking blend for gluten free wafers)
- 1 teaspoon baking powder
- ¼ teaspoon salt
Wet Ingredients
- ½ cup (113g) unsalted butter, softened (or vegan butter for vegan vanilla wafers)
- ¾ cup (150g) granulated sugar
- 1 large egg (or 1 flax egg for vegan vanilla wafers)
- 2 teaspoons pure vanilla extract
- 1-2 tablespoons milk (dairy or plant-based, as needed for consistency)
Introduction: Why Understanding Nilla Wafers Ingredients Matters
The unmistakable crunch, the delicate vanilla aroma, and that subtly sweet finish – for many, the classic Nilla Wafer is more than just a cookie; it’s a cornerstone of childhood memories and countless dessert recipes, especially the beloved banana pudding. I always have a box in my pantry, but lately, I’ve started looking closer at ingredient labels. As our understanding of food and its impact on our bodies grows, many of us are becoming more conscious about what we consume. What I discovered when examining the standard Nilla Wafers ingredients list wasn’t necessarily alarming, but it certainly sparked a desire for more control.
Here’s the thing: while convenient, store-bought versions often contain a host of unfamiliar additives, artificial flavors, and preservatives. For those managing allergies, sensitivities, or simply striving for a cleaner diet, these hidden components can be a real concern. Whether it’s avoiding common allergens like gluten or dairy, or simply wanting to steer clear of artificial colors and high-fructose corn syrup, the desire to know exactly what goes into our food is stronger than ever. This recipe isn’t just about recreating a familiar taste; it’s about empowering you to enjoy that comforting flavor with wholesome, transparent ingredients you can trust. You’ll be surprised how simple it is to achieve that signature crispness and vanilla essence right in your own kitchen, allowing for easy customization, whether you’re aiming for gluten-free wafers or vegan vanilla wafers. This homemade version ensures you get all the nostalgia without any of the worry.
Why You’ll Love This Homemade Vanilla Wafers Recipe
This recipe offers a delightful journey back to the comforting flavors of childhood, but with a significant upgrade. What I love about this homemade version is the sheer superiority in taste and texture. You’ll achieve a delicate crispness that simply doesn’t exist in the store-bought variety, along with a richer, more authentic vanilla essence. This isn’t just a cookie; it’s an experience.
Here’s the thing: making them yourself gives you complete control over every single component. If you’ve ever wondered about the nilla wafers ingredients in commercially produced boxes, you’ll appreciate the transparency here. For instance, if you’re asking, are vanilla wafers gluten free? The answer for store-bought ones is typically no. However, with this recipe, you can easily substitute all-purpose flour for a gluten-free blend, creating delicious gluten free wafers tailored to your needs. Similarly, for those seeking vegan vanilla wafers, simple dairy and egg alternatives work beautifully without sacrificing flavor or structure. This level of customization is truly empowering. It transforms a simple cookie into a conscious choice for your family’s dietary preferences. The process itself is incredibly rewarding, using pantry staples most home bakers already possess. You’ll find the steps straightforward, making it accessible even for those new to baking. Beyond snacking, these wafers are incredibly versatile; they shine in layered desserts, as a base for pie crusts, or crumbled over ice cream. This treat provides both comfort and culinary flexibility.
Demystifying Vanilla Wafers Ingredients: What You Need & Why
Here’s the thing, understanding the role of each component is crucial for baking success. When I set out to recreate that iconic cookie, I meticulously tested how each element contributed to the final product. Getting that perfect balance of crispness and melt-in-your-mouth tenderness comes down to the specifics.
All-purpose flour forms the structural backbone of these wafers. Its protein content develops just enough gluten to hold the cookies together without making them tough. For those wondering, are vanilla wafers gluten free? You can absolutely make gluten free wafers! I’ve had great success substituting with a 1:1 gluten-free baking blend that already contains xanthan gum. This ensures your cookies maintain their delicate structure.
Granulated sugar provides more than just sweetness. It contributes significantly to the crisp texture and helps achieve those lovely golden-brown edges through caramelization during baking. Without enough sugar, the wafers would be soft and pale.
Unsalted butter is key for richness and tenderness. It coats the flour particles, preventing excessive gluten development and resulting in a crumbly, delicate bite. If you’re aiming for vegan vanilla wafers, a good quality vegan butter alternative works wonderfully here. Just ensure it’s a stick butter, not a spread, for proper consistency.
Eggs act as a binder, helping to emulsify the ingredients and provide a touch of leavening. They also add richness and contribute to the wafer’s characteristic color. For vegan options, a flax egg (1 tablespoon ground flaxseed mixed with 3 tablespoons water, let sit for 5 minutes) or a commercial egg replacer can be used effectively.
Vanilla extract is, as its name suggests, the star flavor. I always recommend using a pure vanilla extract for the best, most authentic taste. Imitation vanilla simply won’t give you the same depth of flavor. This is where the magic happens, transforming simple ingredients into something special.
Baking powder is our primary leavening agent. It creates tiny air pockets, giving the wafers their characteristic light and airy texture. Without it, your cookies would be dense and flat.
Salt is often overlooked but incredibly important. It balances the sweetness and enhances all the other flavors, making them pop. A small pinch makes a big difference in the overall taste profile.
Finally, milk is an optional addition, used purely for adjusting the dough’s consistency. Sometimes, depending on humidity or flour type, the dough might be a little stiff. A tablespoon or two of milk can bring it to the perfect, pipeable consistency. For vegan vanilla wafers, plant-based milks like almond or oat milk work perfectly. This comprehensive understanding of vanilla wafers ingredients is what empowers you to bake with confidence.
Essential Equipment You’ll Need for Perfect Homemade Wafers
In my kitchen, having the right tools makes all the difference for a smooth baking experience. You don’t need a professional setup, but a few key items will ensure your homemade wafers turn out beautifully. Investing in these basics will elevate your baking game. Here’s what actually works for consistently great results.
For starters, an electric mixer is non-negotiable. Whether it’s a stand mixer with a paddle attachment or a reliable handheld model, this tool is crucial for creaming together butter and sugar until light and fluffy. It also incorporates the eggs smoothly, creating that essential airy base for the wafers. This step is vital for achieving the proper texture.
Next up, you’ll need at least two large mixing bowls. I always dedicate one for dry ingredients and another for wet. This prevents overmixing and allows for easy, gradual incorporation. Having separate bowls streamlines the process significantly.
Baking sheets are, of course, essential for baking these delicate cookies. I always recommend using light-colored, heavy-gauge sheets. Darker sheets can cause the bottoms of cookies to brown too quickly, leading to uneven baking. Trust me on this one; light sheets provide a gentler, more even heat distribution.
To prevent sticking and make cleanup a breeze, parchment paper or silicone baking mats are indispensable. I prefer silicone mats for their reusability and consistent non-stick surface. They ensure your wafers lift off cleanly every single time.
Accuracy is paramount in baking, so a good set of measuring cups and spoons is a must-have. Eyeballing ingredients often leads to inconsistent results. Precise measurements guarantee the correct balance of flavors and textures.
A sturdy rubber spatula is perfect for scraping down the sides of your mixing bowls, ensuring all ingredients are fully incorporated. It’s also excellent for gently folding in dry ingredients without deflating the batter. This small tool sees a lot of action in my kitchen.
While optional, a small cookie scoop (about 1 tablespoon capacity) is a real time-saver. It ensures that each wafer is uniform in size, which means they’ll bake evenly. Uniformity is key for that classic look and consistent texture.
Finally, a wire cooling rack is necessary for cooling your wafers completely. Placing hot cookies directly on a flat surface can make them steamy and soggy. A rack allows air to circulate, maintaining their crispness. This ensures the perfect finish for your homemade treat.
Step-by-Step Instructions: Crafting Your Own Classic Nilla Wafers
-
Prep Work: Preheat your oven to 350°F (175°C) and line two large baking sheets with parchment paper or silicone baking mats.
-
Creaming: In a large bowl, using an electric mixer on medium speed, cream together the softened unsalted butter and granulated sugar until the mixture is light in color and fluffy, scraping down the sides of the bowl as needed.
-
Adding Wet Ingredients: Reduce the mixer speed to low and beat in the large eggs one at a time, ensuring each egg is fully incorporated before adding the next, then mix in the pure vanilla extract until just combined.
-
Combine Dry Ingredients: In a separate medium bowl, whisk together the all-purpose flour, baking powder, and salt until thoroughly combined and no lumps remain.
-
Mix the Dough: Gradually add the dry ingredients to the wet ingredients in the stand mixer bowl, mixing on low speed until just combined, being careful not to overmix the dough.
-
Form the Wafers: Drop small spoonfuls (about half a teaspoon each) or use a small cookie scoop onto the prepared baking sheets, leaving about 1 inch of space between each wafer as they will spread slightly during baking.
-
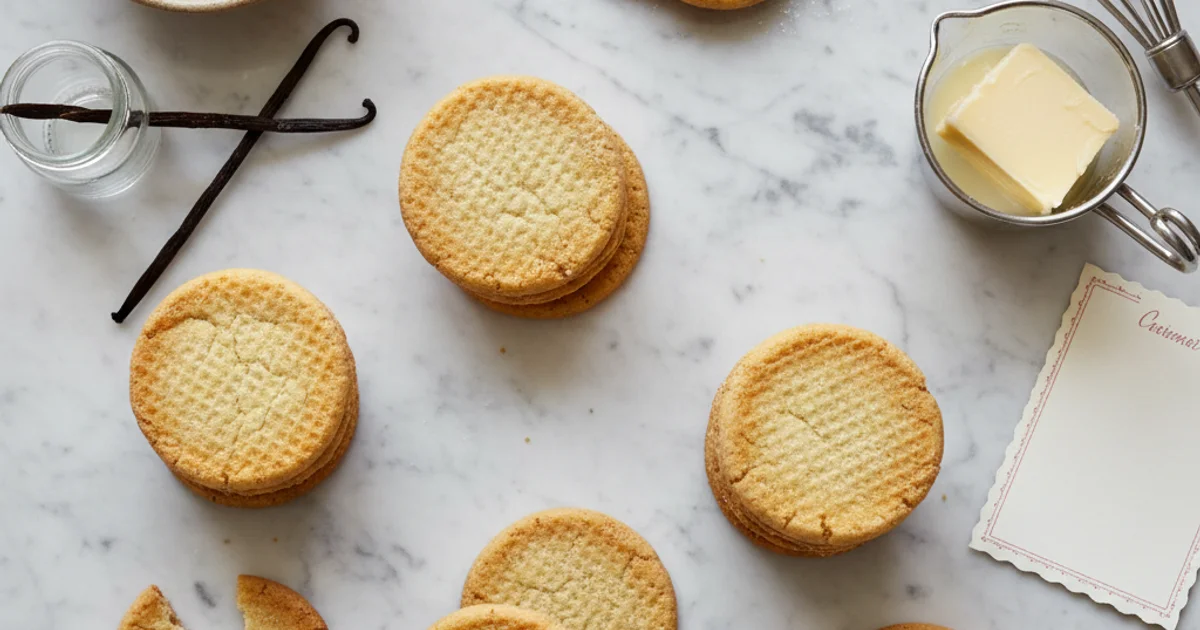
Bake the Nilla wafers for 10-12 minutes, or until their edges are a delicate golden brown and their centers appear set.
-
Carefully transfer the baked Nilla wafers to a wire rack and allow them to cool completely before serving or storing.
Pro Tips & Tricks for the Best Vanilla Wafers Every Time
Achieving that iconic, delicate crispness in your homemade wafers takes a bit of finesse. I always start by ensuring all my dairy ingredients are at room temperature. This helps everything emulsify smoothly, creating a uniform batter. Cold butter or eggs can lead to a lumpy mixture, which affects the final texture. Trust me on this one, patience here pays off.
Building on this, once your wet and dry ingredients are combined, resist the urge to keep mixing. Overmixing develops the gluten in the flour, resulting in a tougher wafer. Mix only until the streaks of flour disappear, no more. You’ll notice that the batter will still be soft and pliable. The trick is to achieve just enough mixing for cohesion without overworking the dough. This attention to detail ensures a tender crumb.
Here’s the thing, for consistent baking, uniformity is key. I recommend using a small cookie scoop, about 1 teaspoon in size, to portion out your dough. This ensures each wafer bakes at the same rate. Unevenly sized wafers can lead to some being underdone and others overbaked. A common mistake is eyeballing the portions, which often leads to inconsistent results.
What I discovered is that oven temperatures vary significantly. The baking time provided in recipes is a guideline, not a strict rule. Keep a close eye on your wafers, looking for those tell-tale golden brown edges. They should be lightly golden, not deeply browned. Pull them from the oven when they are just set and appear slightly pale in the center.
The secret is to let them cool completely on a wire rack. This step is crucial for developing that signature crisp texture. Warm wafers will be soft, but as they cool, they firm up beautifully. Trying to move them too soon can also cause them to break. Give them ample time to achieve their structural integrity.
For a subtle twist, I sometimes add a tiny pinch of freshly grated nutmeg or a few drops of almond extract to the batter. This enhances the overall flavor profile without overpowering the classic vanilla notes. It’s a small addition that makes a noticeable difference. If you’re exploring variations, these little touches can elevate your baking.
In practice, if your wafers come out flat, several factors could be at play. Old baking powder is a frequent culprit; make sure yours is fresh. Another possibility is overmixing, as discussed earlier, which can deflate the air incorporated into the batter. Too much softened butter can also contribute to spreading. Checking your ingredient freshness and mixing technique can help troubleshoot this common issue. If you’re looking into alternative dietary needs, you might wonder, are vanilla wafers gluten free? Many traditional recipes are not, but with careful ingredient swaps, you can adapt them. For those interested in understanding ingredient functions, BBC Good Food provides an excellent guide to baking science. This resource can help you understand why certain ingredients behave the way they do, especially when considering adaptations like making gluten free wafers or vegan vanilla wafers.
Enjoyed this recipe? Share it with a friend or save it to your board for later. Leave a comment below — I love hearing how it turned out!
You May Also Enjoy





You Might Also Love These 🍽️
Recipes picked just for you based on what you’re cooking