Flaky Homemade Gluten-Free Pop Tarts!
Craving classic toaster pastries? Learn how to make delicious gluten free pop tarts from scratch! This easy recipe delivers flaky crusts and sweet fillings.
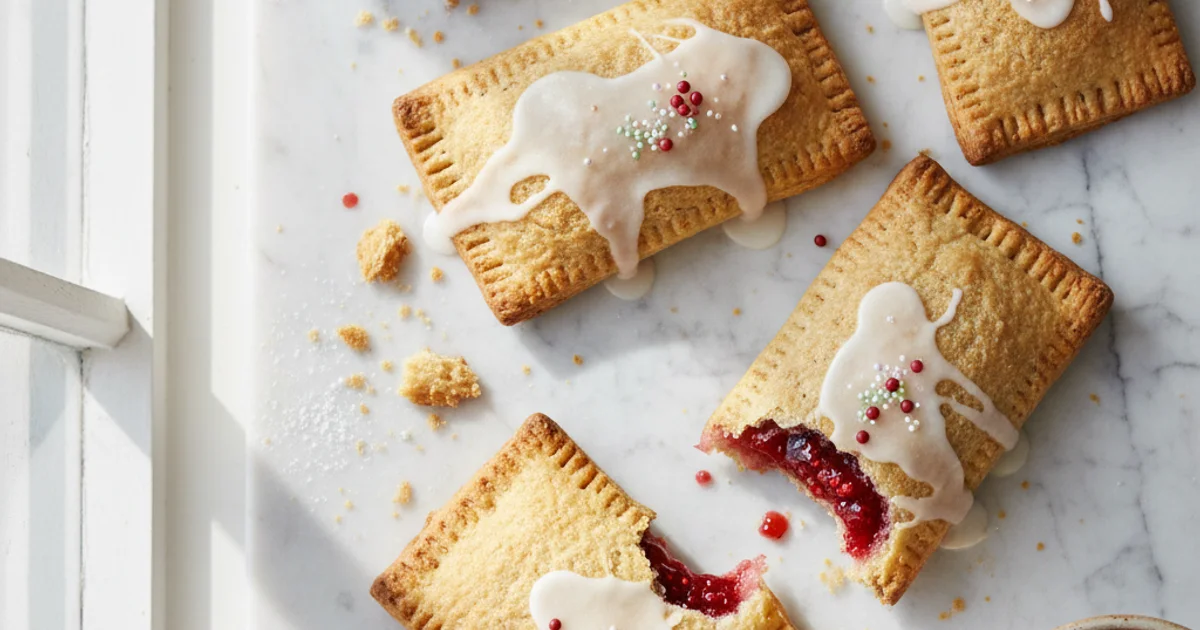
- 1Introduction: The Quest for Perfect Gluten Free Poptarts
- 2Why You’ll Love This Homemade Gluten Free Toaster Pastries Recipe
- 3Ingredients Overview: Crafting Your Gluten-Free Pop Tart Base
- 4Ingredients Overview: Crafting Your Gluten-Free Pop Tart Base
- 5Essential Equipment for Perfect Gluten Free Pop Tarts
- 6Step-by-Step Instructions: Baking Your Homemade Gluten Free Toaster Pastries
- 7Pro Tips & Tricks for Flawless Gluten Free Pop Tarts
- 8Pro Tips & Tricks for Flawless Gluten Free Pop Tarts
Ingredients
For the Gluten-Free Pastry
- 2 ½ cups (300g) gluten-free all-purpose flour blend (with xanthan gum)
- 1 tablespoon granulated sugar
- 1 teaspoon salt
- 1 cup (226g) unsalted cold butter, cut into ½-inch cubes
- ½ cup (120ml) ice water, plus more if needed
For the Filling
- ¾ cup (200g) fruit preserves or jam (strawberry, raspberry, blueberry, etc.)
For the Egg Wash
- 1 large egg yolk
- 1 tablespoon water or milk
For the Glaze (Optional)
- 1 cup (120g) powdered sugar
- 2-3 tablespoons milk (dairy or non-dairy) or lemon juice
- ½ teaspoon vanilla extract (optional)
- Sprinkles (optional)
Instructions
Instructions
Whisk dry pastry ingredients in a large bowl.
Instructions
Cut in cold butter using a pastry blender or food processor until pea-sized crumbs form.
Instructions
Gradually add ice water, mixing until dough just comes together.
Instructions
Divide dough, flatten into discs, wrap, and chill for at least 30 minutes.
Instructions
Preheat oven and line baking sheets with parchment paper.
Instructions
Roll out one dough disc between two sheets of parchment paper to ¼-inch thickness.
Instructions
Cut dough into 3x4-inch rectangles (you'll need 16 total).
Instructions
Place 8 rectangles on prepared baking sheets. Spoon 1-2 tablespoons of filling onto the center of each, leaving a ½-inch border.
Instructions
Top with remaining 8 dough rectangles. Crimp edges firmly with a fork to seal.
Instructions
Whisk egg yolk and water for egg wash. Brush over each pop tart.
Instructions
Pierce the top of each pastry several times with a fork for venting.
Instructions
Bake for 18-22 minutes, or until golden brown.
Instructions
Transfer to a wire rack to cool completely.
Instructions
Prepare glaze by whisking powdered sugar, milk, and vanilla. Drizzle or spread over cooled pop tarts.
Instructions
Let glaze set before serving. Enjoy!
Recipe FAQs
Can I use any gluten-free flour blend for these pop tarts?
My gluten-free pop tart dough is too crumbly/sticky, what went wrong?
How do I prevent the filling from leaking out during baking?
Can I make these dairy-free and/or egg-free?
Why do my gluten-free pop tarts taste dry or bland?
Can I make the dough in advance?
Flaky Homemade Gluten-Free Pop Tarts!
Craving classic toaster pastries? Learn how to make delicious gluten free pop tarts from scratch! This easy recipe delivers flaky crusts and sweet fillings.
Prep Time
45 min
Cook Time
20 min
Total Time
65 min
For the Gluten-Free Pastry
- 2 ½ cups (300g) gluten-free all-purpose flour blend (with xanthan gum)
- 1 tablespoon granulated sugar
- 1 teaspoon salt
- 1 cup (226g) unsalted cold butter, cut into ½-inch cubes
- ½ cup (120ml) ice water, plus more if needed
For the Filling
- ¾ cup (200g) fruit preserves or jam (strawberry, raspberry, blueberry, etc.)
For the Egg Wash
- 1 large egg yolk
- 1 tablespoon water or milk
For the Glaze (Optional)
- 1 cup (120g) powdered sugar
- 2-3 tablespoons milk (dairy or non-dairy) or lemon juice
- ½ teaspoon vanilla extract (optional)
- Sprinkles (optional)
Introduction: The Quest for Perfect Gluten Free Poptarts
For many of us, the mere mention of toaster pastries conjures up vivid childhood memories. I remember those mornings, the sweet aroma filling the kitchen, the anticipation of that warm, fruit-filled treat. It was a simple pleasure, a cornerstone of breakfast nostalgia. But for those navigating a gluten-free diet, that memory often comes with a caveat. What I discovered is that store-bought gluten-free alternatives often fall short. They can be crumbly, dry, and lacking that quintessential flaky crust we all crave. It’s a disappointment, especially when you’re yearning for a taste of the past.
Here’s the thing: you don’t have to settle for subpar. In my kitchen, I’ve spent countless hours perfecting a recipe that brings back all that joy and more. This recipe delivers a truly exceptional homemade experience. Imagine a golden, buttery crust that shatters delicately with each bite, encasing a vibrant, sweet fruit filling. This isn’t just another recipe; it’s a journey back to those comforting flavors, crafted with care and designed to delight. You’ll find that making your own gluten free pop tarts from scratch is not only incredibly rewarding but also surprisingly straightforward. It allows you to control the ingredients, ensuring a wholesome and utterly satisfying result that store-bought versions simply cannot match. This recipe offers a solution for anyone seeking a delicious, inclusive treat without compromise.
Why You’ll Love This Homemade Gluten Free Toaster Pastries Recipe
Here’s the thing: many gluten-free recipes promise a lot but deliver little in terms of texture and taste, especially when it comes to beloved childhood treats. This recipe, however, stands out from the crowd. What I love about this is the incredible flaky, buttery crust it produces. Achieving that delicate, layered texture in gluten-free baking can be a real challenge, but my method consistently yields a pastry that shatters perfectly with each bite, mimicking the best traditional versions. You’ll notice that it doesn’t crumble or taste gritty, common pitfalls of many gluten-free doughs.
Building on this, the joy of customizable fillings truly elevates this experience. Forget the limited, often artificial flavors of store-bought options. In my kitchen, I’ve experimented with everything from vibrant raspberry jam to rich chocolate-hazelnut spread, and even a savory spinach and feta combination. This flexibility means you can tailor every single pastry to your exact cravings or dietary needs. It’s about personalizing your breakfast or snack in a way that commercial products simply cannot offer.
The secret is, making these at home also means you have complete control over ingredients, leading to a healthier and more wholesome treat. I always prioritize using natural sweeteners and high-quality fruit, avoiding the excessive sugar and artificial flavors or preservatives found in most packaged goods. This allows you to enjoy a nostalgic comfort food without any guilt. Trust me on this one, your body will thank you for the difference in quality.
In practice, many people assume homemade pastries are incredibly complicated and time-consuming. However, this recipe is surprisingly easy to follow, even for novice bakers. I’ve streamlined the process to ensure success without requiring advanced pastry skills or specialized equipment. The steps are straightforward, making it an accessible project for a weekend morning. The result is a pastry that is unequivocally better than store-bought alternatives, offering a superior taste and texture that truly satisfies.
Ingredients Overview: Crafting Your Gluten-Free Pop Tart Base
Ingredients Overview: Crafting Your Gluten-Free Pop Tart Base
Making perfect gluten-free pop tarts starts with understanding your ingredients. Each component plays a vital role in achieving that coveted flaky texture and rich flavor. I always approach ingredient selection with precision, especially when working with gluten-free flours. Here’s the thing: not all gluten-free blends are created equal.
For the pastry dough, a gluten-free all-purpose flour blend is absolutely crucial. Look for one that explicitly states it contains xanthan gum, or add it separately if yours doesn’t. Xanthan gum acts as a binder, mimicking the elasticity that gluten provides in traditional doughs. Without it, your pastry would be crumbly and difficult to work with, lacking the necessary structure to hold together during rolling and baking. I’ve experimented with many blends over the years, and a good quality, balanced blend ensures your gluten free poptarts have the right chew and tenderness. Building on this, the blend typically combines various starches and flours like rice flour, tapioca starch, and potato starch, each contributing unique properties to the final texture. This careful balance prevents a gritty mouthfeel and ensures a smooth, pliable dough.
Next up, cold butter (or a high-quality dairy-free alternative) is non-negotiable for flakiness. The secret is that cold fat, cut into small pieces, remains distinct within the dough. As the pastry bakes, the water in the butter turns to steam, creating tiny pockets of air that separate the layers of dough. This process is what gives you those beautiful, airy flakes. In my kitchen, I even cube my butter and pop it back into the freezer for 10-15 minutes before mixing. A common mistake is using softened butter, which will result in a dense, cookie-like crust rather than a light, flaky one. You’ll notice that the dough comes together much better when the butter stays firm.
Ice water is another critical component for pastry success. Just like with cold butter, using ice-cold water prevents the butter from melting prematurely into the flour. This ensures those distinct fat pockets remain intact, ready to create steam and flakiness during baking. It also helps to keep the dough cool and manageable, preventing overworking. The amount of water can vary slightly depending on your specific flour blend and humidity, so add it gradually until the dough just comes together. Worth noting here, too much water can make the dough sticky, while too little will leave it dry and crumbly.
A touch of sugar in the dough contributes to flavor and aids in browning, giving the crust a lovely golden hue. It balances the richness of the butter and provides a subtle sweetness. Salt is equally important; it enhances all the other flavors, preventing the pastry from tasting bland. Trust me on this one, a pinch of salt makes a significant difference.
For that iconic golden sheen, an egg yolk wash is applied before baking. The protein in the egg yolk browns beautifully, giving the toaster pastries a professional finish and a slight crispness to the exterior. What I discovered is that a simple egg wash elevates the visual appeal immensely.
For the filling, fruit preserves or jam are key. I recommend choosing good quality, thick varieties to prevent the filling from bubbling out during baking. Thicker jams hold their shape better and provide a burst of concentrated fruit flavor. You can also make your own fruit filling, ensuring you cook it down until it’s quite thick. Experiment with different flavor profiles like strawberry, blueberry, or even a spiced apple butter for seasonal variations. What I love about this is the endless possibilities for customization.
Finally, for the classic Pop-Tart finish, the optional glaze ingredients – powdered sugar, milk or lemon juice, and vanilla extract – come into play. Powdered sugar forms the base, milk or lemon juice thins it to the desired consistency, and vanilla extract adds a hint of warmth and aroma. Lemon juice also adds a pleasant tang that cuts through the sweetness, making the glaze even more appealing. This simple glaze transforms homemade gluten free toaster pastries into a truly authentic experience.
Essential Equipment for Perfect Gluten Free Pop Tarts
Before diving into the dough and filling, having the right tools makes all the difference for this recipe. You don’t need a professional kitchen, but a few key items will ensure your homemade gluten free pop tarts turn out beautifully. In my kitchen, I always lay out all my equipment before I even measure the first ingredient. This prevents any mid-recipe scrambles.
A large mixing bowl is essential for bringing your dough together. You’ll need ample space to combine the dry ingredients and then work in the butter without making a mess. For incorporating that cold butter into your gluten-free flour blend, a pastry blender is a classic choice, creating those perfect pea-sized pieces. Alternatively, a food processor can do the job in mere seconds, pulsing the butter into the flour until it resembles coarse crumbs. This method is especially useful if your hands tend to warm the butter too quickly. What I discovered is that cold butter is non-negotiable for flaky pastry.
A rolling pin is crucial for achieving an even thickness in your dough. An uneven roll can lead to some parts baking faster than others, resulting in a less consistent texture. I always aim for about 1/8-inch thickness. To prevent sticking and ensure easy cleanup, parchment paper or silicone baking mats are invaluable. They also make transferring the delicate dough much simpler. You’ll need at least two baking sheets to accommodate all your pastries without overcrowding them, which is vital for even baking.
For precise, uniform shapes, a ruler or a pastry wheel helps cut neat rectangles. This ensures each pastry bakes consistently and looks professional. A simple fork serves a dual purpose: it’s perfect for crimping the edges to seal in your filling and for gently pricking the tops to vent steam during baking. Without these vents, your pastries could puff up excessively or even burst. Finally, a few small bowls and a whisk are necessary for preparing the egg wash that gives them their golden sheen and for mixing up your sweet glaze. A cooling rack allows air to circulate around the pastries, preventing the bottoms from becoming soggy as they cool. Having these tools ready sets you up for success with these delightful homemade treats.
Step-by-Step Instructions: Baking Your Homemade Gluten Free Toaster Pastries
Here are the first three steps for your “Homemade Gluten Free Pop Tarts” recipe:
-
Make the Dough: In a large bowl, whisk together your gluten-free flour blend, sugar, baking powder, and salt until well combined. Using a pastry blender or your fingertips, cut the very cold unsalted butter into the dry ingredients until the mixture resembles coarse crumbs with some pea-sized pieces of butter remaining. Gradually add the ice water, one tablespoon at a time, mixing gently with a fork until the dough just comes together and forms a shaggy ball without being overly wet.
-
Chill the Dough: Divide the dough into two equal portions, flatten each into a disc, and wrap tightly in plastic wrap. Refrigerate the dough for at least 30 minutes, or up to 2 hours. Chilling is a crucial step for gluten-free dough as it allows the flours to fully hydrate, which improves the dough’s texture and makes it significantly easier to handle and roll without tearing.
-
Roll & Cut: On a lightly floured surface or, even better, between two sheets of parchment paper, roll out one disc of chilled dough to an even ⅛-inch thickness. Using a sharp knife or a pizza cutter, trim the edges to create a large rectangle, then cut this rectangle into smaller rectangles, approximately 3x4 inches in size, aiming for 8-10 rectangles per disc of dough.
-
Fill & Seal: Carefully spoon approximately 1-2 tablespoons of your chosen fruit filling onto the center of one half of each pastry rectangle, leaving a small border around the edges. Take another pastry rectangle and gently place it directly over the filling, aligning the edges. Use the tines of a fork to firmly crimp all four edges of the pastry, sealing the filling inside and creating a decorative pattern.
-
Egg Wash & Vent: In a small bowl, whisk together one egg with a tablespoon of water to create an egg wash. Lightly brush the tops of each sealed pop tart with the egg wash; this will give them a beautiful golden sheen when baked. Using the tines of a fork, gently pierce the top of each pop tart 2-3 times to create small vents, allowing steam to escape during baking and preventing the pastry from puffing up excessively.
-
Bake: Transfer the prepared pop tarts to the preheated oven and bake for 15-20 minutes, or until the pastry is puffed, golden brown, and cooked through. Keep a close eye on them during the last few minutes of baking to ensure they don’t over-brown.
-
Cool Completely Before Glazing: Once baked, carefully transfer the pop tarts to a wire rack and allow them to cool completely. This crucial step prevents the glaze from melting and running off, ensuring a beautiful, set finish.
-
Glaze (Optional): In a small bowl, whisk together the powdered sugar, milk (or water), and vanilla extract until smooth and free of lumps. Once the pop tarts are fully cooled, drizzle or spread the glaze evenly over the tops of each pastry.
Pro Tips & Tricks for Flawless Gluten Free Pop Tarts
Pro Tips & Tricks for Flawless Gluten Free Pop Tarts
Here’s the thing: working with gluten-free dough is a bit different. It lacks the elastic quality of traditional wheat dough. Understanding these differences is crucial for achieving that perfectly flaky texture in this recipe. I always recommend focusing on temperature control and gentle handling.
The secret is keeping your ingredients, especially the fat, as cold as possible. Trust me on this one, cold butter is non-negotiable for flaky pastries. When tiny pieces of cold butter melt in the oven, they release steam, creating those wonderful layers. If your butter is too warm, it incorporates too readily into the flour, resulting in a tough, dense crust instead of a light, airy one. I even chill my flour sometimes before starting.
A common mistake is overworking the dough. With gluten-free flours, excessive handling develops toughness, even without gluten. You want to mix just until combined. Stop as soon as a cohesive dough forms. Over-mixing activates starches in a way that can make the final product gummy.
Building on this, aim for even thickness when rolling out your dough. In my kitchen, I use rolling pin guides to ensure a consistent 1/8-inch thickness. Uneven dough bakes inconsistently; thin spots burn while thick spots remain raw. This precision guarantees uniform browning and texture across all your gluten free poptarts.
You’ll notice that sealing the edges well is paramount. A good seal prevents your delicious filling from bubbling out during baking. I often use a fork to crimp the edges firmly, pressing down twice for extra security. Some bakers even lightly moisten the edges with water before pressing. What I discovered is that a tight seal also helps maintain the pastry’s shape.
Ventilation is key to preventing your pastries from puffing up like balloons and potentially bursting. I always use a skewer or the tines of a fork to pierce the top crust several times. These small holes allow steam to escape during baking. Without them, the steam gets trapped, causing the pastry to swell and crack. This step is quick but incredibly important.
The key difference is in your filling choice. While any jam works, I prefer thicker, fruit-only jams or homemade fruit compotes. Runny fillings can make your pastry soggy or leak out more easily. If your jam seems thin, try simmering it gently for a few minutes to reduce its liquid content before filling. For a comprehensive guide on making your own fruit fillings, check out BBC Good Food’s fruit compote recipes.
Patience with chilling is another non-negotiable step. Don’t skip the chilling periods specified in the recipe. Chilling allows the butter to firm up again and the dough to relax. This makes the dough much easier to handle and prevents shrinkage during baking. Cold dough also creates a much flakier texture, as the butter remains solid until it hits the hot oven.
Enjoyed this recipe? Share it with a friend or save it to your board for later. Leave a comment below — I love hearing how it turned out!
You May Also Enjoy





You Might Also Love These 🍽️
Recipes picked just for you based on what you’re cooking