Airy GF Ladyfingers: Tiramisu's Best Friend!
Master the art of making light, airy gluten-free ladyfingers at home! Perfect for tiramisu or snacking, these gluten-free sponge fingers are a game-changer.
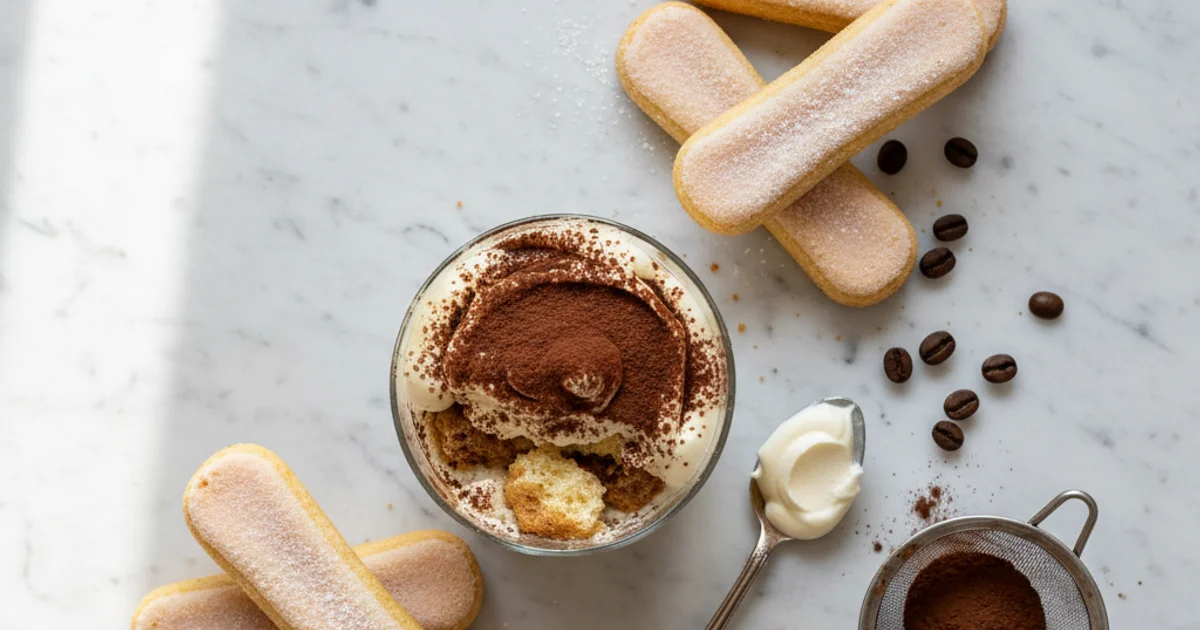
- 1Introduction: Why Mastering Gluten-Free Ladyfingers is a Game-Changer for Your Desserts
- 2Why You’ll Fall in Love with This Gluten-Free Ladyfingers Recipe
- 3Ingredients Overview: Crafting Perfect Gluten-Free Sponge Fingers from Scratch
- 4Essential Equipment You’ll Need for Homemade Gluten-Free Ladyfingers
- 5Step-by-Step Instructions: Crafting Your Own Gluten-Free Sponge Fingers
- 6Pro Tips & Tricks for Perfect Gluten-Free Ladyfingers Every Time
Ingredients
For the Ladyfingers
- 3 large eggs, separated, at room temperature
- 1/2 cup (100g) granulated sugar, divided
- 1/2 cup (60g) gluten-free all-purpose flour blend (e.g., Bob's Red Mill 1-to-1)
- 2 tablespoons (15g) cornstarch or tapioca starch
- 1 teaspoon vanilla extract
- Pinch of salt
- 2 tablespoons powdered sugar, for dusting
Instructions
Instructions
Preheat oven & prepare baking sheets.
Instructions
Separate eggs.
Instructions
Whisk egg yolks with half the sugar and vanilla.
Instructions
Sift and fold in GF flour and cornstarch into yolk mixture.
Instructions
Whip egg whites with salt until soft peaks, then add remaining sugar for stiff peaks.
Instructions
Gently fold meringue into yolk mixture in stages.
Instructions
Transfer batter to piping bag.
Instructions
Pipe ladyfingers onto prepared sheets.
Instructions
Dust generously with powdered sugar.
Instructions
Bake until golden and firm.
Instructions
Cool completely on a wire rack.
Recipe FAQs
Can I make gluten-free ladyfingers without a piping bag?
Why did my gluten-free ladyfingers turn out flat?
What's the best gluten-free flour blend for ladyfingers?
How do I know when my gluten-free ladyfingers are fully baked?
Can I reduce the sugar in this recipe?
My ladyfingers stuck to the parchment paper, what went wrong?
Airy GF Ladyfingers: Tiramisu's Best Friend!
Master the art of making light, airy gluten-free ladyfingers at home! Perfect for tiramisu or snacking, these gluten-free sponge fingers are a game-changer.
Prep Time
30 min
Cook Time
12 min
Total Time
42 min
For the Ladyfingers
- 3 large eggs, separated, at room temperature
- 1/2 cup (100g) granulated sugar, divided
- 1/2 cup (60g) gluten-free all-purpose flour blend (e.g., Bob's Red Mill 1-to-1)
- 2 tablespoons (15g) cornstarch or tapioca starch
- 1 teaspoon vanilla extract
- Pinch of salt
- 2 tablespoons powdered sugar, for dusting
Introduction: Why Mastering Gluten-Free Ladyfingers is a Game-Changer for Your Desserts
Finding truly excellent gluten free ladyfingers at the grocery store can feel like searching for a unicorn. I’ve been there, staring at shelves filled with crumbly, dense, or just plain sad excuses for what should be light and airy sponge fingers. It’s a common frustration for anyone avoiding gluten, especially when dreaming of a classic tiramisu or a delicate charlotte. The disappointment of a dessert ruined by inferior components is something I know all too well. What I discovered is that making your own at home not only solves this problem but elevates your desserts to a whole new level of bakery-quality perfection. This recipe will empower you to create those delicate, melt-in-your-mouth biscuits, opening up a world of possibilities for your sweet creations. You’ll soon be crafting elegant desserts that impress everyone, gluten-free or not. The simplicity of the process, combined with the incredibly rewarding result, makes this a kitchen project you’ll want to revisit again and again. Get ready to transform your dessert game.
Why You’ll Fall in Love with This Gluten-Free Ladyfingers Recipe
In my kitchen, I’ve spent years perfecting the delicate balance required for truly exceptional baked goods. What I love about this particular recipe is how it solves a common dessert dilemma. Many store-bought versions of these delicate sponge fingers often fall short in texture or taste. You’ll notice that this recipe delivers a light, airy crumb with that signature subtle chew. It’s truly a revelation for anyone who has struggled to find a suitable base for their favorite layered desserts.
This treat opens up a world of possibilities for your dessert repertoire. I always keep a batch on hand for impromptu tiramisu cravings or elegant trifles. The trick is in the meticulous whipping of the eggs, creating a stable foam that acts as the backbone for its structure. This method ensures a consistently tender interior, essential for soaking up espresso or fruit juices without becoming soggy. Trust me on this one; the effort is well worth the reward. This recipe proves that dietary restrictions don’t mean sacrificing classic dessert pleasures. This treat is naturally delicious and will impress even the most discerning palates.
Ingredients Overview: Crafting Perfect Gluten-Free Sponge Fingers from Scratch
Here’s the thing, achieving that classic light and airy texture in any sponge-based treat, especially one without gluten, hinges entirely on understanding your ingredients. I always approach baking with a “know your tools” mindset, and in this case, our tools are the foundational components of this recipe. Building on this, selecting the right items is paramount for success, particularly when dealing with the unique challenges of gluten-free baking.
Let’s start with eggs. You’ll notice we separate them, and this isn’t just a quirky step; it’s fundamental. The egg whites are whipped into stiff peaks, creating the essential airy structure that gives these sponge fingers their characteristic lightness. Without strong, stable egg whites, your treats will be dense, not delicate. The egg yolks, on the other hand, contribute richness, a lovely pale yellow hue, and help bind the other ingredients. They prevent the final product from being too dry, adding a subtle depth of flavor.
Next up is granulated sugar. Beyond just sweetness, sugar plays a critical role in stabilizing the whipped egg whites, creating a glossy, firm meringue. It also assists in achieving that beautiful golden-brown exterior during baking, thanks to its caramelization properties. Using the right amount ensures a balanced sweetness without overwhelming the other flavors.
For the dry components, a high-quality gluten-free flour blend is non-negotiable. What I discovered is that not all blends are created equal. Avoid blends with a high proportion of bean flours, as these can impart an off-flavor or gritty texture. Look for a blend designed for all-purpose baking, often containing a mix of rice flour, potato starch, and tapioca starch. This combination mimics the properties of wheat flour much more effectively than a single gluten-free alternative. This specific blend is crucial because it provides the necessary structure without the elasticity of gluten.
To further enhance the tender crumb and prevent gumminess, we incorporate additional cornstarch or tapioca starch. These starches are vital for achieving that delicate, melt-in-your-mouth texture. They lighten the overall flour mixture, ensuring your gluten free sponge fingers remain tender and don’t become overly dense or crumbly.
A dash of vanilla extract is included for its aromatic qualities, subtly enhancing the overall flavor profile. It provides a warm, comforting note that complements the other ingredients beautifully. Finally, a small pinch of salt might seem insignificant, but it’s a powerful flavor enhancer. It balances the sweetness and makes all the other flavors pop. Without it, your treats might taste a bit flat. The final flourish, powdered sugar, is for dusting. It not only adds a touch of elegance but also provides a delightful, slightly crisp finish and an extra whisper of sweetness. Each ingredient plays a specific, indispensable role in creating these perfectly textured treats.
Essential Equipment You’ll Need for Homemade Gluten-Free Ladyfingers
To create these delicate treats, having the right tools makes all the difference. You don’t need a professional kitchen, but a few key pieces of equipment will ensure success. I always find that preparation is half the battle when baking, especially with specific textures like gluten free sponge fingers. Gathering everything beforehand streamlines the process and prevents any last-minute scrambling.
First and foremost, a stand mixer or a powerful hand mixer is essential. Whipping egg whites to stiff, glossy peaks requires consistent, high-speed agitation. Trying to do this by hand is incredibly strenuous and often yields inconsistent results, which can impact the airy texture of your finished product. I’ve learned that investing in a good mixer pays dividends in gluten-free baking, where precise aeration is often critical.
Next, you’ll need several large mixing bowls. I typically use one for dry ingredients, one for egg yolks, and a very clean, grease-free one for egg whites. This separation prevents cross-contamination and ensures each component is prepared perfectly before combining. Piping bags with a round tip, such as a Wilton 1A or even a large open star tip, are crucial for shaping uniform ladyfingers. The consistency in size allows for even baking and a professional appearance. If you don’t have a piping bag, a sturdy Ziploc bag with a corner snipped off can work in a pinch, though it might be a bit messier.
Parchment paper is non-negotiable for lining your baking sheets. It prevents sticking and makes transferring the baked ladyfingers incredibly easy. Trust me, trying to peel them off an unlined sheet is a recipe for disaster. You’ll also need a couple of baking sheets to accommodate all the piped batter. A sifter or fine-mesh sieve is important for aerating your dry ingredients and ensuring a lump-free batter. This step contributes to the light texture of this recipe. Finally, a rubber spatula for gently folding ingredients and standard measuring cups and spoons for accuracy complete your essential toolkit. Having these items ready will set you up for a smooth baking experience.
Step-by-Step Instructions: Crafting Your Own Gluten-Free Sponge Fingers
Here are the first three steps for your Gluten-Free Ladyfingers recipe:
-
Prep Your Workspace: Preheat your oven to 350°F (175°C) and line two large baking sheets with parchment paper; set aside. Prepare a large piping bag fitted with a 1/2-inch round tip (or a star tip for a fluted edge) and have it ready for the batter.
-
Separate the Eggs: Carefully separate the yolks from the whites of six large eggs, placing the yolks in a large mixing bowl and the whites in a separate, very clean, medium-sized mixing bowl, ensuring no yolk contaminates the whites.
-
Whisk the Yolks: Add 1/2 cup of granulated sugar to the bowl with the egg yolks and whisk vigorously with an electric mixer on high speed for 3-5 minutes, or until the mixture is pale yellow, thick, and forms a ribbon when the whisk is lifted.
-
Gently fold in the dry ingredients. Carefully add the sifted gluten-free flour blend and cornstarch to the yolk mixture, using a spatula to fold until just combined, being careful not to overmix.
-
Whip the egg whites. In a separate clean, dry bowl, whisk the egg whites with a pinch of salt using an electric mixer on medium-high speed until soft peaks begin to form. Gradually add the granulated sugar, one tablespoon at a time, continuing to whisk until stiff, glossy peaks are achieved and the meringue holds its shape.
-
Combine the mixtures. Gently fold about a third of the whipped egg whites (meringue) into the yolk and flour mixture to lighten it, then carefully fold in the remaining meringue in two separate additions, ensuring the delicate air is preserved.
-
Piping Ladyfingers: Carefully pipe uniform strips of the batter, about 3-4 inches long and 1 inch wide, onto the prepared parchment-lined baking sheets, leaving a little space between each ladyfinger as they will expand slightly during baking.
-
Dusting: Gently dust the piped ladyfingers with a light, even layer of powdered sugar using a fine-mesh sieve, which will help create their signature delicate crust.
-
Baking: Transfer the baking sheets to the preheated oven and bake for 10-12 minutes, or until the ladyfingers are lightly golden around the edges, firm to the touch, and have a slightly crisp exterior.
-
Once baked, carefully transfer the ladyfingers from the baking sheet to a wire rack, allowing them to cool completely at room temperature, which will ensure they firm up and develop their characteristic crisp yet tender texture.
Pro Tips & Tricks for Perfect Gluten-Free Ladyfingers Every Time
Here’s the thing, even with the best recipe, baking delicate treats like this one requires a few insider secrets. I always find that paying attention to small details makes a huge difference in the final outcome. Getting these gluten free sponge fingers just right is all about precision and patience.
Egg Temperature: Trust me on this one, using room temperature eggs is non-negotiable for superior results. Cold egg whites don’t whip up as voluminous or stable as those at room temperature. This directly impacts the airy texture you want in your ladyfingers. Building on this, separate your eggs when they’re cold, as the yolks are firmer and less likely to break, then let the whites warm up.
Cleanliness is Key: Any trace of fat or oil will prevent your egg whites from whipping properly. Ensure your mixing bowl and whisk attachments are perfectly clean and grease-free. You can even wipe them down with a little lemon juice or vinegar to be absolutely sure. A common mistake is thinking a quick rinse is enough; residual oil from previous baking can sabotage your meringue.
Gentle Folding: Once your egg whites are whipped, the next critical step is gentle folding. You’ve incorporated all that precious air, and you need to keep it there. Use a large spatula and fold the dry ingredients and egg yolks into the whites using an upward motion, turning the bowl as you go. The secret is to combine everything without deflating the airy structure. This technique ensures light and tender ladyfingers.
Uniform Piping: For consistently baked ladyfingers, uniform piping is essential. Use a piping bag fitted with a round or star tip. Pipe even lengths and widths, leaving a little space between each one on the baking sheet. If they are all roughly the same size, they will bake evenly. Otherwise, some will be perfectly golden while others might be underdone or overbaked.
Don’t Overbake: What I discovered is that gluten-free baked goods can go from perfectly done to dry and crumbly very quickly. Keep a close eye on your gluten free ladyfingers as they bake. They should be lightly golden brown at the edges and feel firm to the touch. Remove them from the oven promptly to prevent them from drying out.
Sifting Dry Ingredients: This simple step is often overlooked but is crucial for a smooth batter. Sifting your dry ingredients – the gluten-free flour blend, cornstarch, and any leavening – removes lumps and aerates them. This makes it easier to incorporate them into the wet ingredients without overmixing, which can lead to a tough product. Worth noting here, a fine-mesh sieve works best for this. For more detailed insights into the science of baking with eggs, I often refer to Serious Eats’ guide on egg foams.
Dusting Twice: For that classic ladyfinger appearance and a slightly crispier exterior, consider dusting them twice. After piping, dust generously with powdered sugar. Bake them, and once they’ve cooled slightly, you can give them another light dusting. This creates a lovely, delicate finish and adds a subtle sweetness to the exterior of this treat.
Enjoyed this recipe? Share it with a friend or save it to your board for later. Leave a comment below — I love hearing how it turned out!
You May Also Enjoy





You Might Also Love These 🍽️
Recipes picked just for you based on what you’re cooking