Is Your Ice Cream Gluten-Free? Find Out Now!
Curious if ice cream has gluten? Discover the surprising facts about gluten in ice cream and learn how to make the best gluten-free vanilla bean ice cream at home!
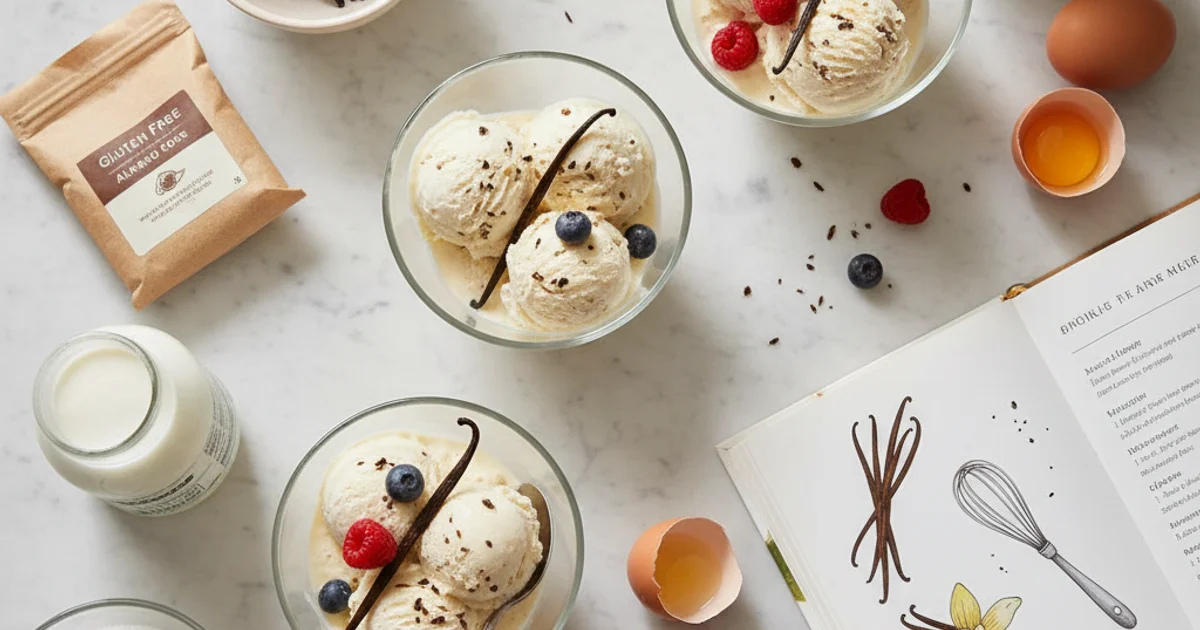
- 1Does Ice Cream Have Gluten? The Scoop on Your Favorite Frozen Treat
- 2Why You’ll Love This Homemade Gluten-Free Vanilla Bean Ice Cream
- 3Ingredients Overview: What Goes into Truly Gluten-Free Ice Cream?
- 4Essential Equipment You’ll Need for Homemade Ice Cream
- 5Step-by-Step Instructions: Crafting Your Own Gluten-Free Ice Cream Masterpiece
- 6Pro Tips & Tricks for the Best Gluten-Free Ice Cream Every Time
Ingredients
Custard Base
- 2 cups (480ml) heavy cream
- 1 cup (240ml) whole milk
- 3/4 cup (150g) granulated sugar
- 1 vanilla bean, split lengthwise and scraped
- 6 large egg yolks
- Pinch of salt
- 1 tsp gluten-free vanilla extract (optional, for extra flavor)
Instructions
Instructions
Combine cream, milk, sugar, vanilla bean, and salt in a saucepan; heat until simmering.
Instructions
Whisk egg yolks in a separate bowl.
Instructions
Temper egg yolks by slowly whisking in hot cream mixture.
Instructions
Return tempered mixture to saucepan and cook until thickened.
Instructions
Strain custard through a fine-mesh sieve into a clean bowl.
Instructions
Cool custard over an ice bath, then refrigerate for at least 4 hours, preferably overnight.
Instructions
Churn chilled custard in an ice cream maker according to manufacturer's instructions (20-30 minutes).
Instructions
Transfer soft-serve ice cream to an airtight freezer-safe container.
Instructions
Freeze for at least 3-4 hours, or until firm, before serving.
Recipe FAQs
Is all plain ice cream gluten-free?
What common ice cream ingredients might contain gluten?
How can I ensure my store-bought ice cream is gluten-free?
Can I make this recipe without an ice cream maker?
Why did my homemade ice cream turn out icy?
How long does homemade gluten-free ice cream last in the freezer?
Is Your Ice Cream Gluten-Free? Find Out Now!
Curious if ice cream has gluten? Discover the surprising facts about gluten in ice cream and learn how to make the best gluten-free vanilla bean ice cream at home!
Prep Time
20 min
Cook Time
15 min
Total Time
35 min
Custard Base
- 2 cups (480ml) heavy cream
- 1 cup (240ml) whole milk
- 3/4 cup (150g) granulated sugar
- 1 vanilla bean, split lengthwise and scraped
- 6 large egg yolks
- Pinch of salt
- 1 tsp gluten-free vanilla extract (optional, for extra flavor)
Does Ice Cream Have Gluten? The Scoop on Your Favorite Frozen Treat
The joy of a cold, creamy scoop on a hot day is undeniable. Many of us grew up with this simple pleasure. However, for those navigating dietary restrictions, particularly gluten sensitivity or celiac disease, enjoying such treats can become a minefield. The question often arises: does ice cream has gluten? It’s a crucial inquiry for many.
Here’s the thing: pure, unadulterated ice cream, in its most basic form, is naturally free of gluten. This means that classic vanilla, chocolate, or strawberry, made with just milk, cream, sugar, and flavorings, typically poses no issue. The concern really begins when manufacturers start adding other components. What I discovered is that the complexity creeps in with various mix-ins and flavorings. Think about cookie dough, brownie bits, or even certain candy pieces. These additions frequently contain wheat, which is a primary source of gluten. Even seemingly innocent flavors might hide gluten-containing thickeners or stabilizers.
A common mistake is assuming all plain flavors are safe. While often true, always check labels. Cross-contamination is another significant factor, especially in commercial settings. Shared equipment or scoops can transfer gluten from one flavor to another. This is why understanding does ice cream contain gluten goes beyond just the ingredients list. It extends to the entire production process. For home cooks, this knowledge empowers you to create safe alternatives. You can control every ingredient, ensuring a truly gluten-free experience. This article aims to guide you through making informed decisions and, ultimately, crafting your own delightful, safe frozen treats.
Why You’ll Love This Homemade Gluten-Free Vanilla Bean Ice Cream
Here’s the thing: making your own best gluten free ice cream at home offers an unparalleled experience. You get to control every single ingredient, ensuring pure, unadulterated flavor without any hidden surprises. This recipe delivers a luxurious, creamy texture that truly melts in your mouth, far surpassing many commercial options. I always say, there’s nothing quite like the satisfaction of scooping a homemade treat.
Beyond the incredible taste, this recipe provides peace of mind. For anyone asking, “does ice cream contain gluten?” or “is there gluten in ice cream?”, this homemade version is your answer. You can rest assured that every spoonful is naturally gluten-free, making it a safe and delightful option for those with celiac disease or gluten sensitivities. No need to scrutinize labels or worry about cross-contamination; you’re in charge from start to finish.
What I love about this particular vanilla bean ice cream is its surprising simplicity. Don’t let the gourmet results intimidate you; the steps are straightforward and require no specialized culinary skills. Even if you’re a novice in the kitchen, you’ll find this recipe incredibly approachable. It’s a fantastic entry point into the world of homemade frozen desserts, yielding impressive results with minimal fuss.
Building on this, the versatility of this vanilla base is truly remarkable. While it stands gloriously on its own, its clean, rich flavor makes it the perfect canvas for endless customization. Whether you dream of swirling in fresh fruit, crunchy nuts, or decadent chocolate chips, this recipe invites creativity. It adapts beautifully to your cravings, allowing you to craft a unique treat every time. This truly is the best gluten free ice cream you can make.
Ingredients Overview: What Goes into Truly Gluten-Free Ice Cream?
Building on this, let’s talk about the components that make this vanilla bean ice cream so special and naturally gluten-free. My philosophy in the kitchen has always been to use the highest quality ingredients I can find. This approach ensures both superior flavor and peace of mind regarding dietary needs.
First up is heavy cream. This is the absolute cornerstone of any truly decadent ice cream. I always opt for cream with at least 36% milk fat. That high fat content is what gives this treat its luxurious, velvety texture. Without enough fat, you risk an icy, less satisfying result.
Next, we have whole milk. While heavy cream provides richness, whole milk balances that intensity. It adds necessary moisture without making the ice cream feel overly heavy. You’ll notice that the combination of both dairy elements creates a perfect harmony.
Granulated sugar serves multiple purposes beyond just sweetness. It lowers the freezing point of the mixture. This is crucial for achieving that wonderfully scoopable texture straight from the freezer. Sugar also contributes to the overall body of the ice cream.
The secret is in the egg yolks. These yolks form the base of our custard, which is what elevates this recipe to another level of creaminess. They emulsify the mixture, preventing ice crystals from forming. Tempering them correctly is key to avoiding scrambled eggs in your base.
For flavor, nothing beats a vanilla bean. I always prefer using a whole vanilla bean over extract when I can. The tiny black seeds infuse the entire base with an unparalleled floral and sweet aroma. Simply split the bean and scrape out those precious seeds.
A tiny pinch of salt might seem insignificant, but trust me on this one. It doesn’t make the ice cream salty. Instead, it magically enhances all the other flavors, making the vanilla taste even more vibrant. It truly balances the sweetness.
Finally, an optional gluten-free vanilla extract can be added for an extra layer of vanilla intensity. If you choose to use it, always double-check the label. Even extracts can sometimes contain hidden gluten, so look for a certified gluten-free brand. What I discovered is that even with seemingly simple ingredients, vigilance is important. Always scan labels to ensure every component contributes to a truly gluten-free experience. This careful selection ensures that does ice cream has gluten is never a concern with this recipe.
Essential Equipment You’ll Need for Homemade Ice Cream
In my kitchen, having the right tools makes all the difference for a successful culinary adventure, especially when crafting something as delicate as homemade ice cream. Building on this, while this recipe shines for its naturally gluten-free nature, ensuring the proper equipment is paramount for achieving that velvety texture we all crave. You don’t need a professional setup, but a few key items will elevate your results significantly.
First on the list is an ice cream maker. This is truly the heart of the operation for achieving that classic creamy consistency. There are two main types: compressor models, which are self-freezing and more expensive, and freezer bowl models, which require you to pre-freeze the bowl for 12-24 hours. I always recommend a freezer bowl model for beginners; they are more affordable and produce excellent results, especially when making smaller batches. The constant churning prevents large ice crystals from forming, which is crucial for a smooth treat.
Next, you’ll need a heavy-bottomed saucepan. This is essential for preparing your custard base. The thick bottom distributes heat evenly, preventing scorching and ensuring your delicate mixture cooks perfectly without sticking. A good quality pan will prevent hot spots, allowing the sugar to dissolve properly and the eggs to temper without scrambling. What I discovered is that a pan with a light interior color helps you monitor the custard’s thickness and color changes more easily.
A sturdy whisk is indispensable. You’ll use it for incorporating the egg yolks into the sugar and later for gently stirring the custard as it heats. A balloon whisk works best for aerating and preventing lumps. Additionally, a fine-mesh sieve is non-negotiable for achieving truly silky ice cream. After cooking, straining the custard removes any tiny bits of cooked egg or vanilla bean specks, ensuring a perfectly smooth and luxurious mouthfeel. I always pass my custard through a sieve at least twice.
For tempering your egg yolks, a heatproof bowl is necessary. This allows you to gradually introduce the hot cream mixture without cooking the eggs too quickly. Having a bowl that can withstand heat is also useful for creating an ice bath. Speaking of which, an ice bath (a large bowl filled with ice and a little water, with a smaller bowl nested inside) is a fantastic tool for rapidly cooling your custard base. This quick cooling stops the cooking process and helps the custard thicken properly, preventing bacterial growth and ensuring a safe, delicious product. Rapid cooling also improves the final texture of the ice cream.
Finally, an airtight freezer-safe container is crucial for storing your finished creation. Glass or high-quality plastic containers work best, preventing freezer burn and maintaining the ice cream’s fresh flavor and texture for longer. Trust me on this one, a good container makes a huge difference in how long your homemade treat stays enjoyable. An optional but highly recommended tool is an immersion blender. If you want an exceptionally smooth custard, a quick blitz with an immersion blender before chilling can break down any remaining tiny lumps, resulting in an even more luxurious final product. The key difference is that while a whisk is great for initial mixing, an immersion blender offers unparalleled smoothness for the base.
Step-by-Step Instructions: Crafting Your Own Gluten-Free Ice Cream Masterpiece
-
Prepare the Vanilla Bean: Carefully split the vanilla bean lengthwise with a sharp knife, exposing the tiny, aromatic seeds within. Use the back of the knife to scrape these seeds into a medium saucepan. Add the scraped vanilla bean pod to the saucepan along with the heavy cream and whole milk.
-
Simmer the Dairy: Place the saucepan with the cream, milk, sugar, and vanilla bean over medium heat. Gently heat the mixture, stirring occasionally, until it just begins to simmer around the edges, but do not allow it to boil.
-
Temper the Egg Yolks: In a separate medium bowl, whisk the egg yolks until they are smooth and pale yellow. Gradually and slowly, ladle about half of the hot dairy mixture into the whisked egg yolks, whisking constantly to prevent the eggs from scrambling.
-
Cook the Custard: Return the tempered egg and cream mixture to the saucepan over medium-low heat, stirring constantly with a rubber spatula or whisk. Continue to cook, scraping the bottom and sides of the pan, until the custard thickens enough to coat the back of a spoon (this is known as the nappe test, meaning it leaves a clear trail when you run your finger across the spoon). Do not let it boil.
-
Strain & Chill: Immediately pour the hot custard through a fine-mesh sieve into a clean bowl to remove any cooked egg bits or vanilla bean specks, ensuring a silky-smooth texture. Place this bowl over a larger bowl filled with ice and a little water (an ice bath) and stir occasionally until the custard is cool to the touch. Once cooled, cover the bowl with plastic wrap, pressing it directly onto the surface of the custard to prevent a skin from forming, and refrigerate for several hours, preferably overnight, to allow it to thoroughly chill and for the flavors to meld.
-
Churn the Ice Cream: Once the custard is completely chilled, pour it into your ice cream maker bowl. Follow your ice cream maker’s specific instructions for churning, which typically involves churning until the mixture reaches the consistency of soft-serve ice cream. Transfer the churned ice cream to an airtight container and freeze for at least 4 hours, or until firm, before serving.
-
Freeze & Ripen: Carefully transfer the churned ice cream mixture into a freezer-safe container with an airtight lid, ensuring it’s evenly distributed. Place the container in the coldest part of your freezer and allow it to freeze for at least 4-6 hours, or preferably overnight, until it reaches a firm, scoopable consistency. This “ripening” period allows the flavors to fully develop and the ice cream to achieve its ideal texture.
Pro Tips & Tricks for the Best Gluten-Free Ice Cream Every Time
Building on this, mastering homemade ice cream involves a few crucial techniques. I always stress the importance of chilling your ice cream base completely. A well-chilled base, ideally for at least 4-6 hours or even overnight, ensures the ice cream churns efficiently. This leads to smaller ice crystals and a much smoother, creamier final texture. Trust me on this one; impatience here results in a grainy, icy treat, which is certainly not what we’re aiming for with the best gluten free ice cream. The base needs to be as cold as possible before it even touches the ice cream maker.
Here’s the thing, when you’re making a custard-based ice cream, precise cooking is vital. A common mistake is overcooking the custard. This can lead to a scrambled egg texture, which is irreversible and quite disappointing. You want to cook the custard gently until it coats the back of a spoon. This is often called the “nappe” stage. If you run your finger across the back of the spoon, the line should hold without the custard running back into it. This indicates perfect thickness without curdling. For more detailed guidance on custard making, you can explore resources like Serious Eats’ guide to custard.
What I discovered is that ingredient quality truly shines through in simple recipes like this. For a vanilla bean ice cream, the vanilla itself is the star. Opt for a whole vanilla bean, split and scraped, rather than just extract. The tiny black flecks and deeper, more complex vanilla flavor elevate this dish significantly. It creates a difference you can both see and taste. Similarly, using good quality heavy cream and whole milk contributes to that luxurious mouthfeel.
In practice, preparing your equipment properly is just as important as your ingredients. If you’re using a freezer-bowl ice cream maker, ensure its bowl is frozen solid. I usually keep mine in the freezer permanently so it’s always ready. A partially frozen bowl will not get your ice cream cold enough. This will prevent proper churning and result in a soft, soupy mixture instead of firm ice cream.
The key difference is knowing how much to fill your machine. Never overfill your ice cream maker. The mixture expands as air is incorporated during churning. Filling it too high can cause overflow or prevent the dasher from working correctly. Always leave about an inch or two of space at the top. This allows for that essential expansion and aeration.
Worth noting here, if you plan to add mix-ins, timing is everything. Swirl in your desired additions, like chocolate chips, chopped nuts, or fruit purees, during the last few minutes of churning. This ensures they are evenly distributed throughout the ice cream. Adding them too early can sometimes damage softer mix-ins or cause them to sink to the bottom.
The secret is patience after churning. Once your ice cream is churned, it will be soft-serve consistency. For firm, scoopable ice cream, it needs to “ripen” in the freezer for at least 2-4 hours. This allows it to firm up properly and develop its full texture. Rushing this step will give you a delicious, but very soft, treat.
Finally, for the smoothest scoops, a warm ice cream scoop is your best friend. A quick dip in hot water before each scoop makes serving effortless. This prevents the ice cream from sticking and allows for perfectly rounded portions.
Enjoyed this recipe? Share it with a friend or save it to your board for later. Leave a comment below — I love hearing how it turned out!
You May Also Enjoy





You Might Also Love These 🍽️
Recipes picked just for you based on what you’re cooking