The Best Gluten-Free Naan: Soft & Chewy!
Discover how to make delicious, soft, and chewy gluten free naan bread at home! This easy gluten free naan recipe is perfect for curries, dips, and more.
- 1Craving Naan? Make This Easy Gluten Free Naan Recipe!
- 2Why You’ll Love This Chewy Gluten Free Naan Bread
- 3Ingredients Overview: What You’ll Need for Amazing GF Naan
- 4Equipment You’ll Need to Master Your Gluten Free Naan
- 5Step-by-Step Instructions: How to Make Gluten Free Naan
- 6Pro Tips & Tricks for the Perfect Cheesy Poofs (Gluten Free Naan)
Ingredients
For the Naan Dough
- 1 cup warm water (105-115°F (40-46°C))
- 1 tsp granulated sugar
- 2.25 tsp active dry yeast (one standard packet)
- 2.5 cups gluten-free all-purpose flour blend (ensure it contains xanthan gum)
- 1 tsp baking powder
- 0.5 tsp salt
- 0.5 cup plain Greek yogurt (whole milk recommended, or dairy-free alternative)
- 2 tbsp olive oil (plus more for oiling the bowl)
For Brushing (Optional)
- 2 tbsp unsalted butter, melted (or ghee/olive oil)
- 1 clove garlic, minced
- 2 tbsp fresh cilantro, chopped
Instructions
Activate Yeast
Combine 1 cup warm water, 1 tsp granulated sugar, and 2.25 tsp active dry yeast in a small bowl. Stir gently and let stand for 5-10 minutes until the mixture is foamy. This indicates the yeast is active.
Combine Dry Ingredients
In a large bowl, whisk together 2.5 cups gluten-free all-purpose flour blend, 1 tsp baking powder, and 0.5 tsp salt until well combined.
Form Dough
Add the activated yeast mixture, 0.5 cup plain Greek yogurt, and 2 tbsp olive oil to the dry ingredients. Mix with a sturdy spoon or a stand mixer with a dough hook attachment until a shaggy dough forms. Knead gently for 1-2 minutes until the dough comes together and is relatively smooth. Gluten-free dough will remain soft and slightly sticky.
First Rise
Lightly oil a clean bowl with olive oil. Transfer the dough to the oiled bowl, turning once to coat. Cover the bowl with plastic wrap or a damp cloth and let rise in a warm, draft-free place for 60-90 minutes, or until the dough has roughly doubled in size. The rise may be less dramatic than with traditional gluten-containing dough.
Divide & Shape
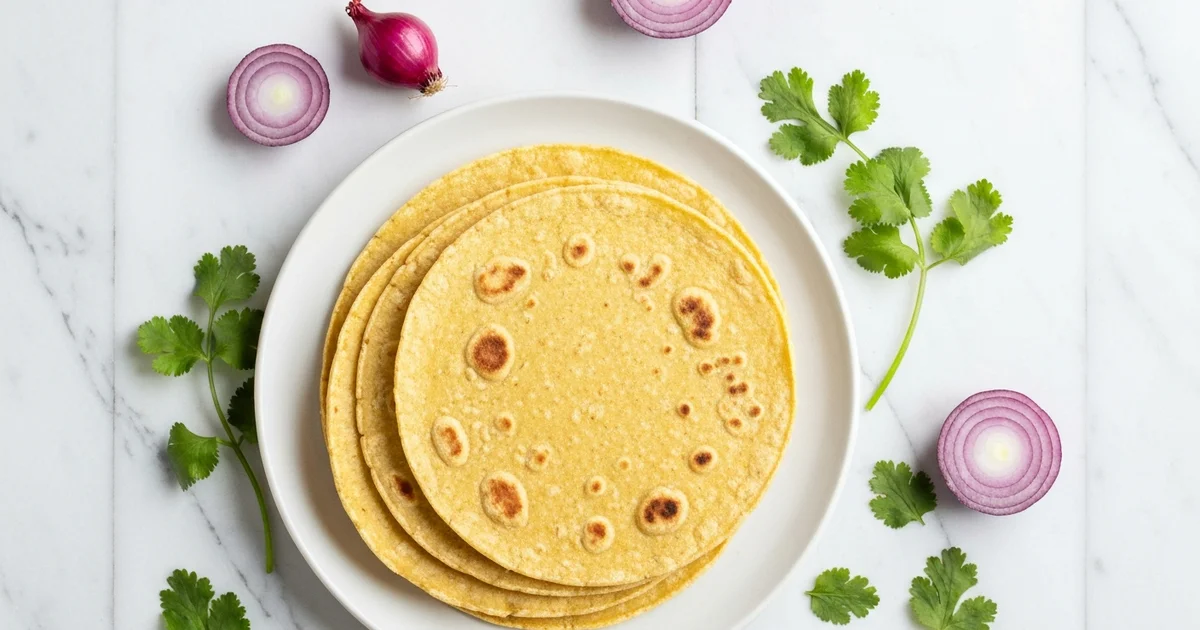
Gently punch down the risen dough to release any air. Transfer the dough to a lightly floured surface (using extra GF flour to prevent sticking). Divide the dough into 6 equal pieces. Roll each piece into an oval or teardrop shape, about ¼ inch (0.6 cm) thick. Avoid rolling them too thin.
Cook Naan
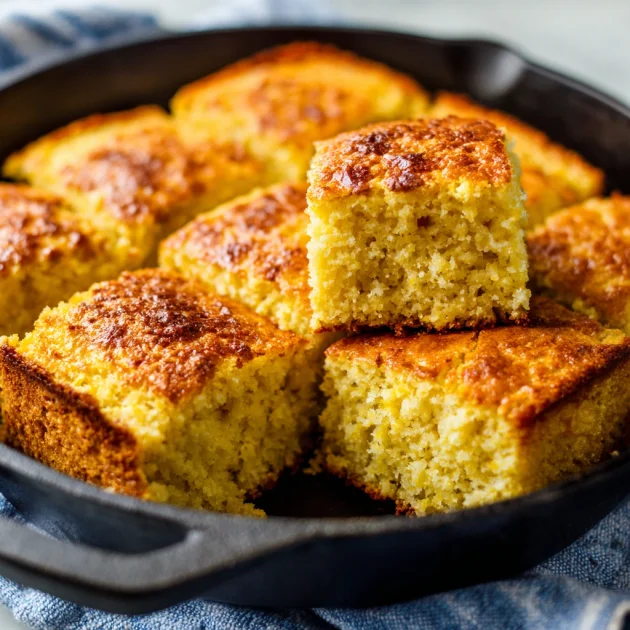
Heat a cast iron skillet or griddle over medium-high heat until it begins to smoke lightly. Place one naan at a time into the hot skillet. Cook for 2-3 minutes per side, until golden brown, puffed up with characteristic bubbles (often called 'cheesy poofs'), and cooked through. Repeat with the remaining naan pieces.
Brush & Serve
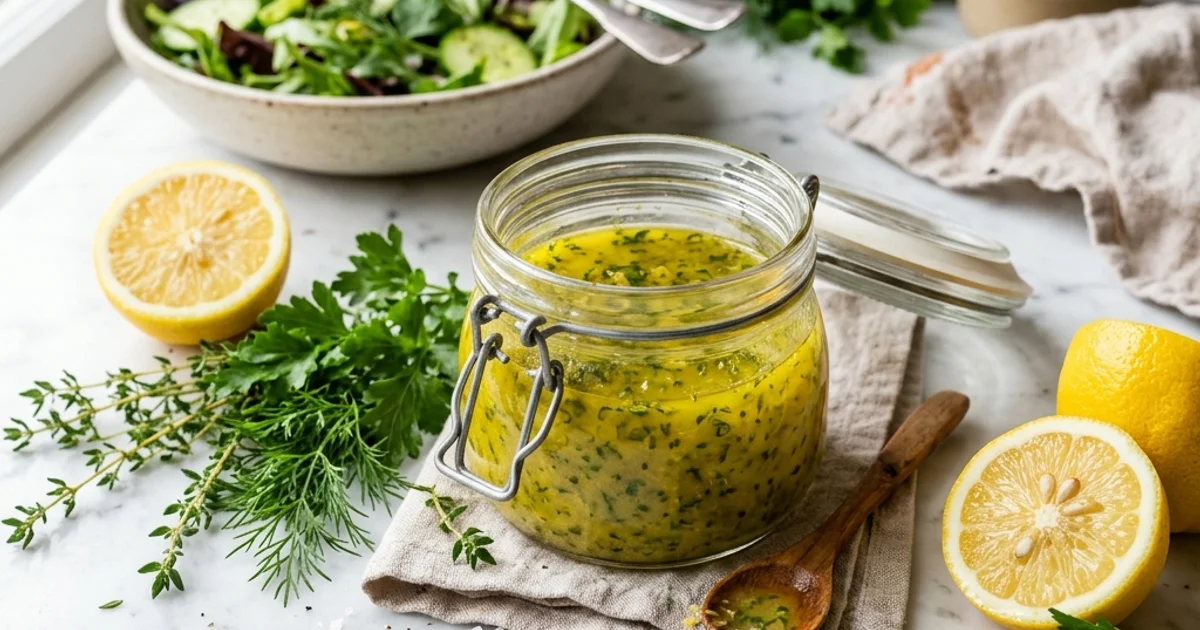
While the naan is cooking, combine 2 tbsp melted unsalted butter (or ghee/olive oil), 1 minced garlic clove, and 2 tbsp chopped fresh cilantro (if using) in a small bowl. Immediately after removing each naan from the skillet, brush generously with the butter mixture. Serve the naan warm.
Equipment You'll Need
Here's what I use to make this recipe perfectly every time:
- Large Mixing Bowl — This bowl provides ample space for thoroughly combining the gluten-free dough ingredients and allowing the dough to rise properly. → Buy Now
- Rolling Pin — A rolling pin is crucial for evenly flattening the delicate gluten-free naan dough into consistent rounds or ovals for uniform cooking. → Buy Now
- Large Skillet or Griddle — A heavy-bottomed skillet or griddle is essential for achieving the high, even heat needed to cook the gluten-free naan quickly, developing its signature bubbles and slight char. → Buy Now
- Measuring Cups and Spoons — Accurate measurements are critical for the delicate balance of ingredients in gluten-free baking, ensuring the correct texture and consistency for your naan. → Buy Now
Recipe FAQs
Is naan inherently gluten free?
What is the best gluten-free flour blend for making naan?
Why didn't my gluten-free naan puff up like I expected?
Can I make this gluten-free naan recipe dairy-free?
How should I store and reheat leftover gluten-free naan?
Does naan bread have gluten, or is naan gluten free if I buy it from the store?
The Best Gluten-Free Naan: Soft & Chewy!
Discover how to make delicious, soft, and chewy gluten free naan bread at home! This easy gluten free naan recipe is perfect for curries, dips, and more.
Prep Time
15 min
Cook Time
25 min
Total Time
40 min
For the Naan Dough
- 1 cup warm water (105-115°F (40-46°C))
- 1 tsp granulated sugar
- 2.25 tsp active dry yeast (one standard packet)
- 2.5 cups gluten-free all-purpose flour blend (ensure it contains xanthan gum)
- 1 tsp baking powder
- 0.5 tsp salt
- 0.5 cup plain Greek yogurt (whole milk recommended, or dairy-free alternative)
- 2 tbsp olive oil (plus more for oiling the bowl)
For Brushing (Optional)
- 2 tbsp unsalted butter, melted (or ghee/olive oil)
- 1 clove garlic, minced
- 2 tbsp fresh cilantro, chopped
Craving Naan? Make This Easy Gluten Free Naan Recipe!
Naan holds such a cherished place in global cuisine, loved by many. Its distinct pillowy soft texture and delightful subtle chew are truly unique. I always crave this incredibly versatile bread alongside hearty, flavorful curries.
Here’s the thing many readers frequently ask in my kitchen. “Is naan gluten free?” they often inquire with hopeful anticipation. Traditional naan, sadly, always contains vital wheat flour and gluten.
Missing that warm, pliable, and satisfying bread can be genuinely frustrating. Most store-bought alternatives simply lack the authentic naan texture we all desire. They often feel disappointingly dry, or sometimes surprisingly too dense to enjoy properly.
What I discovered truly changed my entire approach in the kitchen. This gluten free naan recipe finally delivers the real deal for everyone. It offers that genuinely authentic texture and incredible flavor profile.
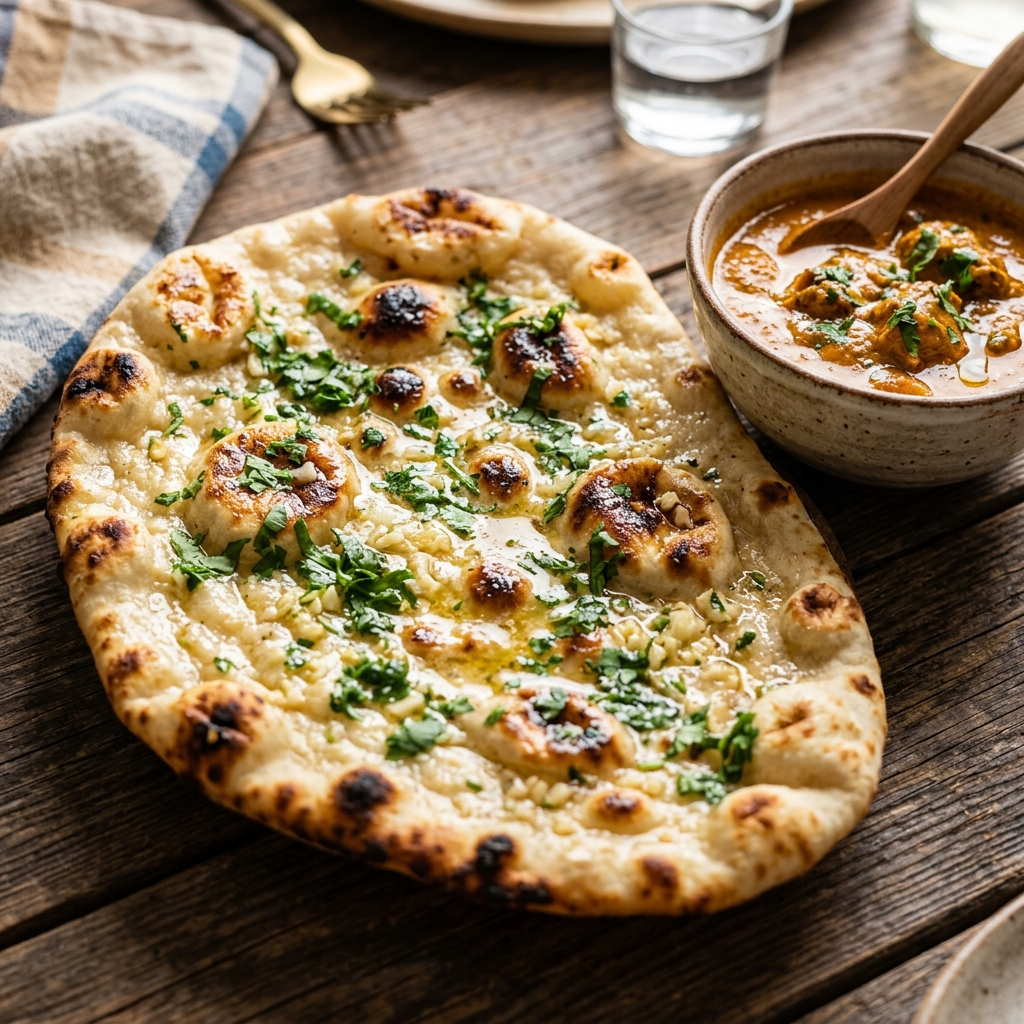
My unique version uses accessible, simple pantry ingredients you will easily recognize. It consistently creates a beautifully soft, wonderfully chewy, and truly pliable bread. You’ll notice its delightful, slightly golden brown edges and characteristic bubbly surface.
This gluten free naan is surprisingly quick and simple to prepare from scratch. Reclaim your love for these deeply satisfying homemade flatbreads today. Let’s confidently dive into making this comforting culinary creation right now.
Why You’ll Love This Chewy Gluten Free Naan Bread
In my kitchen, perfecting a truly exceptional gluten free naan was a personal quest. This recipe delivers that perfect soft, pillowy, and slightly chewy texture. You will notice the delightful structure with every single bite. The subtly blistered surface and tender interior mimic traditional versions perfectly.
Building on this, many home bakers shy away from gluten-free baking. They often fear overly complicated processes. This recipe, however, is surprisingly straightforward. It uses readily available ingredients, making it accessible to all. You will not need any special equipment beyond standard kitchen tools.
What I love about this particular flatbread is its incredible versatility. It pairs beautifully with so many meals. This dish offers endless pairing possibilities:
- Scooping up creamy hummus or raita
- Sopping up rich, aromatic curries
- Serving alongside hearty lentil stews
- Enjoying as a simple, garlicky snack
This recipe ensures everyone can enjoy a beloved staple at the table. Those on a gluten-free diet often miss this comforting treat. Homemade versions consistently surpass store-bought gf naan alternatives. Freshly made, it offers superior flavor and an undeniably better texture.
Ingredients Overview: What You’ll Need for Amazing GF Naan
To achieve truly soft and chewy results, the foundation of your gluten free naan lies squarely in the quality and specific type of ingredients you choose. Each component plays a vital role in creating the signature texture and subtle tang we all crave from this beloved bread. I always emphasize starting with fresh, high-quality ingredients, as they make a noticeable difference in the final product.
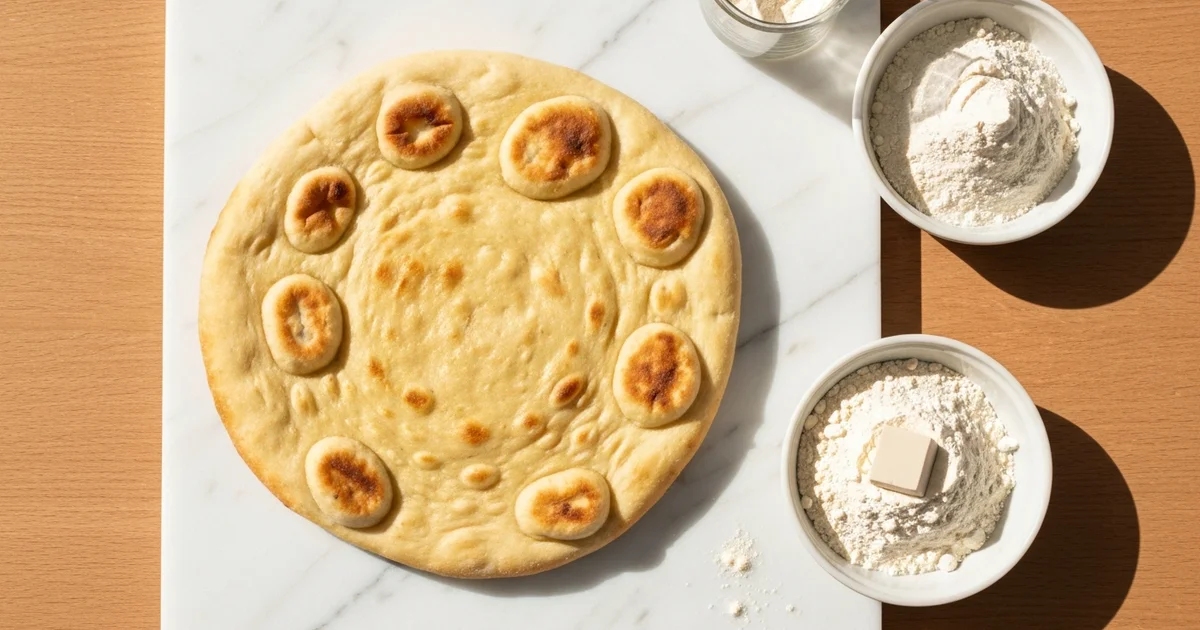
In practice, the most crucial ingredient is your gluten-free all-purpose flour blend. I’ve experimented extensively, and a good blend typically contains a mix of starches and flours designed to mimic wheat. Look for blends that include:
- Rice flour
- Tapioca starch
- Potato starch
- Xanthan gum
The xanthan gum is non-negotiable here; it acts as a binder, replicating the elasticity that gluten provides. Without it, your naan dough would be crumbly and lack that essential stretch. Different brands vary, but for this specific recipe, I find that blends like King Arthur Measure for Measure or Bob’s Red Mill 1-to-1 Baking Flour perform consistently well, delivering excellent texture and rise.
Next, active dry yeast is the engine of our leavening process, responsible for those characteristic airy pockets. Proper activation is key; you’ll want to proof it in warm water with a touch of sugar. The warmth awakens the yeast, while the sugar provides its initial fuel, ensuring it’s vibrant and ready to work its magic in the dough.
Speaking of fuel, granulated sugar isn’t just for a hint of sweetness in this recipe. Its primary purpose is to feed the hungry yeast, kickstarting the fermentation process. This not only aids in leavening but also contributes to the beautiful golden-brown color you’ll see on the cooked naan. Trust me on this one; a little sugar goes a long way.
Warm water is critical for yeast activation. Aim for a temperature between 105-115°F (40-46°C); too cold, and the yeast won’t activate, too hot, and you’ll kill it. This precise temperature creates the perfect environment for the yeast to bloom. It also helps hydrate the flours, forming a cohesive and workable dough.
For an authentic, tender texture and a slight tang, Greek yogurt is indispensable. I always reach for whole milk Greek yogurt in my kitchen because its higher fat content contributes significantly to the naan’s richness and moisture. If you need a dairy-free alternative, a good quality plain, unsweetened coconut or almond milk yogurt can also work effectively, though the flavor profile may shift subtly.
A drizzle of olive oil adds both flavor and pliability to the dough, ensuring it’s not stiff or dry. It also helps keep the finished naan soft. Alternatively, melted ghee or butter can be used for a richer, more traditional flavor. This oil is also perfect for brushing on the cooked naan, giving it a lovely sheen.
Finally, a bit of baking powder works in conjunction with the yeast, providing an additional lift that results in a lighter, fluffier texture. Salt is not just for seasoning; it balances the flavors and also helps to regulate the yeast activity, preventing it from overproofing too quickly.
To elevate your finished naan, consider these optional additions:
- Minced garlic
- Fresh chopped cilantro
- A sprinkle of cheese for homemade cheesy poofs
These optional ingredients turn a simple bread into a delightful, customizable experience.
Equipment You’ll Need to Master Your Gluten Free Naan
Creating exceptional flatbreads requires more than just good ingredients. It calls for the right tools to bring everything together. In my kitchen, having the proper equipment smooths the entire baking process. You will notice a huge difference with even basic items at your disposal.
What I love about this recipe is its accessibility. You do not need highly specialized gadgets. Most items are likely already in your kitchen. However, a few key pieces make all the difference.
- Large Mixing Bowl: This is your starting point for any dough. A spacious bowl ensures ingredients combine without spills. It also provides ample room for the dough to rise effectively. You want one big enough for easy handling.
- Measuring Cups & Spoons: Accuracy is paramount in gluten-free baking. Unlike traditional recipes, substitutions can alter texture dramatically. Always level your dry ingredients precisely. This ensures consistency every time.
- Whisk: Use a whisk to aerate and combine your dry ingredients. It helps distribute leaveners evenly. This prevents pockets of unmixed flour in your dough. A well-whisked mixture leads to a better rise.
- Rolling Pin: This tool is crucial for shaping your dough into flat, even circles. A traditional wooden pin works beautifully. If you lack one, a clean wine bottle or a sturdy drinking glass can substitute. Just apply gentle, even pressure.
- Cast Iron Skillet or Non-Stick Griddle: Here’s what actually works for truly authentic results. A cast iron skillet excels at retaining and distributing high heat. This high heat is essential for those signature bubbles and the slight char. A heavy non-stick griddle also performs well. Both surfaces offer superior heat transfer compared to thinner pans. This contributes to a fluffy texture.
- Tongs: Flipping hot flatbreads requires a safe grip. Tongs prevent burnt fingers and messy mishaps. Choose heat-resistant tongs for easy handling. They are invaluable for maneuvering the dough.
- Pastry Brush: Once cooked, a light brush of melted butter or ghee adds flavor. It also gives the bread a beautiful sheen. A good pastry brush ensures even coating. This little detail truly elevates the finished product.
You might consider some optional equipment for even greater ease. A stand mixer with a dough hook attachment can simplify the mixing process. While not strictly necessary, it saves your arm muscles. This is especially helpful for stickier doughs. Also, a digital kitchen scale offers the most precise flour measurement. Trust me on this one, grams are always more accurate than cups for gluten-free flours. Using precise weights avoids dense or crumbly outcomes. Every tool plays a role in achieving soft and chewy perfection.
Step-by-Step Instructions: How to Make Gluten Free Naan
Here’s what actually works when you’re ready to transform simple ingredients into a beautiful flatbread. Making this recipe might seem intricate, but breaking it down makes it straightforward. You will achieve soft, bubbly results by following these simple instructions.
- Activate the Yeast: Gently warm 1/2 cup water to between 105-115°F. Too hot will kill the yeast, too cold won’t activate it. Stir in 1 teaspoon of granulated sugar, then sprinkle 2 1/4 teaspoons of active dry yeast over the surface. Let this mixture sit for 5-10 minutes. You’ll know it’s ready when a foamy layer appears on top, indicating the yeast is alive and active. This crucial step is the foundation of a good rise for your bread. For more information on understanding yeast activation, you can read about it here: understanding yeast activation.
- Mix Dry Ingredients: In a large mixing bowl, whisk together 2 cups of gluten-free all-purpose flour blend (ensure it contains xanthan gum), 1 teaspoon of baking powder, and 1/2 teaspoon of salt. Whisking ensures all ingredients are evenly distributed. This prevents pockets of unmixed leavening agent. A consistent dry mix makes for a uniform dough texture.
- Combine Wet & Dry: Pour the activated yeast mixture into the dry ingredients. Add 1/4 cup of plain dairy-free yogurt and 2 tablespoons of olive oil. Stir with a wooden spoon or spatula until a shaggy dough forms. It will appear slightly wet and clumpy. Avoid overmixing at this stage.
- Knead (GF-Style): Turn the shaggy dough out onto a lightly floured surface. Gently knead for just 2-3 minutes. Unlike wheat dough, you aren’t developing gluten here. The goal is simply to bring the dough together into a cohesive ball. You’ll notice it becomes smoother but remains pliable. My trick is to use just enough flour to prevent sticking.
- First Rise: Lightly oil a clean bowl. Transfer the dough into the bowl, turning once to coat. Cover the bowl tightly with plastic wrap or a damp kitchen towel. Place it in a warm, draft-free spot. Let the dough rise for 60-90 minutes, or until it has roughly doubled in size. This slow rise develops subtle flavors.
- Divide & Shape: Gently punch down the risen dough to release air. Turn it out onto a lightly floured surface. Divide the dough into 6-8 equal portions. Roll each portion into an oval or teardrop shape, about 1/4 inch thick. I always aim for that classic naan look. This shaping creates ideal surface area for cooking.
- Preheat Skillet: Place a heavy-bottomed skillet or cast iron pan over medium-high heat. Allow it to heat thoroughly for at least 5 minutes. You want it smoking slightly, indicating it’s hot enough. This high heat is crucial for achieving those signature “cheesy poofs.” A properly heated pan prevents sticking and promotes quick cooking.
- Cook the Naan: Carefully place one shaped dough piece into the hot, dry skillet. Cook for 2-3 minutes until large bubbles form on the surface. You’ll see the bottom become beautifully golden brown. Flip the naan and cook for another 1-2 minutes on the second side. It should develop a few charred spots, adding to its authentic character. This quick cooking yields a soft interior.
- Brush & Serve: Once cooked, immediately transfer the hot naan to a plate. Brush generously with melted butter or ghee. For an extra flourish, sprinkle with minced garlic or fresh cilantro. Serve these warm from the pan. They are best enjoyed right away.
Pro Tips & Tricks for the Perfect Cheesy Poofs (Gluten Free Naan)
Here’s the thing: mastering gluten free naan involves a few specific techniques. Unlike traditional wheat-based doughs, the dynamics of gluten-free flours require a slightly different approach. I’ve spent years in my kitchen perfecting this recipe, and I’m eager to share my hard-won secrets.
Don’t Overwork GF Dough
You might be tempted to knead gluten-free dough vigorously, like you would with wheat flour. Trust me on this one: resist that urge. Overworking can make your gluten-free dough tough, dry, and crumbly. The goal is simply to combine the ingredients until just mixed. Gentle handling preserves the delicate structure needed for a soft texture. This approach helps achieve that characteristic tenderness.
The Importance of a Warm Place for Rising
Yeast is a living organism, and it thrives in warmth. A proper rise is crucial for light, airy bread. In my kitchen, I always find a cozy spot for my dough to proof. This could be a warm oven (turned off, with just the light on) or a sunny window. Aim for a spot around 75-85°F (24-30°C). This warmth kickstarts the yeast, producing those lovely air pockets. A good rise is essential for soft results.
Perfect Skillet Temperature for Cheesy Poofs
The key difference is achieving those iconic ‘cheesy poofs’ on your naan. This requires a very hot skillet. I always preheat my cast iron pan for at least five minutes over medium-high heat. You’ll know it’s ready when a drop of water sizzles and evaporates almost instantly. The high heat creates steam inside the dough, causing it to puff up dramatically. This rapid cooking ensures a beautifully cooked exterior.
Hydration is Key
Gluten-free flours absorb liquid differently than wheat flours. What I discovered is that some blends require more moisture. If your dough feels too stiff, dry, or crumbly, add a tiny bit more water, perhaps a tablespoon at a time. The dough should be soft and pliable, but not sticky. This careful adjustment prevents a dense, hard bread. Proper hydration yields a flexible dough.
Roll Thinly But Not Too Thinly
The thickness of your dough greatly impacts the final texture of this recipe. I aim for about 1/4 inch thick. If it’s too thick, the naan can be doughy and won’t puff up well. If it’s too thin, it might become brittle or cook too quickly. You want a balance that allows for a soft interior and a slightly chewy exterior. This ideal thickness is crucial for success.
Cook One at a Time
A common mistake is overcrowding the pan. The secret is to cook one piece of naan at a time. This allows the skillet to maintain its high temperature. Overcrowding drops the temperature significantly. A consistent high heat is vital for that immediate puffing action. Cooking individually ensures each naan gets perfectly blistered. It yields a better quality finished product.
Brushing with Butter/Ghee
The trick is to brush your warm naan immediately after it comes off the skillet. I always use melted butter or ghee, sometimes infused with garlic or herbs. This not only adds a rich flavor and beautiful sheen but also keeps the naan moist and soft. The warmth of the bread absorbs the butter perfectly. This final touch makes a big difference. For more insights on the benefits of different fats, you can explore resources like this Healthline article on cooking oils. It really enhances the overall experience.
Enjoyed this recipe? Share it with a friend or save it to your board for later. Leave a comment below — I love hearing how it turned out!
You May Also Enjoy

You Might Also Love These 🍽️
Recipes picked just for you based on what you’re cooking