Jet-Puffed: GF? Plus, Homemade GF Marshmallows!
Wondering 'are Jet-Puffed marshmallows gluten-free'? Get the definitive answer and a fantastic recipe for homemade gluten-free marshmallows!
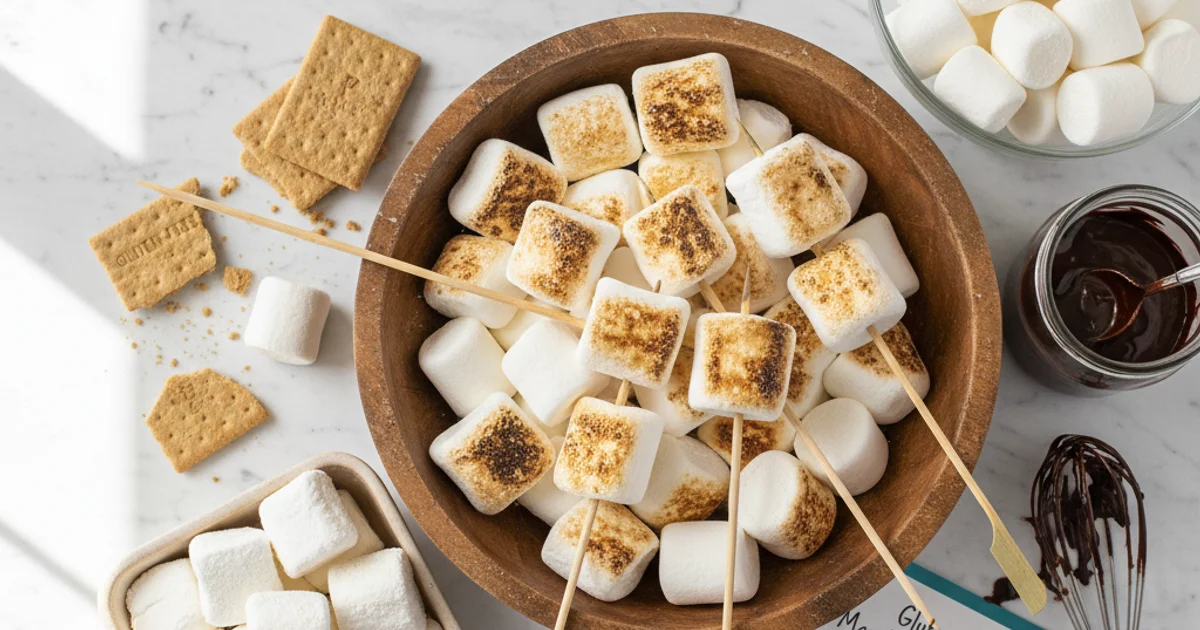
- 1Are Jet-Puffed Marshmallows Gluten-Free? The Sweet Truth Unveiled
- 2Why You’ll Love This Homemade Gluten-Free Marshmallow Recipe
- 3Ingredients Overview: What You Need for Gluten-Free Marshmallows
- 4Equipment You’ll Need for Perfect Homemade Marshmallows
- 5Step-by-Step Instructions: Crafting Your Own Gluten-Free Marshmallows
- 6Pro Tips & Tricks for the Best Gluten-Free Marshmallows
Ingredients
For the Marshmallows
- 1 cup cold water, divided
- 3 envelopes unflavored gelatin (about 3 tablespoons)
- 2 cups granulated sugar
- 2/3 cup light corn syrup
- 1/4 teaspoon salt
- 1 tablespoon vanilla extract
For Dusting
- 1/2 cup powdered sugar
- 1/4 cup cornstarch
Instructions
Instructions
Prepare pan: Line a 9x13 inch pan with parchment paper, dust with powdered sugar/cornstarch mixture.
Instructions
Bloom gelatin: Sprinkle gelatin over 1/2 cup cold water in a stand mixer bowl; let sit 5-10 minutes.
Instructions
Make syrup: Combine sugar, corn syrup, salt, and remaining 1/2 cup water in a saucepan. Heat to dissolve sugar, then boil to 240°F (soft-ball stage).
Instructions
Whip marshmallows: Slowly pour hot syrup into gelatin mixture on low speed. Increase to high and whip 10-15 minutes until thick and glossy.
Instructions
Add vanilla: Beat in vanilla extract during the last minute.
Instructions
Pour and set: Scrape mixture into prepared pan, spread evenly, dust top. Let set 4-6 hours or overnight.
Instructions
Cut and coat: Invert onto cutting board, cut into squares, dust all sides with remaining sugar mixture.
Equipment You'll Need
Here's what I use to make this recipe perfectly every time:
- Stand Mixer with Whisk Attachment — → Buy Now
- Heavy-Bottomed Saucepan — A sturdy saucepan is vital for cooking your sugar syrup. The thick bottom distributes heat evenly, preventing scorching and ensuring the sugar dissolves properly. A thin-bottomed pan can cause hot spots, leading to burnt sugar and a ruined batch. → Buy Now
- Candy Thermometer — This tool is your best friend when making candy. Achieving the precise temperature for the sugar syrup is paramount for marshmallow consistency. Too low, and they won't set; too high, and they'll be hard. Don't skip this, as guesswork here often leads to disappointment. → Buy Now
- 9x13 Inch Baking Pan — This size provides the perfect thickness for your marshmallows. Lining it properly ensures easy removal later. I typically use a glass pan, but metal works just as well. → Buy Now
- Parchment Paper — This is absolutely essential for preventing sticking. Line your pan generously, leaving an overhang on the sides to help lift the set marshmallows out. A light spray of cooking oil can also help the parchment adhere to the pan. → Buy Now
- Pastry Brush (optional) — While not strictly necessary, a pastry brush dipped in water can be used to brush down any sugar crystals that form on the sides of your saucepan during syrup cooking. This prevents crystallization in your final product. → Buy Now
- Sharp Knife or Pizza Cutter — Once your marshmallows are fully set, you'll need a good tool to cut them. A sharp, un-serrated knife or a pizza cutter works wonders for clean, precise squares. Lightly oiling your blade can also help prevent sticking. → Buy Now
- Sifter — For that final dusting of powdered sugar and cornstarch, a sifter ensures an even, light coating. This prevents the marshmallows from sticking to each other and gives them a professional finish. Having these items ready before you start makes the whole process smoother and more enjoyable. → Buy Now
Recipe FAQs
Are Jet-Puffed marshmallows truly gluten-free?
Do all brands of marshmallows contain gluten?
Is marshmallow creme gluten-free?
What is the best substitute for corn syrup in marshmallows?
Why did my homemade marshmallows turn out sticky?
Can I make these marshmallows without a stand mixer?
Jet-Puffed: GF? Plus, Homemade GF Marshmallows!
Wondering 'are Jet-Puffed marshmallows gluten-free'? Get the definitive answer and a fantastic recipe for homemade gluten-free marshmallows!
Prep Time
25 min
Cook Time
15 min
Total Time
40 min
For the Marshmallows
- 1 cup cold water, divided
- 3 envelopes unflavored gelatin (about 3 tablespoons)
- 2 cups granulated sugar
- 2/3 cup light corn syrup
- 1/4 teaspoon salt
- 1 tablespoon vanilla extract
For Dusting
- 1/2 cup powdered sugar
- 1/4 cup cornstarch
Are Jet-Puffed Marshmallows Gluten-Free? The Sweet Truth Unveiled
The simple joy of a fluffy marshmallow is undeniable. Whether toasted over a campfire or floating in hot cocoa, this sweet treat brings smiles. However, for those navigating dietary restrictions, a common question arises. Many wonder, “are jet puffed marshmallows gluten free?”
Here’s the thing: understanding what’s in our food is crucial, especially for individuals with celiac disease or gluten sensitivities. The good news is that traditionally, marshmallows do not contain gluten. Most commercial brands, including Jet-Puffed, formulate their marshmallows without gluten-containing ingredients. Always double-check the packaging for the most current and accurate information. Food manufacturers can change ingredients.
What I discovered is that while Jet-Puffed marshmallows are generally considered gluten-free, cross-contamination is a potential concern in any shared facility. For absolute peace of mind, especially for severe allergies, making your own marshmallows offers complete control. This ensures every ingredient meets your specific dietary needs. It also guarantees a fresh, incredibly flavorful confection. Knowing exactly what goes into your dessert removes any guesswork. It allows everyone to enjoy this classic confection without worry. This homemade approach also opens up a world of flavor possibilities beyond store-bought options.
Why You’ll Love This Homemade Gluten-Free Marshmallow Recipe
For anyone navigating a gluten-free lifestyle, the joy of a truly safe and delicious treat can be a rare find. That’s precisely why this homemade recipe will become a cherished staple in your kitchen. I always prioritize flavor and texture, and these marshmallows deliver on both fronts in a way store-bought simply cannot. You’ll notice that the vibrant, sweet taste and incredibly soft, pillowy texture are miles beyond anything pre-packaged.
Building on this, the primary benefit of crafting your own marshmallows is the absolute certainty of their gluten-free status. No more scanning tiny labels or wondering, “are jet puffed marshmallows gluten free?” when you want to enjoy a classic treat. You meticulously select every single ingredient, guaranteeing a worry-free indulgence. This level of control is invaluable for those with celiac disease or gluten sensitivities, transforming a simple dessert into a truly inclusive experience. Furthermore, while the idea of making marshmallows from scratch might seem daunting, I can assure you it’s surprisingly straightforward. The process is incredibly rewarding, yielding a batch of fluffy, bouncy confections that will impress everyone. What I love about this recipe is its sheer versatility. These homemade wonders are perfect for melting into a mug of rich hot chocolate, toasting over a campfire for the ultimate s’more, or simply enjoying as a sweet, airy snack. You can even experiment with different extracts and food colorings to match any holiday or celebration. This recipe ensures that whether you’re wondering if marshmallows contain gluten, or if marshmallow creme is gluten free, you’ll have a reliable, delicious answer right in your own home.
Ingredients Overview: What You Need for Gluten-Free Marshmallows
Here’s the thing, crafting the perfect gluten-free marshmallow starts with understanding each component. I always scrutinize my ingredients, ensuring they contribute to both flavor and texture. This meticulous approach guarantees a successful batch every time.
Granulated sugar is more than just a sweetener; it forms the backbone of our marshmallow structure. It dissolves into the liquid, creating a rich syrup that sets firm. Rest assured, granulated sugar is naturally gluten-free, making it a safe choice for this recipe. You’ll notice that using a good quality sugar makes a difference in the final product’s consistency.
Building on this, light corn syrup plays a crucial role in preventing sugar crystallization. Without it, your marshmallows might turn grainy instead of smooth and fluffy. It also contributes to that signature chewy texture we all love. Just like granulated sugar, light corn syrup is inherently gluten-free, so there’s no need to worry about hidden gluten.
Water acts as the solvent, dissolving the sugar and corn syrup to form the essential syrup base. Its purity directly impacts the clarity and texture of your final marshmallow. Simple, yet vital, water ensures everything comes together properly.
The secret is unflavored gelatin, the true hero behind marshmallow structure and bounce. This protein-based ingredient transforms the liquid syrup into a stable, airy foam. It’s imperative to use unflavored gelatin, which is always gluten-free. This is the primary ingredient that answers the question, “do marshmallows have gluten?” for homemade versions – because pure gelatin does not.
Vanilla extract infuses our marshmallows with that classic, comforting flavor. I always opt for pure vanilla extract for the best taste. While most vanilla extracts are gluten-free, it’s always wise to check the label for any unexpected additives, especially if you have severe sensitivities. A common mistake is assuming all extracts are identical; quality varies.
For dusting, powdered sugar (also known as confectioners’ sugar) is essential to prevent sticking. This fine sugar often contains cornstarch, which is gluten-free, but double-checking the brand label is a good habit. Some brands might have different anti-caking agents, so a quick read confirms it. This step ensures your marshmallows don’t become one giant, sticky block.
Finally, cornstarch can be mixed with the powdered sugar for an extra layer of anti-stick power. This is particularly useful in humid environments. Cornstarch itself is naturally gluten-free, offering another safe component for this treat. In my kitchen, I often use a 50/50 blend of powdered sugar and cornstarch for perfect, non-sticky results, ensuring are marshmallow gluten free.
Equipment You’ll Need for Perfect Homemade Marshmallows
In my kitchen, having the right tools makes all the difference, especially when tackling something as delicate as homemade marshmallows. You don’t need a professional setup, but a few key pieces of equipment will ensure your success. Trust me on this one; trying to improvise too much can lead to sticky situations or a less-than-fluffy result.
- Stand Mixer with Whisk Attachment: This is truly non-negotiable for achieving that signature airy texture. The continuous, vigorous whipping action of a stand mixer incorporates air beautifully, transforming the gelatin mixture into a cloud-like confection. While a hand mixer can technically work, your arm will get a serious workout, and the results might not be quite as consistent.
- Heavy-Bottomed Saucepan: A sturdy saucepan is vital for cooking your sugar syrup. The thick bottom distributes heat evenly, preventing scorching and ensuring the sugar dissolves properly. A thin-bottomed pan can cause hot spots, leading to burnt sugar and a ruined batch.
- Candy Thermometer: This tool is your best friend when making candy. Achieving the precise temperature for the sugar syrup is paramount for marshmallow consistency. Too low, and they won’t set; too high, and they’ll be hard. Don’t skip this, as guesswork here often leads to disappointment.
- 9x13 Inch Baking Pan: This size provides the perfect thickness for your marshmallows. Lining it properly ensures easy removal later. I typically use a glass pan, but metal works just as well.
- Parchment Paper: This is absolutely essential for preventing sticking. Line your pan generously, leaving an overhang on the sides to help lift the set marshmallows out. A light spray of cooking oil can also help the parchment adhere to the pan.
- Pastry Brush (optional): While not strictly necessary, a pastry brush dipped in water can be used to brush down any sugar crystals that form on the sides of your saucepan during syrup cooking. This prevents crystallization in your final product.
- Sharp Knife or Pizza Cutter: Once your marshmallows are fully set, you’ll need a good tool to cut them. A sharp, un-serrated knife or a pizza cutter works wonders for clean, precise squares. Lightly oiling your blade can also help prevent sticking.
- Sifter: For that final dusting of powdered sugar and cornstarch, a sifter ensures an even, light coating. This prevents the marshmallows from sticking to each other and gives them a professional finish. Having these items ready before you start makes the whole process smoother and more enjoyable.
Step-by-Step Instructions: Crafting Your Own Gluten-Free Marshmallows
Here are the first three steps for your recipe:
-
Prepare the Pan: Line a 9x13 inch pan with parchment paper, ensuring there is an overhang on all sides for easy removal. Then, generously dust the bottom and sides of the parchment paper with a mixture of powdered sugar and cornstarch to prevent sticking.
-
Bloom the Gelatin: In the bowl of a stand mixer fitted with the whisk attachment, sprinkle the unflavored gelatin powder evenly over the cold water. Allow the gelatin to sit undisturbed for 5-10 minutes, or until it has softened and absorbed the water.
-
Make the Sugar Syrup: In a medium saucepan, combine the granulated sugar, corn syrup, and the remaining water. Heat this mixture over medium-high heat, stirring constantly until all of the sugar has completely dissolved. Once the syrup begins to boil, stop stirring and allow it to cook undisturbed.
-
Cook the Syrup: Carefully insert a candy thermometer into the saucepan, ensuring it doesn’t touch the bottom. Bring the sugar mixture to a rolling boil and continue to cook, without stirring after it boils, until the thermometer registers 240°F (115°C), which is the soft-ball stage.
-
Combine & Whip: With your stand mixer running on low speed, slowly and carefully pour the hot sugar syrup in a steady stream into the bowl with the bloomed gelatin. Once all the syrup is added, gradually increase the mixer speed to high and continue to whip the mixture for 10-15 minutes, or until it becomes very thick, glossy, and bright white.
-
Add Flavoring: During the last minute of whipping, add the vanilla extract to the marshmallow mixture and continue to beat until fully incorporated.
-
Pour & Set: Working quickly, scrape the warm marshmallow mixture into your prepared pan. Use an oiled spatula or your oiled hands to spread the mixture evenly into all corners of the pan. Liberally dust the entire top surface of the marshmallow with more of the powdered sugar and cornstarch mixture.
-
Rest & Cut: Allow the marshmallows to set undisturbed at room temperature for at least 4-6 hours, or preferably overnight, until firm. Once set, invert the pan onto a large cutting board and carefully peel away the parchment paper. Using an oiled knife or pizza cutter, cut the marshmallow slab into your desired shapes and sizes, such as squares or rectangles. Dust all of the freshly cut sides of the marshmallows with the remaining powdered sugar and cornstarch mixture to prevent sticking.
Pro Tips & Tricks for the Best Gluten-Free Marshmallows
Achieving that perfect, cloud-like texture in homemade marshmallows requires a bit of finesse. In my kitchen, I’ve learned that precision truly pays off. Trust me on this one: investing in a reliable candy thermometer is non-negotiable for this recipe. You simply cannot guess the syrup temperature and expect consistent results.
Building on this, the whipping stage is where the magic happens. Don’t be tempted to cut it short; you’ll notice that the mixture transforms from a thin liquid to a thick, glossy, and incredibly voluminous fluff. The secret is to whip until it’s very stiff and holds its shape when you lift the whisk. This extended whipping incorporates air, giving the marshmallows their signature lightness. What I discovered is under-whipped marshmallow will be dense and chewy, not light and bouncy.
Here’s the thing about stickiness: it’s the arch-nemesis of marshmallow making. To combat this, I always lightly oil my spatula, knife, or even a pizza cutter before spreading and cutting. This simple step prevents frustrating tugs and tears. Additionally, a generous dusting of a powdered sugar and cornstarch mixture is crucial. This coating keeps the marshmallows from sticking to each other in the pan and in storage.
A common mistake is waiting too long once the whipping is done. This mixture sets surprisingly fast. In practice, have your prepared pan ready and pour the marshmallow mixture in immediately after whipping. The quicker you get it into the pan, the easier it will be to spread evenly. Working quickly ensures a smooth, uniform slab.
Worth noting here, while your sugar syrup is boiling, keep an eye on the sides of the saucepan. Sometimes, sugar crystals can form there. If left unchecked, these crystals can cause your entire batch to become grainy. To prevent this, simply brush down the sides of the pan with a wet pastry brush. This dissolves any stray crystals back into the syrup, ensuring a silky-smooth final product, free from crunchy surprises.
Finally, consider the weather. Marshmallows are surprisingly sensitive to humidity. If you live in a very humid climate, you might find them slightly stickier or taking longer to set. If possible, choose a drier day to make this treat. This small consideration can make a noticeable difference in the final texture and ease of handling. For more insights on the science behind candy making, you can explore resources like Serious Eats on sugar crystallization.
Enjoyed this recipe? Share it with a friend or save it to your board for later. Leave a comment below — I love hearing how it turned out!
You May Also Enjoy





You Might Also Love These 🍽️
Recipes picked just for you based on what you’re cooking