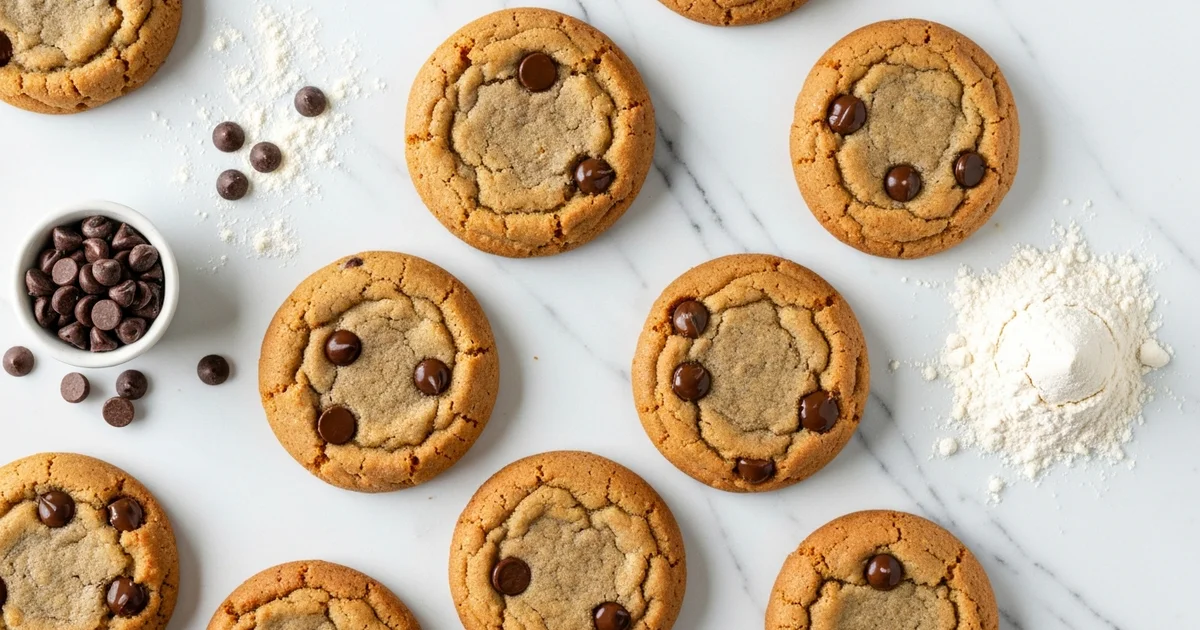
The Ultimate Chewy Chocolate Chip Cookies
Discover our irresistible gluten-free rice-free chocolate chip cookies! Perfectly chewy, easy to make, and safe for multiple dietary needs. Get the best recipe here!
- 1Introduction: Why Gluten and Rice-Free Baking Matters
- 2Why You’ll Love Our Gluten-Free Rice-Free Chocolate Chip Cookies
- 3Ingredients Overview: Crafting the Perfect Gluten & Rice Free Flour Blend
- 4Essential Equipment for Gluten-Free Baking Success
- 5Step-by-Step Instructions: Baking Your Chewy Delights
- 6Pro Tips & Tricks for Gluten-Free Rice-Free Perfection
Ingredients
Dry Ingredients
- 1/2 cup Sweet Potato Flour (60g)
- 1/2 cup Tapioca Starch (60g, also known as Tapioca Flour)
- 1/4 cup Potato Starch (30g, gluten-free)
- 1 teaspoon Xanthan Gum
- 1 teaspoon Baking Soda
- 1/2 teaspoon Sea Salt
Wet Ingredients & Flavor
- 1/2 cup Unsalted Butter (113g, softened, or dairy-free butter alternative)
- 1/2 cup Granulated Sugar (100g)
- 1/2 cup Packed Light Brown Sugar (100g)
- 1 large Egg (room temperature)
- 1 teaspoon Vanilla Extract
- 1 cup Gluten-Free, Dairy-Free Chocolate Chips (170g)
Instructions
Prep Oven & Baking Sheets
Preheat oven to 375°F (190°C) and line baking sheets with parchment paper.
Whisk Dry Ingredients
In a medium bowl, whisk together sweet potato flour, tapioca starch, potato starch, xanthan gum, baking soda, and salt. Set aside.
Cream Butter & Sugars
In a large bowl, cream softened butter, granulated sugar, and brown sugar with an electric mixer until light and fluffy (2-3 minutes).
Add Egg & Vanilla
Beat in the egg, then the vanilla extract, until well combined.
Combine Wet & Dry
Gradually add the dry ingredient mixture to the wet ingredients, mixing on low speed until just combined. Do not overmix.
Fold in Chocolate Chips
Fold in the chocolate chips with a rubber spatula.
Chill Dough
Cover the dough and refrigerate for at least 30 minutes (or up to 24 hours for best results).
Scoop & Space Dough
Scoop dough using a cookie scoop onto the prepared baking sheets, leaving about 2 inches between cookies.
Bake Cookies
Bake for 10-12 minutes, or until the edges are golden brown and the centers are set but still look slightly soft.
Cool
Remove from oven and let cookies cool on the baking sheet for 5 minutes before transferring to a wire rack to cool completely.
Equipment You'll Need
Here's what I use to make this recipe perfectly every time:
- Electric Mixer (Stand or Handheld) — An electric mixer is essential for thoroughly creaming butter and sugars, which is key to achieving the ultimate chewy texture in these gluten-free, rice-free cookies. → Buy Now
- Large Mixing Bowl — A spacious mixing bowl allows for comfortable and thorough combining of all gluten-free flours and wet ingredients without spills, ensuring a well-incorporated dough for consistent cookies. → Buy Now
- Dry Measuring Cups & Spoons — Precise measurement with dry measuring cups and spoons is critical for balancing the unique blend of gluten-free, rice-free flours to achieve the perfect chewy cookie consistency. → Buy Now
- Baking Sheets — Sturdy baking sheets provide a reliable, flat surface for evenly baking multiple batches of your gluten-free, rice-free chocolate chip cookies. → Buy Now
- Parchment Paper or Silicone Baking Mat — Using parchment paper or a silicone baking mat prevents these delicate gluten-free cookies from sticking and promotes even baking and easy release. → Buy Now
Recipe FAQs
What is the best gluten and rice free flour blend for baking chewy cookies?
Can I substitute almond flour for all-purpose flour in other recipes, and how does it compare here?
Xanthan gum vs guar gum: Which is ideal for achieving chewy gluten-free cookies?
Why are gluten free rice free recipes important, and is rice flour good for you in other contexts?
What are some common potato alternatives or sweet potato flour substitutes in this recipe?
Where can I buy individual gluten free rice free flours or organic potato starch?
The Ultimate Chewy Chocolate Chip Cookies
Discover our irresistible gluten-free rice-free chocolate chip cookies! Perfectly chewy, easy to make, and safe for multiple dietary needs. Get the best recipe here!
Prep Time
20 min
Cook Time
12 min
Total Time
32 min
Dry Ingredients
- 1/2 cup Sweet Potato Flour (60g)
- 1/2 cup Tapioca Starch (60g, also known as Tapioca Flour)
- 1/4 cup Potato Starch (30g, gluten-free)
- 1 teaspoon Xanthan Gum
- 1 teaspoon Baking Soda
- 1/2 teaspoon Sea Salt
Wet Ingredients & Flavor
- 1/2 cup Unsalted Butter (113g, softened, or dairy-free butter alternative)
- 1/2 cup Granulated Sugar (100g)
- 1/2 cup Packed Light Brown Sugar (100g)
- 1 large Egg (room temperature)
- 1 teaspoon Vanilla Extract
- 1 cup Gluten-Free, Dairy-Free Chocolate Chips (170g)
Introduction: Why Gluten and Rice-Free Baking Matters
For many years, navigating allergen-friendly baking felt like constant compromise. You would finally find a gluten-free recipe, only to see rice flour listed as a key ingredient. This creates a new challenge for those with both celiac disease and rice sensitivities. Finding truly gluten free rice free options felt like searching for a needle in a haystack for so long.
What I discovered throughout my decade in the kitchen is this: not all ‘flour’ is created equal. Most commercial gluten-free flour blends rely heavily on rice flour or rice starch for ideal texture. This can be problematic for many with specific allergies. Understanding how flour is produced becomes crucial for dietary safety. You must check every ingredient on that bag.
Here’s the thing: everyone deserves a perfectly chewy chocolate chip cookie. That satisfying sizzle of butter, those golden-brown edges, and a melt-in-your-mouth interior shouldn’t be off-limits. I always believed it was possible to create a cookie that met strict dietary needs. This recipe achieves that without sacrificing any flavor or texture. It’s time to enjoy your favorite treat once more.
Why You’ll Love Our Gluten-Free Rice-Free Chocolate Chip Cookies
Forget everything you thought you knew about gluten-free, rice-free baking. When it comes to alternative cookies, the common fear is a dry, crumbly disappointment. But get ready to have your expectations wonderfully shattered, because these chocolate chip cookies deliver a truly remarkable chewiness that will have you reaching for another, and another!
The secret to their sublime texture lies in our carefully crafted custom flour blend. It’s an achievement we’re incredibly proud of, creating a cookie that defies the odds, offering that perfect bend and satisfying resistance with every bite. Beyond the incredible texture, prepare for a flavor explosion. Each cookie is generously studded with an abundance of melty chocolate chips, ensuring a rich, deep sweetness that truly satisfies your dessert cravings.
Here’s why these cookies will become your new go-to:
- Unbelievably Chewy: Experience a texture that rivals traditional cookies, without any gluten or rice in sight.
- Decadent Flavor: Generous chocolate chunks melt into a rich, sweet experience with every single morsel.
- Surprisingly Simple: Forget complicated steps or a mountain of obscure ingredients. This recipe is designed for effortless baking, bringing a comforting classic to your kitchen with ease. It’s far less fuss than many store-bought gluten-free mixes, meaning more time for enjoying the fruits of your labor!
- Joyfully Inclusive: Finally, a treat that everyone at the table can savor, regardless of dietary sensitivities.
Our unique blend of nutritious, alternative flours not only achieves this incredible texture but also offers more than just an empty indulgence. This recipe is also wonderfully versatile – feel free to get creative with your favorite mix-ins. So, whether you’re a seasoned baker or new to the gluten-free world, these cookies promise a delightful, guilt-free experience that truly stands out.
Ingredients Overview: Crafting the Perfect Gluten & Rice Free Flour Blend
Creating the ultimate chewy, gluten-free, and most importantly, rice-free chocolate chip cookie is an art, and it all starts with the right foundation: your flour blend. Many commercial “1 to 1 gluten-free flour” mixes fall short, often relying heavily on rice flour, which can lead to a gritty texture and a lack of the desired chewiness. What truly makes these cookies special is our carefully crafted custom blend, completely free from rice-based fillers, ensuring a genuinely gluten-free rice-free indulgence.
Here’s exactly what you’ll need to create this custom blend and the other foundational ingredients for your cookie masterpiece:
The Custom Gluten & Rice-Free Flour Blend (Total: 2 ¼ cups / 270g):
- Sweet Potato Flour (1 cup / 120g): Our star player! This flour brings a natural sweetness and incredible moisture, ensuring your cookies stay soft and tender without becoming gummy. It’s a fantastic whole grain gluten-free flour component, contributing significantly to flavor and texture.
- Tapioca Starch (½ cup / 60g): This is absolutely crucial for achieving that signature chewy texture and those beautiful, golden, slightly crisp edges. While often referred to as tapioca powder or “tapioca flour,” its role as a starch sets it apart from heavier flours and is key for lightness, unlike rice starch.
- Potato Starch (Gluten Free) (¾ cup / 90g): This finely milled starch is vital for creating a wonderfully tender crumb and a light, airy texture that prevents the cookies from becoming dense. Always make sure to source potato starch gluten free versions; organic potato starch is an excellent option if available.
- Almond Flour (Optional, ¼ cup / 28g): If you’re looking to add an extra layer of rich, nutty flavor and a slightly denser, more luxurious texture, you can include almond flour. If using, substitute ¼ cup of the custom blend with ¼ cup of almond flour. This enhances the cookie’s profile beautifully.
Beyond the flour, a proper binder is absolutely non-negotiable in gluten-free baking to replace gluten’s elasticity and prevent crumbly cookies. My preferred choice?
- Xanthan Gum (or Guar Gum, ½ teaspoon): This is our vital binding agent, providing the necessary structure and elasticity that gluten would normally contribute. For cookies, xanthan vs guar gum can yield slightly different results, with xanthan gum often lending a bit more chew. Finding xanthan gum near me is usually quite simple at most grocery stores or health food shops.
Now, let’s look at the other essential ingredients that build the foundational flavor and ensure consistency in your cookies:
- Fats (1 cup / 226g unsalted butter): High-quality unsalted butter delivers rich flavor and ensures a wonderfully tender cookie. If you’re going dairy-free, choose a plant-based butter alternative with a high-fat content for the best results.
- Sugars (¾ cup / 150g granulated sugar, ¾ cup / 150g packed light brown sugar): We harness the best of both worlds by combining granulated sugar for crispness and spread, and brown sugar for its deep molasses notes, moisture, and essential chewiness. This blend achieves perfect textural harmony.
- Leavening Agent (1 teaspoon baking soda): Baking soda is crucial for giving these cookies their perfect lift and helping them achieve that desirable spread, creating those characteristic alluring cracks on top.
- Flavor Enhancers (2 teaspoons vanilla extract, 1 ½ cups high-quality chocolate chips): High-quality vanilla extract truly brightens the overall flavor profile. And of course, the heart of any chocolate chip cookie is the chocolate itself – use excellent chocolate chips! Consider non-GMO flour ingredients and other components when making your selections for a clean treat.
- Eggs (2 large): These are critical for binding, moisture, and contributing to the rich texture of our cookies. They act as an emulsifier, ensuring everything comes together beautifully.
- Salt (½ teaspoon fine sea salt): A pinch of salt is more than just seasoning; it balances the sweetness and enhances all the other flavors, making every bite more complex and satisfying.
This careful selection and precise blending, particularly our rice-free flour combination, are the secret to truly outstanding, chewy cookies every time.
Essential Equipment for Gluten-Free Baking Success
Creating exceptional cookies requires more than just great ingredients. The right tools truly empower your baking journey. For any gluten free rice free recipe, precision is paramount. Mastering the art of making this treat means equipping your kitchen thoughtfully.
Here’s the thing about baking success with specialized flours. A digital kitchen scale is your absolute best friend. I always measure my gluten and rice free flour blends by weight. Volume measurements can vary wildly with different tapioca powder or potato starch gluten free densities. A reliable powder scale ensures accuracy. It helps overcome the challenge of cups lbs converter estimations, which are often unreliable for these unique mixes.
Here are the essential tools you’ll need:
- Digital Kitchen Scale: For precise ingredient measurement.
- Large Mixing Bowls: To keep wet and dry ingredients separate initially.
- Electric Mixer: A stand or handheld mixer for aeration.
- Rubber Spatula: Perfect for scraping bowls and gentle folding.
- Sturdy Baking Sheets: To ensure even heat distribution.
- Parchment Paper or Silicone Baking Mats: For non-stick baking and easy cleanup.
- Cookie Scoop: To create uniform cookies for even baking.
An electric mixer, whether stand or handheld, makes a noticeable difference. It effectively creams butter and sugar. This process incorporates air, yielding a lighter, chewier texture for this recipe. You’ll notice that thoroughly aerated butter and sugar is a crucial first step.
The secret is also in presentation and consistent baking. Parchment paper or silicone baking mats are non-negotiable. They prevent sticking and promote even browning across the entire batch. They also eliminate the need for extra grease. A cookie scoop ensures uniform portioning. This means every single cookie bakes at the same rate, avoiding over- or under-baked edges. It’s especially helpful when working with a delicate cookie flour dough.
Finally, don’t underestimate the power of good old-fashioned mixing bowls and a sturdy spatula. I always use at least two large bowls for wet and dry ingredients. My personal favorite is a classic red glass bowl for visual appeal. A flexible rubber spatula ensures you scrape down the sides. This incorporates every last bit of dough, leaving no delicious ingredient behind.
Step-by-Step Instructions: Baking Your Chewy Delights
What I discovered is that successful baking relies on precise steps and understanding each stage. Following these instructions meticulously ensures your gluten free rice free chocolate chip cookies achieve that perfect texture. You’ll notice that the process prioritizes careful measurements and specific timing. This yields a delightful homemade treat every time.
- Prepare Oven & Baking Sheets: First, preheat your oven to 350°F (175°C). Line two large baking sheets with parchment paper. This simple step prevents sticking. It also promotes even browning across all cookies.
- Combine Dry Ingredients: In a medium mixing bowl, whisk together 2 ¼ cups of your custom gluten and rice free flour blend. This blend typically includes sweet potato flour, tapioca powder, and potato starch gluten free components. Add 1 teaspoon xanthan gum, 1 teaspoon baking soda, and ½ teaspoon salt. I always rely on a precise powder scale for these measurements. This accuracy is essential for consistent results.
- Cream Wet Ingredients: In a separate large bowl, combine 1 cup (2 sticks) softened unsalted butter. Add ¾ cup granulated sugar and ¾ cup packed light brown sugar. Beat these ingredients with an electric mixer. Continue until the mixture is light and fluffy. This creaming process incorporates vital air. The mixture should appear pale and voluminous.
- Add Eggs & Vanilla: Break two large eggs into the creamed mixture, one at a time. Beat well after each addition. This ensures the eggs are fully emulsified. Stir in 2 teaspoons of pure vanilla extract. The batter will become smooth and cohesive.
- Gradually Add Dry to Wet: Slowly add the whisked dry ingredients to the wet mixture. Mix on low speed. Stop as soon as just combined. Overmixing can negatively impact the final cookie texture. It’s crucial not to develop the starches too much.
- Fold in Chocolate Chips: Gently fold in 2 cups of your favorite chocolate chips. Use a sturdy spatula for this. Ensure they are evenly distributed throughout the dough. This promises chocolate in every bite.
- Chill the Dough (Crucial Step): This step is absolutely vital for chewy cookies. Cover the dough tightly with plastic wrap. Chill for a minimum of 30 minutes in the refrigerator. I often chill mine for up to 24 hours. Chilling allows the different gluten free flours to fully hydrate. It also solidifies the butter, which prevents excessive spreading during baking. You can read more about the benefits of chilling dough here.
- Scoop & Bake: Scoop rounded 1.5-tablespoon balls of chilled dough. Place them about 2 inches apart on your prepared baking sheets. Bake for 10-12 minutes. The edges should look golden brown. The centers will still appear slightly soft.
- Cooling: Remove the baking sheets from the oven. Let the cookies cool on the sheets for 5 minutes. This allows them to set further. Then, transfer them to a wire rack. Cool completely to achieve their ultimate chewiness. This method, while different from preparing a gluten free bread mix, yields an equally satisfying homemade taste.
Pro Tips & Tricks for Gluten-Free Rice-Free Perfection
Here’s the thing, achieving truly exceptional cookies goes beyond simply following a recipe. In my kitchen, I’ve learned that mastering a gluten free rice free bake requires specific finesse. These specialized flours behave uniquely compared to traditional wheat.
I always stress the importance of precision when working with specialty flours. Trust me on this one: a powder scale is your best friend. Weighing ingredients, especially your chosen flour blend, ensures consistent results every single time.
A common mistake is overmixing the dough. Even without gluten, excessive agitation develops starch. You’ll notice that overmixed dough often leads to tough cookies, not the tender texture we desire.
The secret is chilling the dough. This step isn’t just for convenience; it deeply enhances both flavor and texture. For a deeper dive into this culinary magic, learn more about why chilling cookie dough matters.
- Chilling allows the flours to fully hydrate.
- It helps prevent the cookies from spreading too thin.
- This process also concentrates the sugars for a richer taste.
Using room temperature ingredients is another critical detail. Softened butter and eggs at room temperature emulsify properly. This creates a smooth, cohesive dough that bakes evenly.
What I love about this journey is understanding your ingredients. While this recipe provides a specific blend, responsible experimenting is possible. Know the role of each component for best results:
- Potato starch gluten free lends tenderness to your bake.
- Tapioca powder contributes to a delightful chewy texture.
- Sweet potato flour can add nutrients and a subtle earthy note.
- Handling these differs from high protein flour for bread, which seeks gluten development.
Remember that every oven is a little different. Baking time is more of a guideline than a strict rule. You’ll notice that cookies are done when edges are golden brown but centers appear slightly underbaked. This ensures a wonderfully chewy cookie.
Proper storage of your specialty flours is also key to success. Keep your bag of flour in airtight containers. A cool, dark pantry works, but refrigeration or freezing extends shelf life.
Enjoyed this recipe? Share it with a friend or save it to your board for later. Leave a comment below — I love hearing how it turned out!
You May Also Enjoy

You Might Also Love These 🍽️
Recipes picked just for you based on what you’re cooking